Category: Photo Prompts

  • Ultra Realistic Cloudy and Sunlight Photo Prompt

    Ultra Realistic Cloudy and Sunlight Photo Prompt

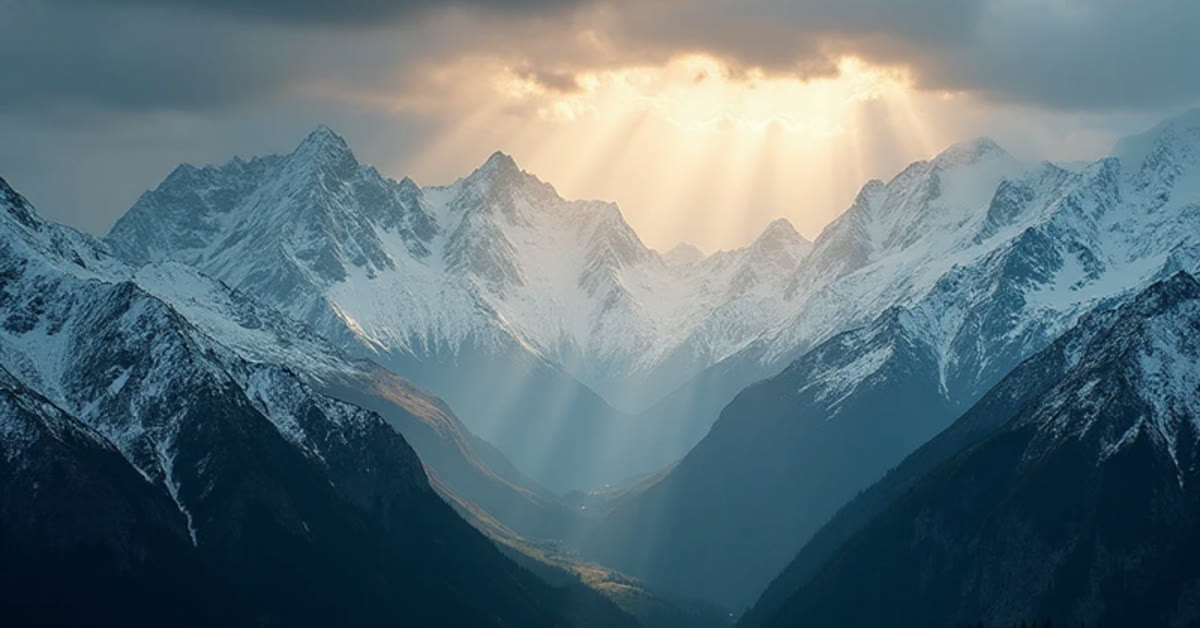
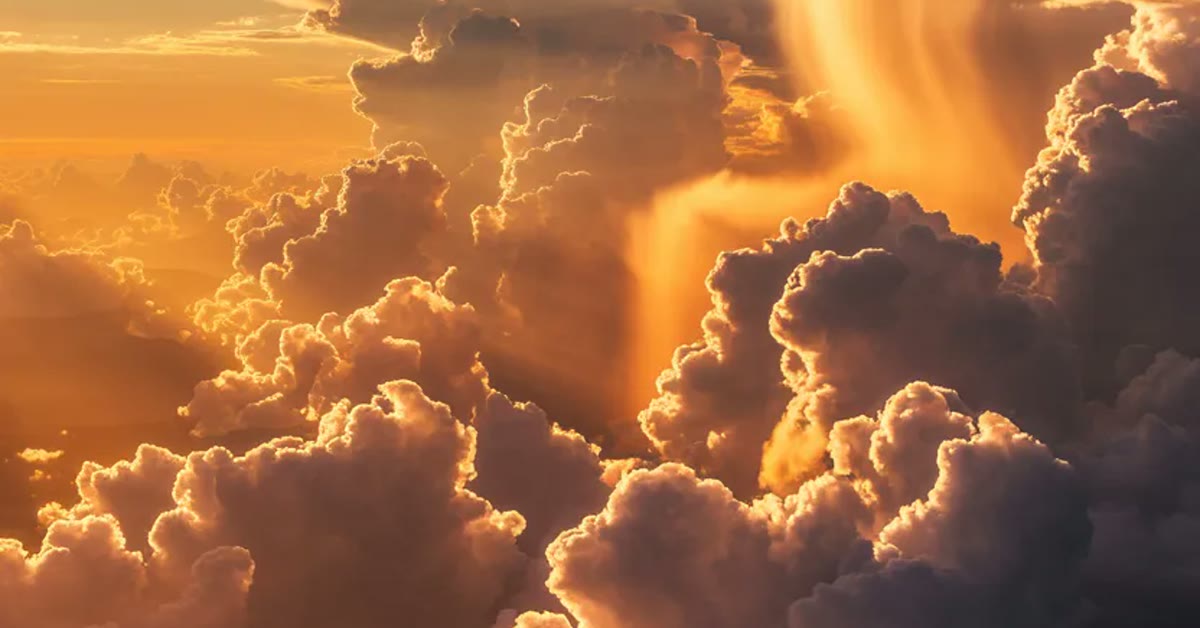
    Cloudy sunlight portrait made with the ultra realistic cloudy and sunlight photo prompt

    Introduction

    Few skies are more dramatic than sunlight breaking through storm clouds, and this ultra realistic cloudy and sunlight photo prompt puts you right under that sky. Golden god rays, a moody cloud contrast, and crisp detail create a portrait that feels awe-inspiring.

    The drama comes from the contrast between dark clouds and bright light. The AI rebuilds the sky while keeping the person sharp and naturally lit, so the result looks like a moment of weather captured at exactly the right second. It is perfect for profile photos and dramatic travel posts. For background reading, see the photography article on Wikipedia.
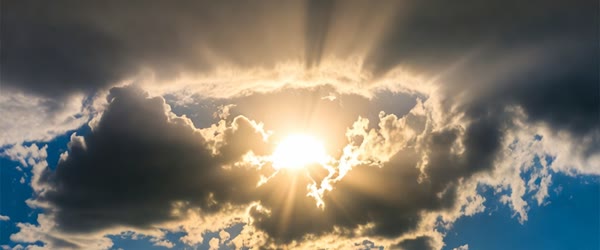
    Golden sunlight breaking through heavy dramatic clouds over a subject

    How to Use This Ultra Realistic Cloudy and Sunlight Photo Prompt

    1. Upload a clear outdoor portrait with a visible sky or a plain background the AI can replace. Photos taken on overcast days give the most believable cloudy sky rebuild.
    2. Paste the prompt exactly as written and generate the first version. Check that the god rays fall naturally on the subject and that the face stays well-lit against the dark clouds.
    3. If the sky overwhelms the person, generate again and pick the version with the best balance. Save it at full size and share it as a dramatic portrait or wallpaper.
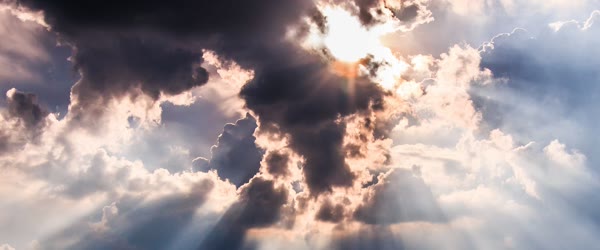
    God rays falling on a person under a moody dramatic sky

    Copy-Paste Prompt

    Transform this photo into an ultra-realistic scene where golden sunlight breaks through heavy dramatic clouds, god rays falling on the subject, moody sky contrast, crisp detail, awe-inspiring atmosphere, ultra-realistic, 4K, cinematic lighting.

    Pro Tips

    • Stand with the sun direction in mind, because god rays look real only when the light on the face matches the break in the clouds.
    • Keep the subject large in the frame, since a small figure under a huge sky can get lost in the drama.
    • Avoid adding extra filters after generation, because the moody contrast is already balanced and more editing can flatten it.
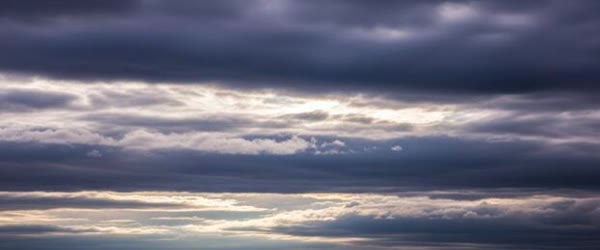
    Moody sky photo editing with crisp detail and cinematic contrast

    More Prompts to Try for Cloudy Sunlight Photos

    Cloudy sunlight is the most dramatic light in photography: dark clouds, breaking sun, and god rays falling like a blessing. These original ultra realistic cloudy and sunlight photo prompts explore different cloudy-light moods, from storm breaks to soft silver linings, so you can build a series that feels epic without repeating the same sky. Keep the clouds heavy, the sun breaking, and the subject lit by the rays, and every image will feel awe-inspiring. Used well, the ultra realistic cloudy and sunlight photo prompt can make the whole result feel more polished and professional. Used well, the ultra realistic cloudy and sunlight photo prompt can make the whole result feel more polished and professional.

    God Rays Breakthrough

    The signature image: golden rays piercing heavy clouds onto the subject.

    Transform this photo into an ultra-realistic scene where golden sunlight breaks through heavy dramatic clouds, god rays falling on the subject, moody sky contrast, crisp detail, awe-inspiring atmosphere, ultra-realistic, 4K, cinematic lighting.

    The god rays are the entire image. They must fall visibly, in distinct shafts, from a break in the clouds directly onto the subject. The subject should stand in the brightest shaft, so the light has a clear target. The clouds must stay heavy and dark around the break, because the contrast between dark sky and bright rays is what creates the awe.

    Silver Lining Portrait

    A softer, hopeful version with light edging the clouds in silver.

    Transform this photo into an ultra-realistic portrait under dramatic clouds with silver linings glowing, soft sunlight breaking gently on the subject's face, hopeful serene mood, moody sky, ultra-realistic, 4K, cinematic lighting.

    Silver linings suit hopeful, reflective content. The light should be soft and diffused, edging the clouds rather than piercing them, and the subject’s face should catch the gentle glow. The mood is quiet hope, not epic drama, so keep the rays subtle and the expression serene.

    Storm Clearing Drama

    A powerful version with a storm ending and the sun returning triumphantly.

    Transform this photo into an ultra-realistic scene of a storm clearing, dark retreating clouds, strong golden sunlight bursting through, wet surfaces reflecting light, triumphant refreshing mood, ultra-realistic, 4K, cinematic lighting.

    The clearing storm tells a story of survival and renewal. The wet surfaces, reflecting the returning sun, double the light and add realism. The subject should stand tall and open to the light, as if receiving it. The contrast between the dark retreating clouds and the bright burst is the visual metaphor for hope after hardship.

    Cloud Sea Above

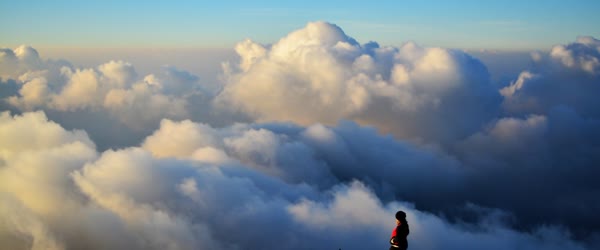
    An epic version with the subject above the clouds, in pure sunlight.

    Transform this photo into an ultra-realistic scene of a person standing on a mountain ridge above a sea of clouds, brilliant sunlight above, cloud ocean stretching to the horizon, epic transcendent mood, ultra-realistic, 4K, cinematic lighting.

    Above the clouds, the light is pure and unobstructed, and the cloud sea becomes a second sky. The subject should be small against the vastness, silhouetted or rim-lit by the sun, so the scale feels transcendent. This is the most epic version, ideal for covers and inspirational posts.

    Rainbow After Rain

    A joyful, colourful version with a rainbow arcing through breaking clouds.

    Transform this photo into an ultra-realistic scene with a vivid rainbow arcing through dramatic clouds, sunlight breaking warmly, a joyful subject looking up, fresh hopeful mood, ultra-realistic, 4K, cinematic lighting.

    The rainbow must arc cleanly and vividly, without looking pasted on. The subject looking up gives the rainbow a witness, which makes the image feel real rather than decorative. The sunlight should warm the scene gently, so the rainbow glows without overpowering the subject.

    Dramatic Field Storm Light

    A rural, cinematic version with storm light over open fields.

    Transform this photo into an ultra-realistic scene of dramatic storm light over open fields, dark clouds with golden breaks, a lone figure on a country road, epic rural mood, ultra-realistic, 4K, cinematic lighting.

    The country road gives the image its leading line, drawing the eye from the foreground to the dramatic sky. The lone figure should be small, walking toward the light, so the journey metaphor reads clearly. The field’s colours should stay natural, letting the sky carry the drama.

    How to Customize This Cloudy Sunlight Prompt

    Customisation starts with the cloud-sky relationship. The drama comes from the contrast between heavy clouds and breaking sun, so describe both explicitly: how heavy the clouds are, where the break is, and where the light falls. A vague “cloudy sky” prompt will produce a grey backdrop; a specific “heavy dark clouds with one golden break above the subject” prompt will produce a cinematic sky. The sky is the subject of this genre, so describe it like one. That is exactly why the ultra realistic cloudy and sunlight photo prompt has become a favourite with so many creators. That is exactly why the ultra realistic cloudy and sunlight photo prompt has become a favourite with so many creators.

    Next, control the rays. God rays can be strong and distinct, soft and diffused, or barely visible as a glow. Strong rays suit epic, dramatic content; soft rays suit hopeful, reflective content; a glow suits subtle, peaceful content. Name the ray quality explicitly, and check that the rays fall on the subject, not beside them. Rays that miss the subject are wasted drama.

    The subject’s relationship to the light is the third lever. Standing in the light says receiving; walking toward it says journeying; looking up at it says wondering; silhouetted against it says awe. The action must match the mood, or the image will feel posed. One natural action, held still in the light, beats a dramatic pose every time in cloudy-light photography.

    Finally, keep the colours natural and the contrast realistic. Storm clouds are dark grey and blue, sunlight is gold, and wet surfaces reflect both. Oversaturated skies and neon rays will look like fantasy art, not photography. Keep the palette grounded in what real storm light looks like, and the awe will feel earned rather than painted on.

    Step-by-Step Guide to Creating the Cloudy Sunlight Photo

    Follow these steps in order. Cloudy-light photos fail on the sky more than on anything else, so the sky steps matter most. With a little practice, the ultra realistic cloudy and sunlight photo prompt becomes quick and easy to repeat. With a little practice, the ultra realistic cloudy and sunlight photo prompt becomes quick and easy to repeat.

    1. Choose the sky story and the subject’s action before generating. Write down the cloud type, the break position, and the action in one sentence. The three choices together define the image, and deciding them first prevents the generic grey-sky results that plague cloudy prompts.
    2. Decide whether you are transforming a photo or generating a scene. If transforming your own photo, upload a clear full-body or half-body shot with a simple background, so the AI has room to build the sky and the rays around you. A tight headshot cannot carry a dramatic sky.
    3. Open your AI photo editor and upload the full-size photo. Use ChatGPT, Gemini, or any editor that accepts text prompts. Upload the original file, because cloudy-light photos are viewed large and the cloud detail, ray shafts, and skin tones need their full resolution.
    4. Paste the prompt exactly and generate the first version. Keep the cloud, break, ray, and mood words intact. They are doing structural work, and trimming them produces an ordinary cloudy photo instead of a cinematic light break.
    5. Check the sky first, then the rays, then the subject. The clouds must be heavy and dramatic, the rays must fall visibly onto the subject, and the subject must be lit by them. If any of the three fails, name it in your correction prompt before regenerating.
    6. Refine with one sky or light correction. If the rays miss the subject, ask for “god rays falling directly onto the subject”. If the sky is too bright, ask for “heavier, darker clouds around the break”. One fix preserves the parts that already work.
    7. Save at full size and test the crop. Save a wide version for the feed and a vertical version for stories, keeping the sky drama and the subject in frame in both. Check on your phone, because cloud detail that looks rich on a laptop can flatten on a small screen.

    Common Mistakes to Avoid

    Making the sky flat grey. A uniform grey sky with no break and no rays is not a cloudy-light photo; it is an overcast day. The break and the rays are mandatory. If the sky comes out flat, strengthen the break and ray words and regenerate. Flat skies are the number one failure in this genre. The ultra realistic cloudy and sunlight photo prompt works best when you keep the setup simple and follow the steps in order. The ultra realistic cloudy and sunlight photo prompt works best when you keep the setup simple and follow the steps in order.

    Letting the rays miss the subject. Rays falling beside the subject, or onto an empty field, waste the entire drama. The light must have a target, and the target must be the subject. Check the ray alignment in every version, and correct it before posting.

    Oversaturating the sky. Neon purple clouds and electric gold rays look like fantasy art. Keep the cloud colours natural, dark grey and blue, and the sunlight warm gold. Real storm light is dramatic enough without artificial colour.

    Hiding the subject in shadow. The subject must stand in the light, not beside it. If the subject is dark while the sky glows, the composition has failed. Ask for the subject to be lit by the rays explicitly, and check the face brightness before posting.

    Adding too many sky elements. Rainbows, lightning, god rays, and storm clouds all at once will bury the subject. Pick one sky drama per image: rays, or rainbow, or lightning. Restraint is what makes cloudy light feel real.

    Best Tools for This Edit

    Gemini is excellent for cloudy sunlight photos, because it renders dramatic skies, god rays, and natural light breaks very accurately. Its cloud detail stays crisp and realistic, and the light direction stays consistent across the frame. For sky-driven images, Gemini’s accuracy gives it the edge. Many beginners start with the ultra realistic cloudy and sunlight photo prompt because the results look clean and natural. Many beginners start with the ultra realistic cloudy and sunlight photo prompt because the results look clean and natural.

    ChatGPT is the easiest option for transforming your own photo into a cloudy-light scene. Upload a clear shot, paste the prompt, and it will place you under the breaking sky while keeping your identity recognisable. Its follow-up corrections are useful for ray adjustments: “rays directly onto me” usually works in one step.

    Canva is the best finishing tool for cloudy-light photos. Use it to crop for different formats, add a subtle vignette that deepens the clouds, and design a clean caption layout. Keep any text small and away from the sky drama, so the light break stays the hero.

    Frequently Asked Questions

    Can I use a photo taken on a sunny day as the starting point? Yes, because the AI rebuilds the sky entirely. A sunny starting photo actually helps, because the face is already well lit and the AI only needs to darken the sky and add the rays. Avoid starting photos with harsh midday shadows, which will fight the new light direction. A careful pass with the ultra realistic cloudy and sunlight photo prompt can lift an ordinary attempt into something special. A careful pass with the ultra realistic cloudy and sunlight photo prompt can lift an ordinary attempt into something special.

    Will the god rays look real or painted on? Real, when the rays are described as falling from a specific break onto the subject, with dust or moisture implied in the air. Rays need something to travel through, so the prompt’s “moody atmosphere” matters. If the rays look painted, add “volumetric light, dust motes glowing in the shafts” and regenerate. Once you try the ultra realistic cloudy and sunlight photo prompt, you can adjust the small details to match your own style. Once you try the ultra realistic cloudy and sunlight photo prompt, you can adjust the small details to match your own style.

    Can I use these prompts for landscape-only photos? Yes, beautifully. Remove the subject and let the sky, rays, and landscape carry the image. Landscape-only cloudy-light photos make excellent wallpapers and covers, because the drama needs no human anchor. Keep the composition strong, with a leading line toward the light break. In short, the ultra realistic cloudy and sunlight photo prompt keeps the whole process fast, free and fun. In short, the ultra realistic cloudy and sunlight photo prompt keeps the whole process fast, free and fun.

    What if the sky keeps coming out too bright? Strengthen the cloud words with “heavy dark storm clouds, low and oppressive” and reduce the sun’s area to “one narrow break”. The contrast between dark clouds and narrow light is what creates the drama. A bright sky with a small sun is not a storm break; it is a sunny day with clouds. For a reliable finish, save the ultra realistic cloudy and sunlight photo prompt and reuse it whenever you need this look. For a reliable finish, save the ultra realistic cloudy and sunlight photo prompt and reuse it whenever you need this look.

    How do I keep a cloudy-light series consistent? Use the same cloud heaviness, ray quality, and warmth level across all images. Change only the subject’s action and the landscape. The shared sky treatment will tie the series together, and the profile will read as one dramatic weather story. That simple approach is what makes the ultra realistic cloudy and sunlight photo prompt so popular right now. That simple approach is what makes the ultra realistic cloudy and sunlight photo prompt so popular right now.

    Final Words

    An ultra realistic cloudy and sunlight photo prompt turns an ordinary portrait into a moment of awe, where heavy clouds break and golden light chooses one person to fall on. Keep the clouds dark, the break narrow, and the rays aimed at the subject, and the image will feel like a blessing caught on camera. Try the different sky stories across the series, from god rays to rainbows to storm clearings, and let the light do what it has always done: remind viewers that even the darkest sky breaks, and the break is beautiful. Shared widely by creators, the ultra realistic cloudy and sunlight photo prompt keeps delivering consistent results.

    The best cloudy-light photo is the one where the viewer feels the sun arrive, and stands in it with the subject, for one long, golden moment. This ultra realistic cloudy and sunlight photo prompt turns an ordinary sky into a dramatic masterpiece. Keep the rays golden, the clouds heavy, and the subject sharp, and the photo will feel truly awe-inspiring. If you want a dependable option, the ultra realistic cloudy and sunlight photo prompt is hard to beat for this style.
  • Viral Spiderman Photo Prompts for ChatGPT

    Viral Spiderman Photo Prompts for ChatGPT

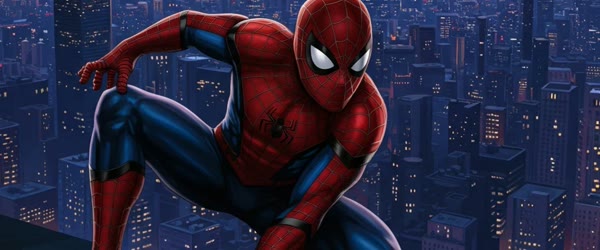
    Viral spiderman photo prompts for chatgpt example

    Introduction

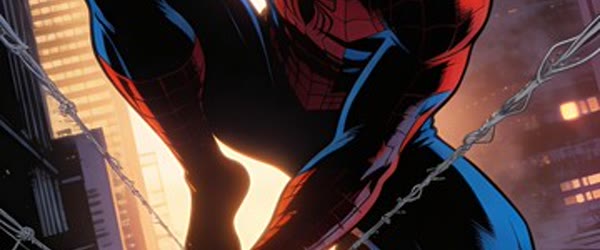
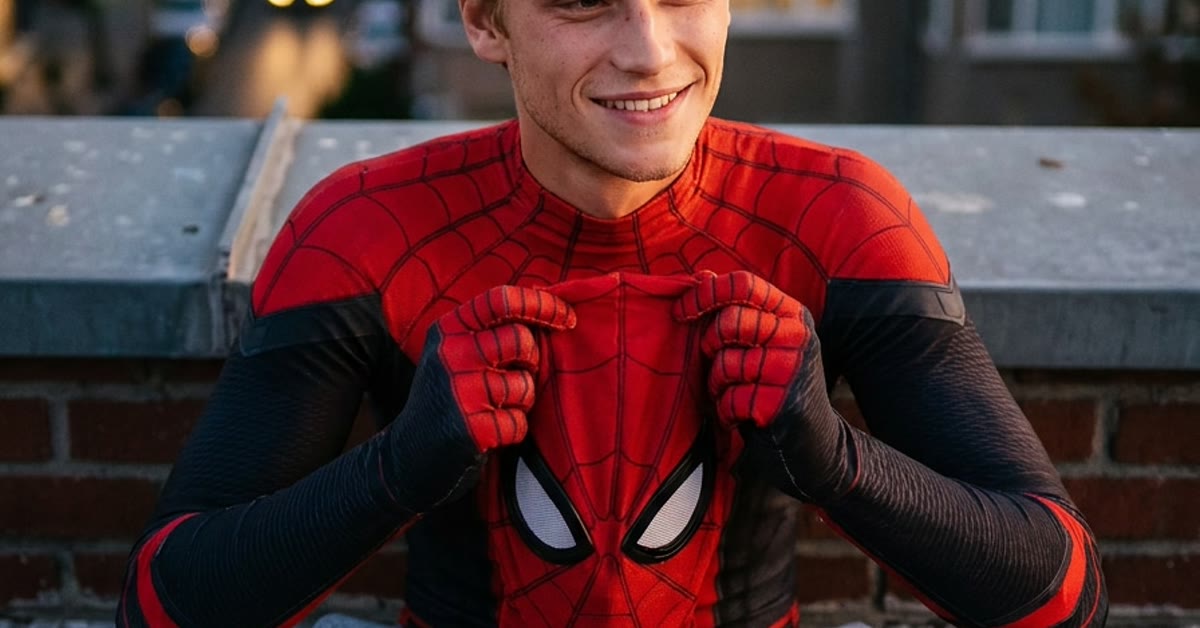
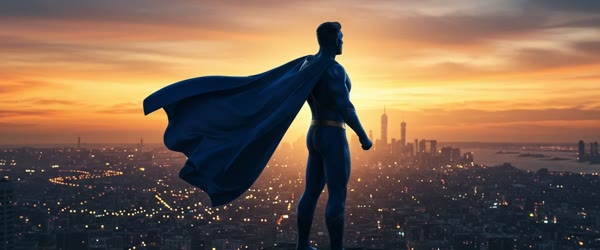
    Spider-Man photos go viral because they mix heroics with fun, and viral Spiderman photo prompts for ChatGPT capture both in one frame. A person in a Spider-Man suit crouching on a rooftop edge at sunset, mask half lifted, with a dramatic skyline behind, is a photo made to be shared.

    The playful detail matters most. The half-lifted mask and the relaxed crouch make the hero feel human and fun instead of stiff. The prompt below builds the whole scene in ChatGPT, and the steps show you how to get the most shareable version.

    Person in Spider-Man suit crouching on a city rooftop edge at sunset

    How to Use These Viral Spiderman Photo Prompts for ChatGPT

    1. Upload a clear photo of the person in a natural crouch or standing pose. A plain background helps ChatGPT rebuild the rooftop and skyline cleanly around the figure.
    2. Paste the prompt exactly as written and generate the first version. Check that the suit fits naturally and that the half-lifted mask looks playful rather than awkward.
    3. If the skyline looks flat, generate again and keep the version with the deepest sunset colours. Save it at full size and post it with a fun superhero caption.
    Dramatic skyline behind a playful superhero portrait at dusk

    Copy-Paste Prompt

    Create a viral-style photo of a person in a Spider-Man suit crouching on a city rooftop edge at sunset, mask half lifted playfully, dramatic skyline behind, heroic fun mood, ultra-realistic, 4K, cinematic lighting.

    Pro Tips

    • Use a photo taken from a low angle, because shooting upward makes the rooftop pose look taller and more heroic.
    • Keep the sunset warm and golden, since the contrast between the red suit and the orange sky is what makes the photo pop.
    • Add the mask detail last in your checks, because a natural face under the lifted mask is what makes the photo feel fun and real.
    ChatGPT photo editing with heroic fun mood and cinematic lighting

    More Prompts to Try for Viral Spiderman Photos

    Spider-Man photos work because they mix heroism with playfulness: the suit is epic, but the person inside it is having fun. These original viral spiderman photo prompts for chatgpt explore different Spider-Man moments, from rooftop crouches to city swings frozen mid-air, so you can build a superhero series that never repeats the same pose. Keep the suit correct, the city glowing, and the mood heroic yet fun. Used well, the viral spiderman photo prompts for chatgpt can make the whole result feel more polished and professional. Used well, the viral spiderman photo prompts for chatgpt can make the whole result feel more polished and professional.

    Rooftop Edge Crouch

    The signature Spider-Man photo: crouched on a rooftop edge at sunset, mask half lifted.

    Create a viral-style photo of a person in a Spider-Man suit crouching on a city rooftop edge at sunset, mask half lifted playfully, dramatic skyline behind, heroic fun mood, ultra-realistic, 4K, cinematic lighting.

    The half-lifted mask is the detail that makes this photo viral. It says the hero is a real person having fun, not a distant icon. The crouch must be balanced and athletic, with the skyline sharp behind. Sunset light makes the glass towers glow, which gives the whole image its blockbuster colour.

    Mid-Swing Freeze

    A dynamic action shot frozen at the peak of a swing.

    Create a viral-style photo of Spider-Man frozen mid-swing between skyscrapers, one web line taut above, body arched dynamically, city lights below, thrilling heroic mood, ultra-realistic, 4K, cinematic lighting.

    The frozen swing needs a clear arc: the body must read as moving, even though the image is still. The web line should be taut and diagonal, leading the eye upward, and the body should arch with the momentum. The city below must be sharp enough to give scale, because height is the whole thrill.

    Alley Landing Hero Pose

    A grounded, powerful shot ending in the classic three-point landing.

    Create a viral-style photo of Spider-Man landing in a heroic crouch in a dark alley, dust bursting outward, one fist on the ground, dramatic rim light, powerful heroic mood, ultra-realistic, 4K, cinematic lighting.

    The landing is the entire photo. The crouch must be low and stable, one fist grounded, with dust radiating outward in a ring. The rim light separates the hero from the dark alley, and the pose must hold perfectly still, because any wobble will break the power. This is the poster version of the series.

    Mask Off Portrait

    A human, relatable shot with the mask held in the hand.

    Create a viral-style photo of a young man in a Spider-Man suit holding his mask in one hand, smiling confidently, city rooftop background at dusk, relatable heroic mood, ultra-realistic, 4K, cinematic lighting.

    The mask in the hand is the story: the hero is also a person. The smile must be confident but not arrogant, and the suit must stay correct even with the mask off. Dusk light keeps the mood warm and human, contrasting with the action shots. This version builds the personal brand behind the hero.

    Upside-Down Hang

    A playful, iconic shot hanging upside down from a web line.

    Create a viral-style photo of Spider-Man hanging upside down from a web line in a city street, relaxed playful pose, amused expression, pedestrians blurred below, fun heroic mood, ultra-realistic, 4K, cinematic lighting.

    The upside-down hang is pure Spider-Man: playful, impossible, and instantly recognisable. The pose must be relaxed, not strained, because the joke is how easy the hero makes it look. The blurred pedestrians below give the height and the humour, so keep them soft and small.

    Rain Rooftop Silhouette

    A moody, cinematic shot with rain and a lone silhouette.

    Create a viral-style photo of Spider-Man silhouetted on a rooftop in heavy rain, lightning flashing behind, dramatic dark sky, lone heroic mood, ultra-realistic, 4K, cinematic lighting.

    The silhouette needs the lightning. One flash behind the hero, freezing the outline against the storm, is enough. The rain should streak diagonally, adding motion to the still image. Keep the hero’s outline sharp and the background dark, because the contrast is what makes silhouettes powerful.

    How to Customize This Spiderman Prompt

    Customisation starts with the suit. The classic red and blue, the black symbiote, the Iron Spider, and the homemade suit each tell a different Spider-Man story, and fans will notice which one you use. Name the suit explicitly in every prompt, because a generic “Spider-Man suit” will produce a random version that may not match your series. The suit decides the colour palette and the audience’s expectations, so choose it before anything else. That is exactly why the viral spiderman photo prompts for chatgpt has become a favourite with so many creators. That is exactly why the viral spiderman photo prompts for chatgpt has become a favourite with so many creators.

    Next, control the balance between heroism and playfulness. The viral Spider-Man photos work because they mix both: the pose is heroic, but the half-lifted mask or the playful expression says the person is having fun. If the photo is all heroism, it feels like a movie poster; if it is all play, it feels like a costume. The mix is the magic, so state both moods in the prompt: “heroic fun mood” or “playful heroic energy”.

    The city is the third lever. Skyscrapers suit swinging, rooftops suit crouches, alleys suit landings, and streets suit hangs. The location must match the action, or the photo will feel staged. A swing needs towers; a landing needs an alley. Name the location’s character in one phrase, and the AI will build the right backdrop.

    Finally, keep the person visible. The half-lifted mask, the held mask, and the smiling face are what make these photos go viral, because they reveal the human inside the hero. Pure suit-only photos are impressive but impersonal. Show the person at least once in every series, and the audience will follow the human, not just the costume.

    Step-by-Step Guide to Creating the Spiderman Photo

    Follow these steps in order. Superhero photos fail on the suit more than on anything else, so the checking steps matter most. With a little practice, the viral spiderman photo prompts for chatgpt becomes quick and easy to repeat. With a little practice, the viral spiderman photo prompts for chatgpt becomes quick and easy to repeat.

    1. Choose the suit, pose, and location before generating. Write down all three, and pick the matching prompt from this article. The three choices together define the photo, and deciding them first prevents the generic results that make superhero edits forgettable.
    2. Decide whether you are transforming a photo or generating a scene. If transforming your own photo, upload a clear full-body shot in a dynamic pose, so the AI has a body to dress in the suit. A stiff standing photo will produce a stiff Spider-Man.
    3. Open your AI photo editor and upload the full-size photo. Use ChatGPT, Gemini, or any editor that accepts text prompts. Upload the original file, because superhero photos are viewed large and the suit’s web pattern needs its full detail.
    4. Paste the prompt exactly and generate the first version. Keep the suit, pose, and mood words intact. They are doing precise work, and trimming them produces a generic superhero rather than Spider-Man specifically.
    5. Check the suit first, then the pose, then the city. The suit’s colours and web pattern must be correct and consistent, the pose must be athletic and balanced, and the city must support the action. If any of the three fails, name it in your correction prompt before regenerating.
    6. Refine with one specific correction. If the web pattern is wrong, ask for “correct Spider-Man web pattern, red and blue suit”. If the pose is stiff, ask for a more dynamic version of the same pose. One fix preserves the parts that already work.
    7. Save at full size and test the crop. Save a square version for the feed and a vertical version for stories, keeping the hero and the city in frame in both. Check on your phone, because suit detail that looks crisp on a laptop can blur on a small screen.

    Common Mistakes to Avoid

    Getting the suit wrong. Wrong colours, a missing web pattern, or a distorted mask will be noticed instantly by every Spider-Man fan. Name the suit explicitly, and check it at full zoom before posting. The suit is the entire content; everything else is background. The viral spiderman photo prompts for chatgpt works best when you keep the setup simple and follow the steps in order. The viral spiderman photo prompts for chatgpt works best when you keep the setup simple and follow the steps in order.

    Posing stiffly. A stiff, mannequin-like Spider-Man looks like a costume display, not a hero. The poses must be athletic: crouched, arched, mid-motion, or relaxed with intent. If the pose looks posed, ask for more dynamic language and regenerate.

    Ignoring the city. A hero floating against a blank sky looks pasted in. The city must be present, sharp, and scaled correctly, because height and place are what make Spider-Man’s world real. A detailed skyline behind the hero is not decoration; it is proof.

    Making every photo an action shot. Non-stop action becomes noise. Alternate action shots with quiet shots, the rooftop perch and the mask-off portrait, so the series breathes. The quiet shots make the action shots feel earned.

    Overdoing the effects. Lightning, explosions, and energy blasts all at once will bury the hero. One dramatic element per photo is enough. The suit, the pose, and the city carry the image; effects should support them, never replace them.

    Best Tools for This Edit

    ChatGPT is the easiest option for viral Spider-Man photos, because it keeps the suit consistent while placing the hero in dynamic poses. Its conversational corrections are ideal for suit fixes: “correct web pattern, classic red and blue” usually works in one step, and it handles follow-up adjustments gracefully. Many beginners start with the viral spiderman photo prompts for chatgpt because the results look clean and natural. Many beginners start with the viral spiderman photo prompts for chatgpt because the results look clean and natural.

    Gemini is excellent for photorealistic Spider-Man portraits, because it renders suit texture, city light, and cinematic colour very accurately. Its action shots look photographic rather than illustrated, which matters for viral posts that must feel real. For realism-critical hero shots, Gemini’s accuracy gives it the edge.

    Canva is the best finishing tool for superhero posts. Use it to add one bold caption line, a clean border, or a simple comic-style frame for stories. Keep the text minimal and never cover the hero or the mask. One strong line in a bold font is more viral than a paragraph.

    Frequently Asked Questions

    Can I use my own face in the Spider-Man suit? Yes, and the half-lifted mask and mask-off versions are written for exactly that. Upload a clear photo of yourself, and the AI will dress you in the suit while keeping your face recognisable. The personal reveal is what makes these photos go viral. A careful pass with the viral spiderman photo prompts for chatgpt can lift an ordinary attempt into something special. A careful pass with the viral spiderman photo prompts for chatgpt can lift an ordinary attempt into something special.

    Will the AI keep the suit consistent across a series? Yes, if you name the suit identically in every prompt and keep the descriptions word for word. Copy the suit description exactly, including colours and pattern, and the suit will stay recognisable. Changing even one word can shift the design. Once you try the viral spiderman photo prompts for chatgpt, you can adjust the small details to match your own style. Once you try the viral spiderman photo prompts for chatgpt, you can adjust the small details to match your own style.

    Can children use these prompts? Yes, all the versions in this article are fun and family-friendly. The rooftop crouch and the upside-down hang are especially loved by younger fans. Keep captions playful and heroic, and the series will build a young, loyal audience. In short, the viral spiderman photo prompts for chatgpt keeps the whole process fast, free and fun. In short, the viral spiderman photo prompts for chatgpt keeps the whole process fast, free and fun.

    Is it okay to post AI Spider-Man photos? Yes, as fan art and personal creative posts. These prompts create original portraits inspired by the character, not copies of copyrighted movie stills. Do not claim the image is official, and do not use it commercially as if it were from the films. As fan content, it is a normal creative use. For a reliable finish, save the viral spiderman photo prompts for chatgpt and reuse it whenever you need this look. For a reliable finish, save the viral spiderman photo prompts for chatgpt and reuse it whenever you need this look.

    What crop works best for superhero photos? Vertical 4:5 for the feed, because it gives the hero and the city room to breathe. Square crops cut the skyline, and stories need vertical. Generate once, crop twice, and check both on your phone before posting. That simple approach is what makes the viral spiderman photo prompts for chatgpt so popular right now. That simple approach is what makes the viral spiderman photo prompts for chatgpt so popular right now.

    Final Words

    Viral spiderman photo prompts for chatgpt turn an ordinary person into a hero for a frame: a crouch on a rooftop, a swing frozen mid-air, a mask half lifted with a grin. Keep the suit correct, the pose athletic, and the city glowing, and the photo will feel like a moment from the films. Show the human inside the hero at least once in every series, because the person is what viewers follow. Shared widely by creators, the viral spiderman photo prompts for chatgpt keeps delivering consistent results.

    The best Spider-Man photo is not the most action-packed one; it is the one where the hero looks like they are having the time of their life, and the viewer wishes they could swing too. Viral Spider-Man photo prompts for ChatGPT turn a simple pose into a superhero moment. Keep the suit sharp, the mask playful, and the skyline dramatic, and the photo will swing straight into shares. If you want a dependable option, the viral spiderman photo prompts for chatgpt is hard to beat for this style.

  • Cinematic Couple Studio Light Photo Prompt

    Cinematic Couple Studio Light Photo Prompt

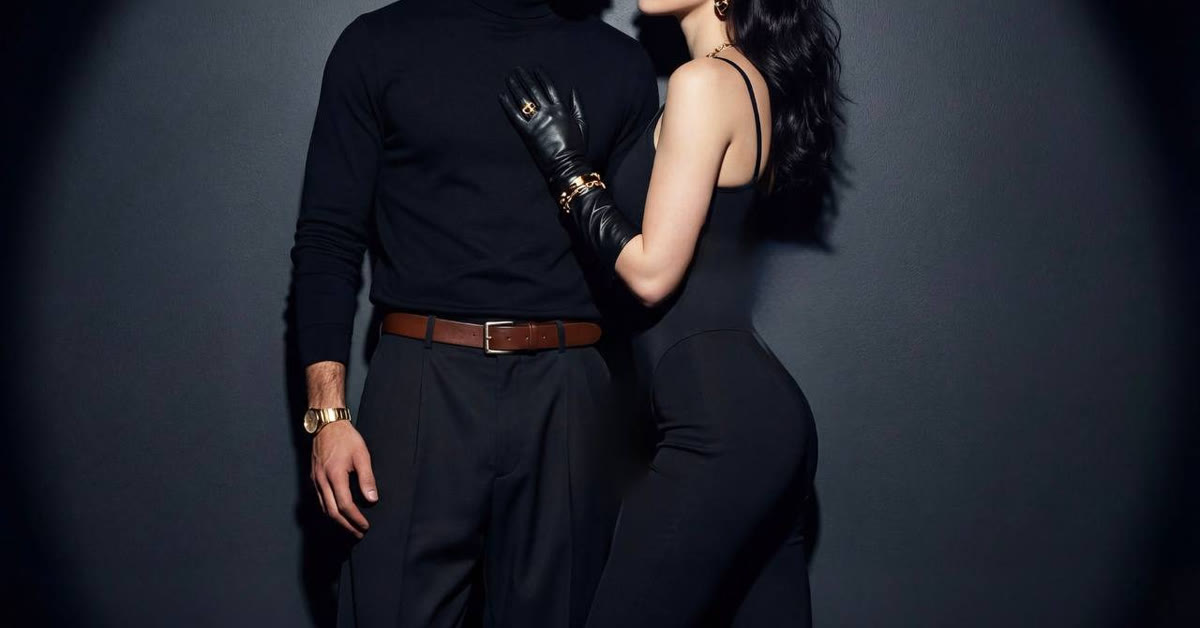
    Cinematic couple studio portrait made with the cinematic couple studio light photo prompt

    Introduction

    Studio portraits become cinematic when the light is dramatic, and this cinematic couple studio light photo prompt creates that drama from any couple photo. Deep shadows, a dark backdrop, and elegant poses give the portrait a film-noir romance that feels refined and timeless.

    The style works for anniversaries, engagements, and couple shoots where you want something more artistic than a bright outdoor photo. The AI rebuilds the lighting while keeping both faces natural and the connection between the couple real.

    Couple under dramatic softbox lighting with deep shadows

    How to Use This Cinematic Couple Studio Light Photo Prompt

    1. Upload a clear photo of the couple with both faces visible and a simple background. Photos taken indoors with even light give the cleanest studio rebuild.
    2. Paste the prompt exactly as written and generate the first version. Check that both faces stay natural and that the shadows fall dramatically without hiding either person.
    3. If one face falls too dark, generate again and keep the version with the best balance. Save it at full size and use it for an anniversary post or a framed print.
    Elegant couple poses against a dark backdrop with film-noir mood

    Copy-Paste Prompt

    Create a cinematic studio portrait of a couple under dramatic softbox lighting, deep shadows, elegant poses, dark backdrop, film-noir romance mood, refined styling, ultra-realistic, 4K, cinematic lighting.

    Pro Tips

    • Pose close together with relaxed shoulders, because the film-noir mood works best when the couple looks comfortable and connected.
    • Wear dark, solid colours in the source photo so the outfits blend into the backdrop and the faces carry the light.
    • Keep jewellery simple, since one soft highlight on a ring or earring reads as more elegant than several bright spots.
    Studio photo editing with refined styling and cinematic lighting

    More Prompts to Try for Cinematic Couple Studio Portraits

    Studio light gives you total control: every shadow, every highlight, every mood is a choice. These original cinematic couple studio light photo prompts explore different studio moods, from film-noir romance to soft editorial elegance, so you can build a studio series that never repeats the same setup. Keep the backdrop dark, the light directional, and the poses elegant, and every image will feel like a film still. Used well, the cinematic couple studio light photo prompt can make the whole result feel more polished and professional. Used well, the cinematic couple studio light photo prompt can make the whole result feel more polished and professional.

    Film-Noir Romance

    The signature studio look: deep shadows, dramatic light, and timeless romance.

    Create a cinematic studio portrait of a couple under dramatic softbox lighting, deep shadows, elegant poses, dark backdrop, film-noir romance mood, refined styling, ultra-realistic, 4K, cinematic lighting.

    The softbox is the key light here. It should fall from one side, sculpting the faces and leaving the far sides in deep shadow. The couple should pose close, foreheads nearly touching, because the intimacy must survive the darkness. The dark backdrop keeps all attention on the lit faces, which is the entire point of noir.

    Soft Editorial Elegance

    A bright, refined version for fashion and magazine-style portraits.

    Create a cinematic studio portrait of an elegant couple in soft diffused studio light, light grey backdrop, refined poses, gentle smiles, premium editorial mood, ultra-realistic, 4K, cinematic lighting.

    Soft diffused light flatters everyone, because it erases harsh shadows and smooths skin. The light grey backdrop keeps the image airy and modern, contrasting with the dark noir version. Poses should be relaxed and confident, like a magazine cover shoot, with the couple standing tall and close.

    Golden Rim Light Embrace

    A warm, glowing version with light tracing the couple’s outlines.

    Create a cinematic studio portrait of a couple embracing with strong golden rim light tracing their silhouettes, dark background, warm glow on hair and shoulders, tender romantic mood, ultra-realistic, 4K, cinematic lighting.

    Rim light separates the couple from the darkness, drawing a line of gold around them. The embrace must be close and still, because movement will blur the rim. The warm glow on hair and shoulders is the detail that makes the image feel alive against the black backdrop.

    Single Spotlight Drama

    A theatrical version with one hard spotlight and total darkness around.

    Create a cinematic studio portrait of a couple standing in a single hard spotlight, deep black surrounding darkness, dramatic poses, intense loving gazes, theatrical cinematic mood, ultra-realistic, 4K, cinematic lighting.

    The single spotlight creates a stage, and the couple must perform for it. Poses should be bold and held, like actors freezing a moment. The gazes must meet, because the spotlight isolates the couple and the connection is the only story. This is the most dramatic version, ideal for anniversary posts.

    Window Studio Softness

    A gentle version mimicking natural window light inside the studio.

    Create a cinematic studio portrait of a couple in soft window-style light, gentle shadows, light neutral backdrop, relaxed natural poses, calm tender mood, ultra-realistic, 4K, cinematic lighting.

    Window-style light is the softest studio light, and it suits couples who prefer natural, unposed portraits. The poses should be relaxed, almost candid: a shared laugh, a hand held loosely, a forehead resting on a shoulder. The neutrality of the backdrop keeps the focus on the genuine connection.

    Red Accent Noir

    A bold, passionate version with a single red accent in a monochrome world.

    Create a cinematic studio portrait of a couple in black-and-white studio light with one red accent, such as a rose or a dress detail, deep shadows, passionate elegant mood, ultra-realistic, 4K, cinematic lighting.

    The red accent is the hook. It must be small and precise, a single rose, a lip colour, or a dress detail, so it reads as deliberate rather than accidental. The monochrome grade makes the red glow, and the passion comes from the contrast. Keep the accent truly singular, because two red elements will dilute the effect.

    How to Customize This Studio Light Prompt

    Customisation starts with the light setup. Studio portraits are built from light, so name the setup explicitly: softbox, rim light, spotlight, or window-style. Each setup creates a different shadow pattern, and the shadow pattern is the portrait. A softbox sculpts, a rim light separates, a spotlight isolates, and window light softens. Choose the setup that matches the mood, and hold it consistently across the whole image. That is exactly why the cinematic couple studio light photo prompt has become a favourite with so many creators. That is exactly why the cinematic couple studio light photo prompt has become a favourite with so many creators.

    Next, control the backdrop. Dark backdrops create drama and intimacy; light grey creates editorial refinement; neutral tones create calm. The backdrop must agree with the light, because a dark backdrop with soft diffused light will look muddy, while a light backdrop with hard spotlight will look washed out. Match the backdrop to the setup, and the portrait will cohere.

    The poses are the third lever. Studio couples must pose with intention, because the camera sees everything and the backdrop hides nothing. Close, connected poses suit noir and romance; tall, confident poses suit editorial; still, held poses suit drama. Rehearse the pose before generating, and describe it precisely: “foreheads touching”, “arms wrapped around”, “standing tall side by side”. Vague pose words produce awkward, uncertain bodies.

    Finally, adjust the styling. Refined, elegant clothing suits the studio, because the controlled environment rewards deliberate choices. Dark, tailored outfits suit noir; light, flowing outfits suit editorial; one bold accent suits the red version. Keep the styling consistent between the couple, because mismatched formality, one formal and one casual, will break the portrait’s unity.

    Step-by-Step Guide to Creating the Studio Portrait

    Follow these steps in order. Studio portraits fail on light direction more than on anything else, so the light steps matter most. With a little practice, the cinematic couple studio light photo prompt becomes quick and easy to repeat. With a little practice, the cinematic couple studio light photo prompt becomes quick and easy to repeat.

    1. Choose the light setup, backdrop, and mood before generating. Write down all three, and pick the matching prompt from this article. The three choices together define the portrait, and deciding them first prevents the mismatched results that make studio edits look amateur.
    2. Decide whether you are transforming a photo or generating a scene. If transforming a couple’s photo, upload a clear, well-lit portrait with a simple background, so the AI can rebuild the studio light around the real faces. A dark or cluttered starting photo will fight the new lighting.
    3. Open your AI photo editor and upload the full-size photo. Use ChatGPT, Gemini, or any editor that accepts text prompts. Upload the original file, because studio portraits are viewed large and the light, skin, and fabric details need their full resolution.
    4. Paste the prompt exactly and generate the first version. Keep the light setup, backdrop, and mood words intact. They are doing structural work, and trimming them produces a generic dark photo instead of a cinematic studio portrait.
    5. Check the light direction first, then the shadows, then the faces. The light must come from the described direction, the shadows must fall consistently, and the faces must be lit as described. If the light direction is wrong, the whole portrait is wrong, no matter how good the faces look.
    6. Refine with one lighting correction. If the shadows are too harsh, ask for “softer light, gentler shadows”. If the backdrop is wrong, ask for the correct backdrop explicitly. One fix preserves the poses and faces you already like.
    7. Save at full size and test the crop. Save a square version for the feed and a vertical version for stories, keeping both faces and the light pattern in frame in both. Check on your phone, because studio contrast that looks rich on a laptop can crush shadows on a small screen.

    Common Mistakes to Avoid

    Lighting the faces from two directions. Studio light comes from one setup, not from everywhere. If both sides of the faces are equally lit, the portrait looks flat and amateur. State the light direction explicitly, and check that one side of each face falls into soft shadow. The cinematic couple studio light photo prompt works best when you keep the setup simple and follow the steps in order. The cinematic couple studio light photo prompt works best when you keep the setup simple and follow the steps in order.

    Using a busy backdrop. Studio backdrops must be plain, dark, grey, or neutral. A busy background destroys the studio illusion and competes with the couple. If the backdrop comes out cluttered, regenerate with “plain dark backdrop, nothing else visible” stated firmly.

    Posing the couple awkwardly. Vague pose descriptions produce uncertain bodies: arms in strange places, heads at odd angles, and gaps where closeness should be. Describe the pose precisely and simply, and keep it to one clear arrangement. Stillness and closeness beat complexity in studio portraits.

    Overdoing the contrast. Deep shadows are essential, but faces lost in blackness are a failed edit. Keep a soft light on the faces even in the darkest noir version. If you cannot see both faces clearly, the portrait has gone too far.

    Mismatching the couple’s styling. One partner formal and the other casual, or one in warm tones and the other in cool, will break the portrait’s unity. Keep the styling consistent in formality and palette, because the studio sees everything and forgives nothing.

    Best Tools for This Edit

    Gemini is excellent for cinematic studio portraits, because it renders directional light, deep shadows, and skin tones very accurately. Its studio scenes look photographed, with believable light falloff and shadow gradients. For light-critical portraits, Gemini’s accuracy gives it the edge. Many beginners start with the cinematic couple studio light photo prompt because the results look clean and natural. Many beginners start with the cinematic couple studio light photo prompt because the results look clean and natural.

    ChatGPT is the easiest option for transforming a real couple’s photo into a studio portrait. Upload the portrait, paste the prompt, and it will rebuild the studio light while keeping the couple recognisable. Its follow-up corrections are useful for light adjustments: “softer light” or “darker backdrop” usually work in one step.

    Canva is the best finishing tool for studio portraits. Use it to crop precisely, add a thin elegant border, and design a clean caption layout. Keep any text minimal and away from the faces, so the light and the couple stay the heroes.

    Frequently Asked Questions

    Can I use a casual photo as the starting point? Yes, provided the faces are clear and well lit. The AI will rebuild the studio environment around the real faces. A casual starting photo actually helps, because the contrast between the ordinary original and the cinematic result makes the transformation more impressive. A careful pass with the cinematic couple studio light photo prompt can lift an ordinary attempt into something special. A careful pass with the cinematic couple studio light photo prompt can lift an ordinary attempt into something special.

    Will the AI keep the couple looking the same? Usually yes, when the starting photo is clear and the light is described consistently. Check both faces at full zoom, and add “keep both faces and identities exactly the same” if either face drifts. Two or three attempts normally produce a version where both people look right. Once you try the cinematic couple studio light photo prompt, you can adjust the small details to match your own style. Once you try the cinematic couple studio light photo prompt, you can adjust the small details to match your own style.

    What if one partner is in shadow? That is often intentional in noir lighting, but the shadowed face must still be readable. If a face disappears into blackness, ask for “soft fill light on both faces, shadows gentle” and regenerate. Drama must never cost a face. In short, the cinematic couple studio light photo prompt keeps the whole process fast, free and fun. In short, the cinematic couple studio light photo prompt keeps the whole process fast, free and fun.

    Can I print studio portraits? Yes, beautifully. Studio portraits are made for printing, and the controlled light suits paper perfectly. Print at full size on matte or lustre paper, which enhances the cinematic feeling, and check the shadow detail at full zoom before printing. For a reliable finish, save the cinematic couple studio light photo prompt and reuse it whenever you need this look. For a reliable finish, save the cinematic couple studio light photo prompt and reuse it whenever you need this look.

    How do I keep a studio series consistent? Use the same light setup, backdrop, and grade across all portraits. Change only the poses. The shared light will tie the series together, and the profile will read as one deliberate studio collection rather than random edits. That simple approach is what makes the cinematic couple studio light photo prompt so popular right now. That simple approach is what makes the cinematic couple studio light photo prompt so popular right now.

    Final Words

    A cinematic couple studio light photo prompt turns an ordinary portrait into a film still, where light sculpts, shadow defines, and closeness tells the story. Keep the light directional, the backdrop plain, and the poses connected, and the studio will do the rest. Try the different setups across the year, from noir to editorial to rim light, and let each one show a different side of the same love. Shared widely by creators, the cinematic couple studio light photo prompt keeps delivering consistent results.

    The best studio portrait is the one where the light feels intentional and the love feels effortless, and both arrive in the same frame. This cinematic couple studio light photo prompt turns a simple couple photo into a film-noir portrait. Keep the light dramatic, the poses elegant, and the backdrop dark, and the romance will glow. Book the same dramatic style for an engagement or anniversary shoot, because couples who love this look always want a second portrait in the same cinematic light. If you want a dependable option, the cinematic couple studio light photo prompt is hard to beat for this style.
  • Golden Hour Field Cinematic AI Photo Editing

    Golden Hour Field Cinematic AI Photo Editing

    Golden hour field portrait made with golden hour field cinematic AI photo editing

    Introduction

    Golden hour light makes everything look cinematic, and golden hour field cinematic AI photo editing brings that light to any portrait. Tall wheat glowing in warm sunset light, soft lens flare, and gentle wind movement turn a simple photo into a peaceful rural film still.

    This style suits portraits taken outdoors in open space. The AI replaces a plain background with a glowing field, warms the light on the face, and adds the rich amber tones of sunset. The result feels calm, warm, and beautifully natural.

    Wheat field glowing in warm sunset light with a portrait subject

    How to Use This Golden Hour Field Cinematic AI Photo Editing Prompt

    1. Upload a clear portrait with natural light on the face and a simple background. Photos taken outdoors give the most believable field result.
    2. Paste the prompt exactly as written and generate the first version. Check that the wheat sits naturally around the person and that the lens flare stays soft and off the face.
    3. If the amber tones look too strong, generate again and pick the version with the most balanced warmth. Save it at full size and share it as a sunset or travel post.
    Soft lens flare and gentle wind movement in a rural field portrait

    Copy-Paste Prompt

    Transform this photo into a golden hour field portrait with tall wheat glowing in warm sunset light, soft lens flare, gentle wind movement, peaceful rural mood, rich amber tones, ultra-realistic, 4K, cinematic lighting.

    Pro Tips

    • Use a photo with the sun roughly behind or beside the subject, because backlight gives the most natural golden flare.
    • Keep clothing simple and earthy, since natural tones blend into the wheat field far better than bright patterns.
    • Crop the final image with the horizon low in the frame so the glowing field fills the photo and the sky stays clean.
    Cinematic field photo editing with rich amber tones and peaceful mood

    More Prompts to Try for Golden Hour Field Portraits

    A golden hour field is nature’s studio: warm light, flowing grain, and open sky. These original golden hour field cinematic ai photo editing prompts explore different field moods, from wheat to wildflowers, so you can build a rural portrait series that never repeats the same sunset. Keep the light low and warm, the wind gentle, and the subject calm, and every image will glow. Used well, the golden hour field cinematic ai photo editing can make the whole result feel more polished and professional. Used well, the golden hour field cinematic ai photo editing can make the whole result feel more polished and professional.

    Wheat Field Glow

    The classic golden hour field portrait, with tall wheat catching the last light.

    Transform this photo into a golden hour field portrait with tall wheat glowing in warm sunset light, soft lens flare, gentle wind movement, peaceful rural mood, rich amber tones, ultra-realistic, 4K, cinematic lighting.

    The wheat is the co-star here. It should glow amber from behind, with individual stalks catching the light, while the subject stands calm among it. The lens flare should be soft and to one side, never across the face. This is the most iconic version, ideal for the main feed post.

    Wildflower Meadow Dream

    A softer, romantic version with flowers and pastel evening light.

    Transform this photo into a golden hour field portrait in a wildflower meadow, soft pink and gold evening light, flowers swaying gently, dreamy peaceful expression, romantic rural mood, ultra-realistic, 4K, cinematic lighting.

    Wildflowers add colour and delicacy that wheat cannot. Keep the flowers in the foreground soft and blurred, framing the subject without hiding them. The pink and gold light should feel like the last ten minutes of daylight, when everything goes soft and warm. This version suits romantic and dreamy content best.

    Harvest Worker Portrait

    A dignified, working portrait honouring rural life and labour.

    Transform this photo into a golden hour field portrait of a farmer standing proudly in a harvested field, tools resting nearby, warm evening light, dignified hardworking mood, rich earthy tones, ultra-realistic, 4K, cinematic lighting.

    Dignity comes from posture and honesty here. The subject should stand tall and calm, with the tools as honest props, not decorations. The harvested field, stubble and open sky, tells the story of work done. Keep the light warm but the mood grounded, because this portrait honours labour, not fantasy.

    Child in the Cornfield

    A joyful, innocent version for children in tall summer crops.

    Transform this photo into a golden hour field portrait of a happy child peeking through tall corn stalks, sunlight dappling through leaves, joyful curious expression, warm summer evening mood, ultra-realistic, 4K, cinematic lighting.

    Children in crops need the plants to frame, not hide, the face. The peek-through composition works because the leaves create a natural window around the eyes and smile. Keep the dappled light soft, because hard spots on a child’s face will look harsh. The joy must be genuine and unposed.

    Lone Tree Silhouette

    A dramatic, minimal version with one tree and a vast field.

    Transform this photo into a golden hour field portrait of a lone figure standing beneath a single large tree in an open field, huge amber sky, long shadows, epic peaceful mood, ultra-realistic, 4K, cinematic lighting.

    The lone tree is the composition’s anchor. It gives the vast field a centre and the figure a companion, so the emptiness feels intentional rather than barren. The long shadows should stretch toward the camera, drawing the eye to the figure. This is the most artistic version, ideal for covers and prints.

    Evening Hay Bales

    A warm, rustic version with hay bales and the last light of day.

    Transform this photo into a golden hour field portrait with round hay bales glowing in warm sunset light, a subject sitting relaxed on one bale, peaceful rural evening mood, rich honey tones, ultra-realistic, 4K, cinematic lighting.

    Hay bales give the subject a natural seat and the composition a rhythm: round shapes repeating into the distance. The sitting pose keeps the mood relaxed and unposed, which suits the end-of-day feeling. The honey tones should be rich but natural, never oversaturated into orange.

    How to Customize This Golden Hour Field Prompt

    Customisation starts with the crop. Wheat, wildflowers, corn, harvested stubble, and hay each create a different field character, and the crop decides the texture, colour, and height of the whole image. Name the crop explicitly, because a generic “field” prompt will produce generic grass. The crop is the setting, and the setting is half the portrait. That is exactly why the golden hour field cinematic ai photo editing has become a favourite with so many creators. That is exactly why the golden hour field cinematic ai photo editing has become a favourite with so many creators.

    Next, control the sun’s position. Low sun behind the subject creates rim light and flare; low sun to the side creates modelling and shadow; low sun in front creates a glowing face but risks squinting. Choose the position that matches the mood: behind for drama, side for modelling, front for warmth. State the position explicitly, such as “sun low behind the subject”, and the AI will light the scene consistently.

    The wind is the third lever. Still air suits calm, reflective portraits; gentle wind suits dreamy, flowing portraits; strong wind suits dramatic, epic portraits. Name the wind level, because wind moves hair, clothing, and crops, and those movements are what make a still image feel alive. A field portrait with no wind feels like a studio shot; a field portrait with wind feels like a moment.

    Finally, adjust the subject’s relationship to the field. Standing among the crop says immersion; sitting on a bale says rest; walking a path says journey; gazing at the horizon says contemplation. The action must match the mood, or the portrait will feel posed. One natural action, held calmly, beats a dramatic pose every time in field photography.

    Step-by-Step Guide to Creating the Golden Hour Field Portrait

    Follow these steps in order. Field portraits fail on light more than on anything else, so the timing steps matter most. With a little practice, the golden hour field cinematic ai photo editing becomes quick and easy to repeat. With a little practice, the golden hour field cinematic ai photo editing becomes quick and easy to repeat.

    1. Choose the crop, sun position, and mood before generating. Write down all three, and pick the matching prompt from this article. The three choices together define the image, and deciding them first prevents the generic results that make field portraits forgettable.
    2. Decide whether you are transforming a photo or generating a scene. If transforming your own photo, upload a full-body or half-body shot with a simple background, so the AI has room to build the field around you. A tight headshot cannot become a wide field portrait.
    3. Open your AI photo editor and upload the full-size photo. Use ChatGPT, Gemini, or any editor that accepts text prompts. Upload the original file, because field portraits are viewed large and the grain, hair, and fabric details need their full resolution.
    4. Paste the prompt exactly and generate the first version. Keep the crop, light, and wind words intact. They are doing structural work, and trimming them produces a portrait with a yellow background rather than a golden hour field.
    5. Check the light first, then the crop, then the face. The light must be low, warm, and directional. The crop must read clearly as wheat, flowers, or corn. The face must be warmly lit and natural. If any of the three fails, name it in your correction prompt before regenerating.
    6. Refine with one lighting or composition correction. If the flare covers the face, ask for “lens flare to one side, face clear”. If the field looks generic, ask for the specific crop named more strongly. One fix preserves the parts that already work.
    7. Save at full size and test the crop. Save a wide version for the feed and a vertical version for stories, keeping the subject and the horizon in frame in both. Check on your phone, because golden tones that look rich on a laptop can look oversaturated on a small screen.

    Common Mistakes to Avoid

    Shooting the light too high. Golden hour means the sun is low. If the light looks like midday, the prompt’s time-of-day words were too weak. Strengthen them with “sun very low on the horizon, long shadows” and regenerate. Low light is the entire genre. The golden hour field cinematic ai photo editing works best when you keep the setup simple and follow the steps in order. The golden hour field cinematic ai photo editing works best when you keep the setup simple and follow the steps in order.

    Making the field generic. A vague green-yellow background with no identifiable crop will read as a filter, not a field. Name the crop explicitly and check that it appears: wheat stalks, flower heads, corn leaves, or hay bales must be visible and specific.

    Letting flare cover the face. Lens flare is beautiful at the edge of the frame and ruinous across the eyes. If flare covers the face, regenerate with the flare positioned explicitly to one side. The face must stay clear in every version.

    Oversaturating the gold. Rich amber is beautiful; neon orange is not. If the field looks orange, ask for “rich but natural amber tones, no oversaturation” and regenerate. Golden hour is warm, not radioactive.

    Forgetting the wind. A perfectly still field looks like a backdrop. Gentle wind movement in hair, clothing, and crops is what makes the image breathe. If the image feels static, add wind words and regenerate. Movement, even implied, is life.

    Best Tools for This Edit

    Gemini is excellent for golden hour field portraits, because it renders warm directional light, glowing crops, and natural skin tones very accurately. Its field scenes look photographed, with believable haze and flare. For light-driven portraits, Gemini’s accuracy gives it the edge. Many beginners start with the golden hour field cinematic ai photo editing because the results look clean and natural. Many beginners start with the golden hour field cinematic ai photo editing because the results look clean and natural.

    ChatGPT is the easiest option for transforming your own photo into a field scene. Upload a full-body shot, paste the prompt, and it will place you in the field while keeping your identity recognisable. Its follow-up corrections are useful for light adjustments: “lower sun, warmer light” usually works in one step.

    Canva is the best finishing tool for field portraits. Use it to crop for different formats, add a subtle warm vignette that deepens the sky, and design a clean caption layout. Keep any text small and away from the face and horizon, so the field stays the hero.

    Frequently Asked Questions

    Can I use a photo taken indoors as the starting point? Yes, provided it is a full-body or half-body shot with a simple background. The AI will replace the background with the field. A tight headshot will struggle, because the AI must invent the body and the field relationship. Use the largest, simplest starting photo you have. A careful pass with the golden hour field cinematic ai photo editing can lift an ordinary attempt into something special. A careful pass with the golden hour field cinematic ai photo editing can lift an ordinary attempt into something special.

    What time of day should the original photo be taken? Any time works, because the AI rebuilds the light. But a photo taken in soft, even light converts best, because harsh shadows in the original will fight the new golden light. Avoid starting photos with strong midday shadows across the face. Once you try the golden hour field cinematic ai photo editing, you can adjust the small details to match your own style. Once you try the golden hour field cinematic ai photo editing, you can adjust the small details to match your own style.

    Will the field look real, or like a fantasy backdrop? Real, when the crop, light, and wind are described specifically and the palette stays natural. Fantasy creeps in when the prompt uses words like “magical” or “enchanted”, or when the colours are pushed too far. Keep the words realistic and the tones natural. In short, the golden hour field cinematic ai photo editing keeps the whole process fast, free and fun. In short, the golden hour field cinematic ai photo editing keeps the whole process fast, free and fun.

    Can I use these prompts for couple or family photos? Yes, and field settings suit groups beautifully, because the open space gives everyone room. Keep the group formation simple, the light consistent, and the background clean. Check every face before sharing, as with all group edits. For a reliable finish, save the golden hour field cinematic ai photo editing and reuse it whenever you need this look. For a reliable finish, save the golden hour field cinematic ai photo editing and reuse it whenever you need this look.

    How do I keep a field series consistent? Use the same light direction, the same warmth level, and the same crop family across all portraits. Change only the subject’s action. The shared light and field will tie the series together, and the profile will read as one golden journey. That simple approach is what makes the golden hour field cinematic ai photo editing so popular right now. That simple approach is what makes the golden hour field cinematic ai photo editing so popular right now.

    Final Words

    A golden hour field cinematic ai photo editing prompt turns an ordinary portrait into a warm, glowing moment at the edge of day. Keep the sun low, the crop specific, and the wind gentle, and the field will feel real enough to walk into. Try the different crops across the season, from wheat to wildflowers to hay, and let the series follow the farming year. Shared widely by creators, the golden hour field cinematic ai photo editing keeps delivering consistent results.

    The best field portrait is the one where the light looks so warm you can almost feel it, and the subject looks like they never want the evening to end. Golden hour field cinematic AI photo editing turns any portrait into a warm sunset moment. Keep the light golden, the wheat glowing, and the mood peaceful, and the photo will feel like evening in the countryside. If you want a dependable option, the golden hour field cinematic ai photo editing is hard to beat for this style.
  • Friendship Day AI Photo Editing Prompts

    Friendship Day AI Photo Editing Prompts

    Friendship Day portrait made with friendship day AI photo editing prompts

    Introduction

    Friendship Day is about the people who laugh with you, and friendship day AI photo editing prompts turn a group photo into a celebration of that bond. Friends laughing with arms around each other, colourful friendship bands, and a sunny park background make a frame full of joy.

    The prompt works with any group photo where everyone is visible and smiling. The AI brightens the scene, adds the festive details, and keeps every face natural and recognisable. It is the easiest way to make a Friendship Day post that feels warm and real.

    Friends laughing together with arms around each other in a park

    How to Use These Friendship Day AI Photo Editing Prompts

    1. Upload a group photo with all faces visible and good daylight on everyone. Photos taken outdoors in a park give the most natural Friendship Day result.
    2. Paste the prompt exactly as written and generate the first version. Check that every face still looks like the right person and that no one is hidden behind the new details.
    3. Save the best version at full size and tag your friends when you post it. A group photo shared on Friendship Day gets more comments when everyone in it is tagged.
    Colourful friendship bands and sunny park background in a portrait

    Copy-Paste Prompt

    Create a cheerful Friendship Day portrait of friends laughing with arms around each other, colourful friendship bands, sunny park background, carefree joyful mood, bright natural light, ultra-realistic, 4K, cinematic lighting.

    Pro Tips

    • Use a photo where everyone is close together, because tight group poses read as warmer and more joyful than spread-out ones.
    • Keep the friendship bands subtle in the result, since small colourful details feel real while oversized ones look pasted on.
    • Post the edit on Friendship Day morning, when friends are checking their feeds and ready to share and comment.
    Joyful friendship photo editing with bright natural light and colours

    More Prompts to Try for Friendship Day Photos

    Friendship Day is about laughter, loyalty, and the people who feel like family. These original friendship day ai photo editing prompts give you different friendship moments, from sunny parks to late-night talks, so you can celebrate every friend without repeating the same photo. Generate them from your group photos and pick the versions that match each friendship. Used well, the friendship day ai photo editing prompts can make the whole result feel more polished and professional. Used well, the friendship day ai photo editing prompts can make the whole result feel more polished and professional.

    Sunny Park Laughter

    The classic Friendship Day image: friends laughing together outdoors.

    Create a cheerful Friendship Day portrait of friends laughing with arms around each other, colourful friendship bands, sunny park background, carefree joyful mood, bright natural light, ultra-realistic, 4K, cinematic lighting.

    The laughter is the hero, so the photo must catch a genuine moment, not a posed smile. Arms around each other create the closeness, and the friendship bands add the Friendship Day detail. Bright natural light keeps the mood carefree, and the park gives the photo room to breathe.

    Late Night Talks

    A quiet, intimate version for the friends who talk until dawn.

    Create a warm Friendship Day portrait of two friends talking late at night with fairy lights glowing, cups of tea, soft smiles, cosy intimate mood, warm golden light, ultra-realistic, 4K, cinematic lighting.

    Night talks need warmth and closeness. The fairy lights create the intimacy, and the tea cups give the hands something natural to do. Keep the smiles soft, because the mood is quiet understanding, not loud celebration. This version suits the closest friendships best.

    Adventure Together

    An energetic version for friends who travel and explore together.

    Create an adventurous Friendship Day portrait of friends standing on a mountain viewpoint with arms raised, backpacks on, wind in their hair, epic landscape behind, joyful free mood, bright crisp light, ultra-realistic, 4K, cinematic lighting.

    The landscape does half the work here, so keep the friends small enough that the view reads clearly. Raised arms signal triumph and freedom, and the backpacks tell the travel story instantly. Bright crisp light keeps the energy high and the colours vivid.

    Childhood Friends Reunion

    A nostalgic version for friends who have known each other since childhood.

    Create a nostalgic Friendship Day portrait of old friends reuniting at their childhood school gate, laughing and hugging, warm afternoon light, sepia-tinged nostalgic tones, heartfelt joyful mood, ultra-realistic, 4K, cinematic lighting.

    The school gate is the storytelling detail. It places the friendship in time and gives the reunion its meaning. Warm afternoon light and a slight sepia tone add the nostalgia without making the photo look old. The hug is the payoff, so keep it central and unhurried.

    Festival Friends

    A colourful version for friends celebrating a festival together.

    Create a colourful Friendship Day portrait of friends celebrating a festival together with coloured powder in the air, laughing, vibrant outfits, bright joyful light, festive energetic mood, ultra-realistic, 4K, cinematic lighting.

    Festival colours give you energy for free, but they must not cover the faces. Keep the powder in the air around the friends, not across their eyes, and let the laughter carry the photo. Vibrant outfits help, but the faces must stay clear and recognisable.

    Long Distance Friendship

    A touching version for friends separated by distance but close at heart.

    Create a touching Friendship Day portrait of two friends on a video call shown side by side, both smiling warmly, one at home and one travelling, warm light on both faces, connected loving mood, ultra-realistic, 4K, cinematic lighting.

    Distance friendships are the reality for many people, and this version honours them. The side-by-side composition shows both faces equally, and the warm light on both keeps the connection feeling close. The smiles must match in warmth, because the connection lives in the mirrored joy.

    How to Customize These Friendship Day Prompts

    Customisation starts with the friendship itself. Every friendship has a character: loud and adventurous, quiet and deep, old and nostalgic, or new and exciting. The prompt must match that character, because a loud prompt on a quiet friendship will feel false, and a quiet prompt on a loud friendship will feel dull. Think of the specific friendship, name its character in one word, and choose the prompt whose mood matches it. That is exactly why the friendship day ai photo editing prompts has become a favourite with so many creators. That is exactly why the friendship day ai photo editing prompts has become a favourite with so many creators.

    Next, control the group size. Two friends need intimacy and closeness; three to five need formation and energy; larger groups need simplicity and space. State the number of friends explicitly, and keep the composition simple as the group grows. A group of six with a busy background will bury half the faces, while the same group against a clean park background will read clearly.

    The setting is the third lever. Parks suit laughter, night rooms suit talks, mountains suit adventure, school gates suit nostalgia, festivals suit colour, and video calls suit distance. The setting tells the friendship’s story, so pick the one that matches your real memories together. A real setting, even described simply, will always beat a generic beautiful background.

    Finally, adjust the friendship details. Friendship bands, matching outfits, shared jokes, and familiar gestures are the small truths that make a friendship photo feel real. Include one specific detail from your actual friendship, and the AI will build the photo around it. Generic friendship photos are forgettable; specific ones are treasured.

    Step-by-Step Guide to Creating the Friendship Day Photo

    Follow these steps in order. Group photos are the hardest edits, because every face must survive, so the checking steps matter most. With a little practice, the friendship day ai photo editing prompts becomes quick and easy to repeat. With a little practice, the friendship day ai photo editing prompts becomes quick and easy to repeat.

    1. Choose the sharpest group photo you have. Pick a photo with all faces in focus, good light on every face, and a simple background. If one face is blurry or dark in the original, the AI will struggle to fix it. A slightly plain sharp group photo beats a beautiful soft one.
    2. Decide the friendship character and the group size. Write down the mood in one word and the number of friends, then pick the matching prompt from this article. The two choices together define the edit, and deciding them first prevents mismatched results.
    3. Open your AI photo editor and upload the full-size photo. Use ChatGPT, Gemini, or any editor that accepts text prompts. Upload the original file, because group photos are viewed large and every face needs its detail preserved.
    4. Paste the prompt exactly and generate the first version. Keep the group, mood, and detail words intact. Trimming them produces a generic group photo instead of a Friendship Day portrait with a specific feeling.
    5. Check every face, one by one. Zoom in on each face in turn: eyes, smile, and identity. All faces must look like the right people and feel natural. If one face fails, note which one before correcting, because a vague correction will change the good faces too.
    6. Refine with one specific correction. If one face changed, ask for “the same photo, keep all faces exactly the same, only change the background”. If the background is busy, ask for “a simpler, cleaner background”. One targeted fix preserves the faces you already like.
    7. Save at full size and share in the right format. Save a square version for the feed, a vertical version for stories, and keep the full-size file for the group chat. Check each crop on your phone, because group crops cut faces at the edges more easily than solo crops.

    Common Mistakes to Avoid

    Starting with a photo where faces are unclear. If faces are small, dark, or blurry in the original, the AI cannot invent them convincingly. Use the sharpest group photo you have, even if the composition is plain. Clarity beats beauty for group edits. The friendship day ai photo editing prompts works best when you keep the setup simple and follow the steps in order. The friendship day ai photo editing prompts works best when you keep the setup simple and follow the steps in order.

    Asking for too many people or too much detail. Ten friends, balloons, confetti, a cake, and a sunset will bury every face. Keep the group to the real friends, the details to two or three, and the background clean. The friendship is the content, not the decorations.

    Letting decorations cover faces. Confetti across eyes, balloons behind heads, and powder over smiles ruin group photos faster than any other mistake. If it happens, regenerate with “keep all faces completely clear, decorations behind the group” added to the prompt.

    Mixing moods in one photo. A laughing group with a solemn background, or a quiet group with a party background, will feel inconsistent. Match the background and light to the group’s mood, and the photo will feel like one real moment.

    Posting without checking every face. AI group edits sometimes soften the edge faces or swap an expression. Check every face before posting, because the one face you skip will be the one your friend notices. Thirty seconds of checking protects the friendship as well as the photo.

    Best Tools for This Edit

    ChatGPT is the easiest option for Friendship Day group photos, because it keeps multiple faces recognisable while adding the celebration details. Its conversational corrections are ideal for group fixes: “keep all faces the same, only change the background” usually works in one step, and it handles follow-up adjustments gracefully. Many beginners start with the friendship day ai photo editing prompts because the results look clean and natural. Many beginners start with the friendship day ai photo editing prompts because the results look clean and natural.

    Gemini is excellent for bright, natural group portraits, because it renders daylight, skin tones, and group compositions very accurately. Its park and outdoor versions look photographic, and faces stay natural across the group. For daytime friendship photos, Gemini’s realism gives it the edge.

    Canva is the best finishing tool for Friendship Day posts. Use it to add a clean Friendship Day caption, the date, or a simple frame for stories. Keep the text minimal and never cover any face. A simple, joyful design honours the friendship better than a busy template.

    Frequently Asked Questions

    Can I use these prompts for a photo with just two friends? Yes, and the late-night talks and long-distance versions are written for pairs. Pairs need intimacy and closeness, so keep the background simple and the faces large. Two friends fill a frame beautifully when the composition is clean. A careful pass with the friendship day ai photo editing prompts can lift an ordinary attempt into something special. A careful pass with the friendship day ai photo editing prompts can lift an ordinary attempt into something special.

    Will the AI keep all my friends’ faces looking the same? Usually yes, when the starting photo is sharp and well lit. Check every face at full zoom, and add “keep all faces and identities exactly the same” if any face drifts. Two or three attempts normally produce a version where everyone looks right. Once you try the friendship day ai photo editing prompts, you can adjust the small details to match your own style. Once you try the friendship day ai photo editing prompts, you can adjust the small details to match your own style.

    What if one friend is missing from the photo? The AI cannot reliably add a missing person to a group photo from a separate portrait, and attempts usually look wrong. It is better to use the photo as it is, or to create a new group image from scratch with all friends described. Honesty about the limitation saves a disappointing result. In short, the friendship day ai photo editing prompts keeps the whole process fast, free and fun. In short, the friendship day ai photo editing prompts keeps the whole process fast, free and fun.

    Can I print Friendship Day photos? Yes, at full size they print beautifully, especially the park and adventure versions. Check every face at full zoom before printing, because print reveals softness that screens hide. The group will treasure a printed copy more than a post. For a reliable finish, save the friendship day ai photo editing prompts and reuse it whenever you need this look. For a reliable finish, save the friendship day ai photo editing prompts and reuse it whenever you need this look.

    How many versions should I generate? Three is a good number for groups. The first shows the general look, the second usually fixes the faces, and the third lets you compare backgrounds. More than five wastes time, because the differences become tiny. Pick the best of three and share it with the group. That simple approach is what makes the friendship day ai photo editing prompts so popular right now. That simple approach is what makes the friendship day ai photo editing prompts so popular right now.

    Final Words

    Friendship day ai photo editing prompts turn a group photo into a celebration of the people who make life better. Keep every face clear, match the mood to the real friendship, and let the laughter lead, and the photo will feel like the friendship itself. Try the different versions for different friends, share each one personally, and let the day be about the people, not the posts. Shared widely by creators, the friendship day ai photo editing prompts keeps delivering consistent results.

    The best Friendship Day photo is the one that makes the whole group smile when they see it together. Friendship day AI photo editing prompts turn a good group photo into a joyful celebration. Keep the laughter real, the light bright, and the friendship at the centre, and the post will make everyone smile. If you want a dependable option, the friendship day ai photo editing prompts is hard to beat for this style.
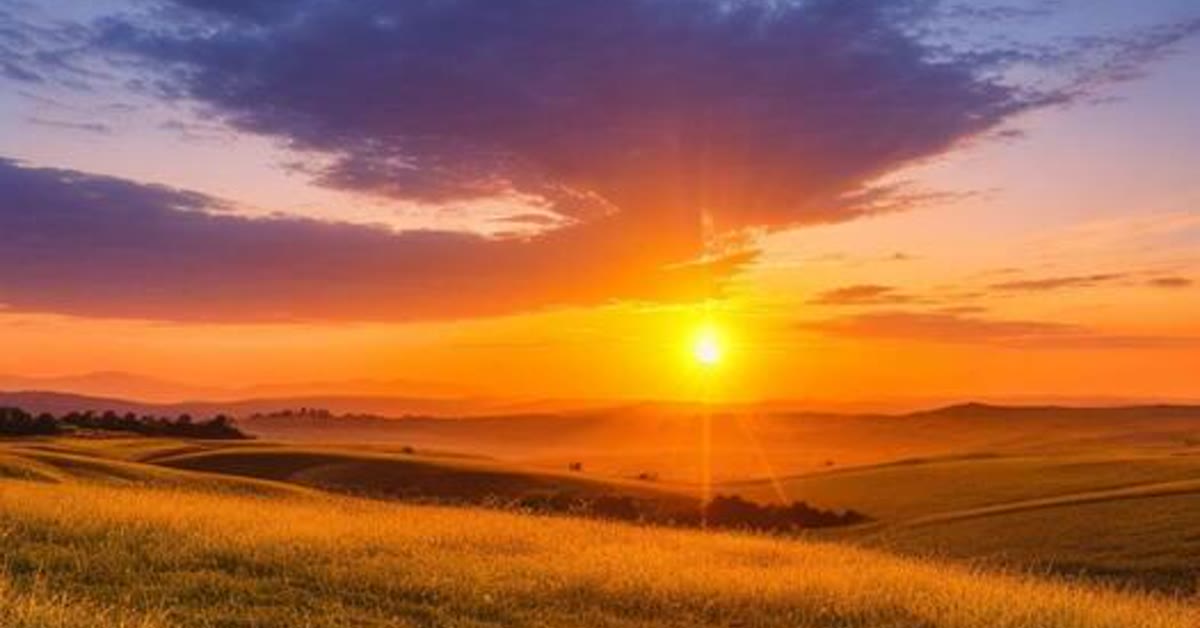
  • Realistic Cinematic Mountain Prompt

    Realistic Cinematic Mountain Prompt

    Mountain ridge portrait made with the realistic cinematic mountain prompt

    Introduction

    The best mountain photos make the person look small and the landscape look endless. This realistic cinematic mountain prompt does exactly that, placing a traveller on a rocky ridge above a sea of clouds with dramatic peaks behind. This is where the realistic cinematic mountain prompt saves you a lot of trial and error.

    The epic scale comes from the composition: a small figure, a huge sky, and layers of mountains fading into the distance. The AI rebuilds the background while keeping the person natural, so a photo taken on a small hill can look like an expedition to the high peaks. Once you understand how the realistic cinematic mountain prompt works, adjusting small details becomes much easier. Done right, the realistic cinematic mountain prompt produces a result that looks planned rather than accidental.

    Traveller standing on a rocky ridge above a sea of clouds

    How to Use This Realistic Cinematic Mountain Prompt

    1. Upload a full-body photo with a simple background and a standing pose. Photos taken outdoors with natural light give the most believable mountain result.
    2. Paste the prompt exactly as written and generate the first version. Check that the person stands naturally on the ridge and that the scale of the peaks feels grand without looking fake.
    3. If the clouds cover the person, generate again and keep the version with the clearest figure. Save it at full size and share it as a travel or adventure post.
    Dramatic mountain peaks with epic scale and cinematic light

    Copy-Paste Prompt

    Create a realistic cinematic mountain portrait of a traveller standing on a rocky ridge above a sea of clouds, dramatic peaks behind, crisp cold air feel, epic scale, adventurous mood, ultra-realistic, 4K, cinematic lighting.

    Pro Tips

    • Wear outdoor clothing in the source photo, because hiking gear makes the mountain scene believable in a way formal wear cannot.
    • Keep the person near the centre of the frame, since a centred figure against huge peaks reads as epic rather than lost.
    • Add a light cool grade after generation if the image feels too warm, because cold tones sell the high-altitude air.
    Adventure photo editing with crisp cold tones and cinematic depth

    More Prompts to Try for Realistic Cinematic Mountain Portraits

    A mountain portrait is a portrait of scale: a small human against an immense world. These original realistic cinematic mountain prompts explore different mountain moods, from dawn summits to stormy ridges, so you can build a travel series that feels epic without repeating the same peak. Keep the traveller small, the mountains huge, and the light dramatic, and every image will feel cinematic.

    Sea of Clouds Summit

    The classic summit image: a traveller above the clouds at dawn.

    Create a realistic cinematic mountain portrait of a traveller standing on a rocky ridge above a sea of clouds, dramatic peaks behind, crisp cold air feel, epic scale, adventurous mood, ultra-realistic, 4K, cinematic lighting.

    The sea of clouds is what creates the epic scale, because it erases the ground and leaves only peaks and sky. The traveller should stand still and small, silhouetted against the light, so the viewer feels the height. Dawn light keeps the clouds soft and the peaks sharp, which is the contrast that makes the image work.

    Storm Ridge Walker

    A dramatic, moody version with weather closing in.

    Create a realistic cinematic mountain portrait of a lone hiker walking a narrow ridge in approaching storm light, dark clouds gathering, wind moving the jacket, dramatic tense mood, epic scale, ultra-realistic, 4K, cinematic lighting.

    Storm light is the most dramatic mountain light, because the dark sky makes the lit ridge glow. The walker should be mid-stride, leaning slightly into the wind, so the image feels like a moment in a journey rather than a pose. Keep the ridge narrow and the drop visible, because danger is part of the epic feeling.

    Alpine Lake Reflection

    A calm, beautiful version with still water doubling the peaks.

    Create a realistic cinematic mountain portrait of a traveller sitting beside a still alpine lake, perfect mountain reflection in the water, soft morning light, peaceful reflective mood, epic calm scale, ultra-realistic, 4K, cinematic lighting.

    Still water doubles the mountains for free, and the sitting pose changes the energy from conquest to contemplation. The reflection must be sharp and complete, or the symmetry breaks. This is the most peaceful version, ideal for reflective captions and morning posts.

    Snow Peak Climber

    A heroic version with ice, snow, and the highest places on earth.

    Create a realistic cinematic mountain portrait of a climber in bright snow gear standing on a snowy peak, ice axe in hand, vast white wilderness behind, crisp bright light, triumphant adventurous mood, ultra-realistic, 4K, cinematic lighting.

    Snow scenes need careful exposure: bright snow can wash out the whole image. Ask for crisp detail in the snow and strong contrast on the climber, so the figure stands out against the white. The ice axe is the storytelling prop, so keep it visible and planted firmly.

    Golden Valley Descent

    A warm, inviting version with a valley glowing below the ridge.

    Create a realistic cinematic mountain portrait of a traveller looking down into a golden valley at sunset, warm light flooding the valley, soft haze, peaceful accomplished mood, epic warm scale, ultra-realistic, 4K, cinematic lighting.

    The valley gives the image its warmth, contrasting with the cold ridge where the traveller stands. The gaze should be downward and outward, toward the valley, because the viewer follows the traveller’s eyes. The haze softens the distance and creates the depth that makes the scale feel real.

    Night Camp Stars

    A quiet, awe-filled version with a tent under the Milky Way.

    Create a realistic cinematic mountain portrait of a traveller beside a glowing tent under a star-filled night sky, Milky Way arching over dark peaks, cool night tones, warm tent light, awe-filled peaceful mood, ultra-realistic, 4K, cinematic lighting.

    Night mountain images need the tent light. The small warm glow against the vast cold sky is the entire story: human warmth inside immense darkness. Keep the stars sharp and the tent glow soft, and the image will feel like a real night in the mountains rather than a fantasy.

    How to Customize This Mountain Prompt

    Customisation starts with the mountain itself. Every great range has a character: the Himalayas are vast and spiritual, the Alps are sharp and elegant, the Rockies are rugged and wild, and the Andes are high and stark. Name the character of the mountains you want, or describe the peaks precisely, such as “jagged snow peaks” or “rolling green ridges”, and the AI will build the right world. A generic “mountains” prompt produces generic peaks; a specific description produces a place.

    Next, control the scale relationship. The traveller must be small against the mountains, or the epic feeling disappears. If the traveller fills the frame, the image becomes a portrait with a mountain background, not a mountain portrait. Ask for a wide shot with the traveller small, and check that the mountains dominate the frame. Scale is the whole point of this genre, so protect it ruthlessly.

    The weather and light are the third lever. Dawn suits summits, storm light suits ridges, morning suits lakes, bright light suits snow, sunset suits valleys, and night suits camps. Match the light to the scene, because a storm-lit lake or a sunny night camp will look inconsistent. Weather is the mood of mountain images, so choose it as deliberately as the location.

    Finally, adjust the traveller’s action. Standing suits summits, walking suits ridges, sitting suits lakes, climbing suits snow, gazing suits valleys, and resting suits camps. The action must match the place, or the image will feel posed rather than lived. One natural action, held still, beats a dramatic pose every time in mountain photography. That balance of speed and quality is what makes the realistic cinematic mountain prompt stand out from generic alternatives. Keep the realistic cinematic mountain prompt saved in your notes so you can reuse it whenever you need it.

    Step-by-Step Guide to Creating the Mountain Portrait

    Follow these steps in order. Mountain portraits fail on scale more than on anything else, so the composition steps matter most. If the first attempt feels slightly off, run the realistic cinematic mountain prompt once more with a different source. Most people end up recommending the realistic cinematic mountain prompt to friends after trying it once.

    1. Choose the mountain character and the traveller’s action. Write down the range’s character, the scene, and the action in one sentence. The three choices together define the image, and deciding them first prevents the generic results that plague mountain prompts.
    2. Decide the scale before generating. State “wide shot, traveller small in the frame, mountains dominating” in your planning, and make sure the prompt carries that instruction. If the traveller comes out large, the epic feeling is lost, and no grading can restore it.
    3. Open your AI photo editor and upload the starting photo. Use ChatGPT, Gemini, or any editor that accepts text prompts. If you are transforming your own photo, upload a full-body shot with a simple background, so the AI has room to build the mountains around you. A tight headshot cannot become a wide mountain portrait.
    4. Paste the prompt exactly and generate the first version. Keep the scale, light, and mood words intact. They are doing structural work, and trimming them produces a portrait with a mountain backdrop rather than a cinematic mountain image.
    5. Check the scale first, then the light, then the face. The mountains must dominate, the traveller must be small, and the light must match the scene. Then check that the face, if visible, looks natural at small size. If the scale is wrong, regenerate with the wide-shot instruction strengthened.
    6. Refine with one composition correction. If the traveller is too large, ask for “the same scene, wider shot, traveller smaller”. If the light is wrong, ask for the correct time of day explicitly. One fix preserves the parts that already work.
    7. Save at full size and test the crop. Save a wide version for the feed and a vertical version for stories, keeping the traveller and the peaks in frame in both. Check on your phone, because mountain scale that looks epic on a laptop can feel cramped on a small screen.

    Common Mistakes to Avoid

    Making the traveller too large. A large traveller turns a mountain portrait into an ordinary portrait. The mountains must dominate the frame, or the epic feeling disappears. Always check the scale first, before the face or the colours. Readers keep coming back to the realistic cinematic mountain prompt because the results stay consistent from one try to the next. For consistent output, pair the realistic cinematic mountain prompt with a clean, high-quality source file.

    Using flat, even light. Mountain images need dramatic light: dawn, storm, sunset, or night. Flat midday light makes even the Himalayas look dull. Name the time of day and the light quality explicitly, and never accept a flat result.

    Ignoring the weather. Clear blue skies over every mountain will make the series monotonous. Vary the weather: clouds, mist, storm, snow, and stars each create a different mountain mood. Weather is the variety in this genre, so use it deliberately.

    Placing the traveller in the centre. Centred travellers feel static and posed. Place the traveller slightly off-centre, on a ridge line or a natural leading line, so the eye travels through the landscape before resting on the figure. Composition rules matter more in mountain images than anywhere else.

    Overdoing the saturation. Oversaturated skies and neon peaks look like fantasy art, not photography. Keep the colours natural and the contrast realistic. The mountains are dramatic enough without artificial colour. The real strength of the realistic cinematic mountain prompt is how little setup it needs before you start.

    Best Tools for This Edit

    Gemini is excellent for realistic cinematic mountain portraits, because it renders scale, atmospheric depth, and natural light very accurately. Its mountain scenes look photographed, with believable haze, cloud, and snow detail. For landscape-heavy portraits, Gemini’s realism gives it the edge. A little patience with the realistic cinematic mountain prompt usually pays off in the final result. The realistic cinematic mountain prompt works best when you generate two or three versions and keep the strongest one.

    ChatGPT is the easiest option for transforming your own photo into a mountain scene. Upload a full-body shot, paste the prompt, and it will place you in the landscape while keeping your identity recognisable. Its follow-up corrections are useful for scale adjustments: “wider shot, smaller figure” usually works in one step.

    Canva is the best finishing tool for mountain portraits. Use it to crop for different formats, add a subtle vignette that deepens the sky, and design a clean caption layout. Keep any text small and away from the peaks, so the landscape stays the hero. When you apply the realistic cinematic mountain prompt carefully, the small details start to look far more polished.

    Frequently Asked Questions

    Can I use a headshot for a mountain portrait? No, not well. Mountain portraits need a full-body or wide shot, because the traveller must be small in a vast landscape. A headshot cannot supply the body and the scale. Use a full-body starting photo, or generate the scene without your photo and add yourself later. The realistic cinematic mountain prompt is also a friendly learning tool if you are new to AI editing.

    Will the mountains look like a real place? Yes, when the description is specific. Name the character of the peaks, the weather, and the light, and the result will feel like a real location. Generic descriptions produce generic mountains that viewers will read as fake. In short, the realistic cinematic mountain prompt does the heavy lifting while you stay in control of the look.

    Can I use these prompts for travel content? Yes, they are ideal for travel series. Post one mountain mood per day across a week, keep the traveller consistent, and the series will read as a journey. Add the real location name in the caption only if the image genuinely resembles it; otherwise keep the caption about the feeling. Plenty of creators treat the realistic cinematic mountain prompt as their default starting point for this style.
    What if the scale keeps coming out wrong? Strengthen the scale words with “very wide shot, traveller tiny in the lower third, mountains filling the frame” and regenerate. If the traveller still dominates, generate the landscape first without a person, then add the figure in a second step. Two-step generation holds scale better. Used well, the realistic cinematic mountain prompt can completely change the feel of the final result.

    How do I avoid the fantasy look? Avoid words like “magical”, “enchanted”, and “epic fantasy”. Keep “realistic”, “photographic”, and “natural light” in every prompt, and keep the palette natural. Realism in mountain images comes from restraint in both words and colours. That is exactly why the realistic cinematic mountain prompt keeps getting shared among creators.

    Final Words

    A realistic cinematic mountain prompt turns a small human figure into a story of scale, weather, and light. Keep the traveller small, the mountains huge, and the light dramatic, and the image will feel like a frame from an expedition film. Try the different moods across the series, from dawn summits to starlit camps, and let the mountains do what they have always done: remind viewers how big the world is, and how brave it feels to stand in it. If you want a reliable starting point, the realistic cinematic mountain prompt is a safe choice.

    This realistic cinematic mountain prompt turns any standing photo into an adventure poster. Keep the figure small, the peaks huge, and the air crisp, and the result will feel truly epic. Use the finished portrait as your phone wallpaper for a week, and every glance at your screen will feel like standing on that ridge above the clouds again. Many beginners get their best first result simply by following the realistic cinematic mountain prompt closely.

  • Classic and Aesthetic Photo Prompts

    Classic and Aesthetic Photo Prompts

    Classic aesthetic portrait made with classic and aesthetic photo prompts

    Introduction

    Trends change every week, but the classic look never ages. Classic and aesthetic photo prompts give a portrait timeless film tones, soft window light, and elegant vintage styling that looks as good years from now as it does today. If you want a reliable starting point, the classic and aesthetic photo prompts is a safe choice.

    This style suits calm, graceful poses and simple outfits. The AI rebuilds the photo with a muted warm palette and an old-master painting feel while keeping the face natural and detailed. It is the right choice when you want a profile photo that feels refined rather than loud. Keep the classic and aesthetic photo prompts saved in your notes so you can reuse it whenever you need it. Many beginners get their best first result simply by following the classic and aesthetic photo prompts closely.

    Classic portrait with timeless film tones and soft window light

    How to Use These Classic and Aesthetic Photo Prompts

    1. Choose a photo with a calm expression and a simple background. A portrait taken near a window gives the most natural soft light for this style.
    2. Paste the prompt exactly as written and generate the first version. Check that the vintage styling looks elegant and that the face keeps its natural features and skin texture.
    3. If the colours look too faded, generate again and pick the version with the warmest balanced tones. Save it at full size and use it as a profile photo or a framed print.
    Elegant vintage styling with muted warm palette and graceful pose

    Copy-Paste Prompt

    Transform this photo into a classic aesthetic portrait with timeless film tones, soft window light, elegant vintage styling, calm graceful pose, muted warm palette, old-master painting feel, ultra-realistic, 4K, cinematic lighting.

    Pro Tips

    • Wear solid, muted colours in the source photo, because loud patterns fight against the calm classic palette.
    • Keep the pose still and graceful with relaxed shoulders, since the timeless mood depends on composure more than expression.
    • Print or post the final image at high resolution, because the film tones and soft light deserve clean detail.
    Aesthetic photo editing with old-master painting feel and soft light

    More Prompts to Try for Classic and Aesthetic Portraits

    Classic aesthetic is timelessness: film tones, soft window light, and graceful calm. These original classic and aesthetic photo prompts explore that timelessness in different settings, so you can build a portfolio of portraits that look like they could belong to any decade. Keep the palette muted and warm, the poses calm, and the light soft, and every image will feel like a painting.

    Window Light Elegance

    A quiet, Vermeer-like portrait lit by a single window.

    Transform this photo into a classic aesthetic portrait with soft window light falling across the face, elegant vintage styling, calm graceful pose, muted warm palette, old-master painting feel, ultra-realistic, 4K, cinematic lighting.

    Window light is the defining element of classic portraiture. It should fall from one side, creating a gentle gradient across the face, with the far side in soft shadow. Keep the pose still and the expression serene, because movement would break the painting illusion. This is the most timeless version in the set.

    Vintage Garden Grace

    An outdoor classic with old-world garden elegance.

    Transform this photo into a classic aesthetic portrait in an old rose garden, soft overcast light, vintage dress, gentle smile, muted greens and creams, timeless romantic mood, ultra-realistic, 4K, cinematic lighting.

    Overcast light is a gift for classic portraits, because it is soft and even without being flat. The garden should feel old and slightly wild, not manicured, because a touch of wildness keeps the image from looking like a studio set. Muted greens and creams hold the palette together.

    Library Scholar Portrait

    A thoughtful, intellectual classic with books and warm lamplight.

    Transform this photo into a classic aesthetic portrait in an old library, warm lamplight, shelves of books in soft-focus background, thoughtful calm expression, vintage academic styling, muted amber tones, ultra-realistic, 4K, cinematic lighting.

    The library version suits thoughtful, serious subjects. The lamplight should be warm and low, pooling on the books and the face, while the background stays soft and dark. The expression should be contemplative, as if interrupted mid-thought. This is the portrait for writers, readers, and thinkers.

    Seaside Timelessness

    A coastal classic with salt air, soft light, and endless horizon.

    Transform this photo into a classic aesthetic portrait on a quiet seaside promenade, soft sea mist, vintage coat, calm distant gaze, muted blue and cream palette, nostalgic peaceful mood, ultra-realistic, 4K, cinematic lighting.

    The sea gives you horizon and mist, two elements that instantly create timelessness. Keep the gaze distant, toward the horizon, because looking at the camera would anchor the image in the present. The muted blue and cream palette keeps the sea from becoming loud or touristic.

    Autumn Study Portrait

    A warm, scholarly classic with falling leaves and amber light.

    Transform this photo into a classic aesthetic portrait in autumn light, golden leaves drifting, warm wool styling, calm reflective pose, muted amber and brown palette, nostalgic academic mood, ultra-realistic, 4K, cinematic lighting.

    Autumn is the classic season, and its palette does half the work. The drifting leaves add gentle motion to a still portrait, and the wool textures add the tactile richness that classic images need. Keep the pose reflective rather than posed, as if the subject is unaware of the camera.

    Candlelit Evening Portrait

    A dramatic, Rembrandt-like classic with deep shadow and warm flame.

    Transform this photo into a classic aesthetic portrait by candlelight, warm flame glow on one side of the face, deep soft shadows, elegant dark styling, serene dignified expression, old-master painting feel, ultra-realistic, 4K, cinematic lighting.

    Candlelight is the most dramatic classic light, and the most demanding. The flame must light one side of the face warmly while the other side falls into soft shadow. If both sides light evenly, the drama disappears. This version suits formal, dignified subjects and evening posts.

    How to Customize These Classic Aesthetic Prompts

    Customisation starts with the era you want to evoke. Classic aesthetic is not one period: it can be Renaissance, Victorian, early photographic, or mid-century film. Each era has its own palette and styling, and mixing them will blur the timelessness. Choose one era, name its cues in the prompt, and hold them consistently. “Old-master painting feel” evokes the Renaissance; “vintage film tones” evokes the mid-century. Pick one phrase and commit to it.

    Next, control the palette ruthlessly. Classic images use muted, warm, limited palettes: creams, ambers, soft greens, dusty blues, and deep browns. Neon, saturated, or clashing colours will destroy the classic feeling instantly, no matter how good the pose is. Name the palette in the prompt, and check that the result holds it. If a bright modern colour appears, correct it before posting, because one anachronism breaks the spell.

    The pose and expression are the third lever. Classic portraits are calm, still, and graceful. Avoid dynamic poses, big grins, or modern gestures like peace signs, because they anchor the image firmly in the present. A calm gaze, a relaxed posture, and a serene or thoughtful expression will carry the timelessness. Stillness is the pose of classic portraiture.

    Finally, consider the texture. Film grain, soft focus, and the suggestion of canvas or paper all add to the classic feeling. A light film grain unifies the image and hides digital perfection, which is the enemy of timelessness. Keep the grain light, because heavy grain looks like damage. The goal is an image that feels like it has existed for decades, not one that has been artificially aged. Most people end up recommending the classic and aesthetic photo prompts to friends after trying it once. The real strength of the classic and aesthetic photo prompts is how little setup it needs before you start.

    Step-by-Step Guide to Creating the Classic Portrait

    Follow these steps in order. Classic portraits reward restraint, and each step here removes something modern rather than adding something new. For consistent output, pair the classic and aesthetic photo prompts with a clean, high-quality source file. When you apply the classic and aesthetic photo prompts carefully, the small details start to look far more polished.

    1. Choose a calm, elegant starting photo. Pick a portrait with a serene or thoughtful expression, good focus on the eyes, and a simple background. The AI will add the classic light and palette, but it cannot invent grace that is not in the pose.
    2. Decide the era, palette, and setting before generating. Write down one era phrase, one palette, and one setting from this article. The three choices together define the image, and deciding them first prevents the mixed-era results that ruin classic edits.
    3. Open your AI photo editor and upload the full-size photo. Use ChatGPT, Gemini, or any editor that accepts text prompts. Upload the original file, because classic edits rely on fine detail in skin, fabric, and light, and compression will soften exactly those textures.
    4. Paste the prompt exactly and generate the first version. Keep the palette, light, and era words intact. They are doing precise work, and trimming them produces a generic warm photo instead of a classic portrait.
    5. Check the palette, the light, and the expression in that order. The palette must be muted and warm, the light must be soft and directional, and the expression must be calm. If any of the three fails, name it in your correction prompt before regenerating.
    6. Refine with one precise correction. If the palette is too bright, ask for “more muted, desaturated warm tones”. If the light is too even, ask for “softer directional light from one side”. One fix at a time preserves the parts that already work.
    7. Save at full size and test the timelessness. View the image small, as a thumbnail, and ask whether it could belong to another decade. If it could, the edit succeeded. If it screams modern phone photo, adjust the palette and grain once more, then save the final version.

    Common Mistakes to Avoid

    Mixing eras. A Renaissance pose with neon sneakers, or a Victorian dress with a modern smartwatch, will break the timelessness instantly. Check the whole frame for anachronisms before posting, including jewellery, glasses, and background objects. One modern detail is enough to anchor the image in the present. The classic and aesthetic photo prompts works best when you generate two or three versions and keep the strongest one. This is where the classic and aesthetic photo prompts saves you a lot of trial and error.

    Oversaturating the palette. Classic means muted. Bright, saturated colours read as modern and digital, no matter how elegant the pose. If the result looks vivid, ask for muted, desaturated tones and generate again. Restraint in colour is the entire classic aesthetic.

    Using a dynamic or silly pose. Peace signs, jumping, laughing hard, and playful gestures all belong to modern casual photography, not classic portraiture. Keep the pose still and the expression serene. The calm is what makes the image feel timeless.

    Overdoing the grain or vignette. A light grain adds age; a heavy grain looks like damage. A soft vignette adds focus; a hard vignette looks like a cheap filter. Keep both subtle, and let the light and palette do the work. Effects should be felt, not seen.

    Forgetting the background. A classic face against a modern background, such as a shopping mall or a car park, will never read as timeless. The background must support the era: a garden, a library, a seaside, or a plain studio wall. If the background fights the era, change the setting, not the face. Used well, the classic and aesthetic photo prompts can completely change the feel of the final result.

    Best Tools for This Edit

    Gemini is excellent for classic aesthetic portraits, because it renders soft directional light, muted palettes, and film-like skin tones very accurately. Its classic edits look photographic and painterly at once, and the light stays consistent across the frame. For timeless portraiture, Gemini’s tonal control gives it the edge. Once you understand how the classic and aesthetic photo prompts works, adjusting small details becomes much easier. Done right, the classic and aesthetic photo prompts produces a result that looks planned rather than accidental.

    ChatGPT is the easiest option for building a matching classic series. Generate the first portrait, then ask for the same person and palette in new settings, and it keeps the styling consistent. Its conversational corrections are useful for palette tuning: “more muted” or “warmer and softer” usually work in one step.

    Canva is the best finishing tool for classic portraits. Use it to add a thin, elegant border, a small serif caption, or a simple frame for printing. Keep the design minimal and period-appropriate, and never cover the face. A restrained presentation completes the timeless feeling. That is exactly why the classic and aesthetic photo prompts keeps getting shared among creators.

    Frequently Asked Questions

    What exactly makes a photo look “classic”? Muted warm palette, soft directional light, calm graceful pose, and a setting that could belong to another era. Remove any one of those and the image becomes merely warm or merely posed. The combination is what creates timelessness. That balance of speed and quality is what makes the classic and aesthetic photo prompts stand out from generic alternatives.

    Can I use a modern outfit in a classic portrait? Yes, if the outfit is simple and elegant. A plain dark dress, a simple shirt, or a tailored coat all work, because simplicity is timeless. Avoid logos, bright patterns, and trendy cuts, because they date the image instantly. If the first attempt feels slightly off, run the classic and aesthetic photo prompts once more with a different source.

    Will classic portraits perform well on social media? Yes, especially as a series. Timeless portraits stand out in feeds full of bright, loud content, and viewers save them for their calm beauty. Post them as a consistent series with matching crops and borders, and the profile will look curated and premium. Readers keep coming back to the classic and aesthetic photo prompts because the results stay consistent from one try to the next.

    Can I print classic portraits? Yes, beautifully. Classic portraits are made for printing, and the muted palette suits paper perfectly. Print at full size on matte paper, which enhances the painterly feeling, and check the palette at full zoom before printing, because prints render warm tones slightly darker. A little patience with the classic and aesthetic photo prompts usually pays off in the final result.

    How do I keep a classic series consistent? Use the same palette family, the same light direction, and the same crop across all portraits. Change only the setting. The shared palette and light will tie the series together even when the locations differ, and the profile will read as one deliberate body of work. The classic and aesthetic photo prompts is also a friendly learning tool if you are new to AI editing.

    Final Words

    Classic and aesthetic photo prompts turn an ordinary portrait into a timeless image, where soft light, muted colour, and calm grace do all the talking. Keep the palette restrained, the light directional, and the pose still, and the portrait will feel like it has always existed. Build a small series across the settings in this article, keep the styling consistent, and let your feed become a gallery. In short, the classic and aesthetic photo prompts does the heavy lifting while you stay in control of the look.

    Timelessness is not an effect; it is a discipline of restraint, and it is worth practising. Classic and aesthetic photo prompts prove that quiet edits age best. Keep the light soft, the palette warm, and the pose graceful, and the portrait will stay beautiful for years. Frame the best version as a print for your wall, because a classic portrait deserves a place in your home just as much as it deserves a place in your feed. Plenty of creators treat the classic and aesthetic photo prompts as their default starting point for this style.
  • Aesthetic Beautiful Eyes Prompt for Girls

    Aesthetic Beautiful Eyes Prompt for Girls

    Close-up aesthetic eyes portrait made with the aesthetic beautiful eyes prompt for girls

    Introduction

    Eyes carry the whole expression in a close-up portrait, and this aesthetic beautiful eyes prompt for girls makes them the star of the frame. Soft kajal, delicate lashes, and a warm catchlight create a dreamy, feminine look that feels natural and elegant. Once you understand how the aesthetic beautiful eyes prompt for girls works, adjusting small details becomes much easier.

    The prompt works best with a photo where the eyes are sharp and well-lit. The AI softens the background into blurred flowers, adds gentle warmth, and keeps the skin and eyes realistic. The result is perfect for a profile photo or a soft aesthetic post. In short, the aesthetic beautiful eyes prompt for girls does the heavy lifting while you stay in control of the look. That balance of speed and quality is what makes the aesthetic beautiful eyes prompt for girls stand out from generic alternatives.

    Close-up of beautiful expressive eyes with soft kajal and lashes

    How to Use This Aesthetic Beautiful Eyes Prompt for Girls

    1. Upload a close-up or half-face photo with the eyes in sharp focus. Natural daylight works best because it gives the eyes a real catchlight to build on.
    2. Paste the prompt exactly as written and generate the first version. Check that the eyes still look like the person and that the kajal and lashes look soft, not heavy.
    3. If the floral background feels too strong, generate again and pick the version with the softest blur. Save it at full size and crop a square for a profile photo if needed.
    Dreamy eyes portrait with warm catchlight and blurred floral background

    Copy-Paste Prompt

    Create a close-up aesthetic portrait of a girl's beautiful expressive eyes with soft kajal, delicate lashes, warm catchlight, gentle freckles, blurred floral background, dreamy feminine mood, ultra-realistic, 4K, cinematic lighting.

    Pro Tips

    • Look slightly away from the camera in the source photo, because a gentle off-camera gaze makes close-up portraits feel more dreamy.
    • Keep makeup light in the original photo so the AI kajal and lashes blend in naturally instead of stacking up.
    • Avoid heavy filters before generation, since a clean natural photo gives the most realistic eyes in the final edit.
    Soft feminine photo editing with gentle tones and natural detail

    More Prompts to Try for Aesthetic Eyes Portraits

    Beautiful eyes are a world of detail: lashes, kajal, catchlight, colour, and expression. These original aesthetic beautiful eyes prompts explore that detail in different lights and moods, so you can build a matching set of close-up portraits. Keep the eyes as the hero in every version, and let everything else stay soft and secondary.

    Golden Hour Eyes

    A warm, glowing close-up with sunlight catching the eyes.

    Create a close-up aesthetic portrait of a girl's beautiful expressive eyes in golden hour light, warm catchlight in each eye, soft kajal, delicate lashes, sun-kissed skin, blurred golden field background, dreamy feminine mood, ultra-realistic, 4K, cinematic lighting.

    Golden hour light makes eyes glow naturally, because the low sun creates a warm catchlight without harsh shadows. The blurred field keeps the image warm and open. This is the most flattering version, and the safest first choice for a new set.

    Monsoon Rain Eyes

    A moody, romantic close-up with raindrops and soft grey light.

    Create a close-up aesthetic portrait of a girl's beautiful eyes with tiny raindrops on the lashes, soft grey monsoon light, gentle kajal, dreamy distant gaze, blurred wet window background, romantic melancholic mood, ultra-realistic, 4K, cinematic lighting.

    Rain on the lashes is a delicate detail that rewards a sharp starting photo. Keep the gaze distant and dreamy, because the mood is longing, not posing. The wet window blur adds depth without competing with the eyes.

    Floral Bokeh Eyes

    A soft, feminine close-up wrapped in flowers and gentle colour.

    Create a close-up aesthetic portrait of a girl's beautiful eyes framed by soft-focus flowers, pastel petals in the foreground, gentle freckles, warm soft light, serene happy expression, dreamy spring mood, ultra-realistic, 4K, cinematic lighting.

    Flowers in the foreground create a natural frame, but they must stay soft. If the flowers sharpen, they steal attention from the eyes. Ask for them blurred explicitly, and keep the petals at the edges of the frame, never across the eyes.

    Kohl Drama Eyes

    A bold, dramatic close-up built on strong kajal and deep contrast.

    Create a dramatic close-up aesthetic portrait of a girl's beautiful eyes with bold kohl, deep dark lashes, sharp catchlight, dark elegant background, intense confident gaze, powerful feminine mood, ultra-realistic, 4K, cinematic lighting.

    Drama needs contrast. The dark background makes the eyes luminous, and the bold kohl gives them definition. Keep the gaze direct and confident, because this version is about power, not softness. One strong catchlight per eye is enough; more will look artificial.

    Morning Dew Eyes

    A fresh, innocent close-up with the clarity of early morning.

    Create a fresh close-up aesthetic portrait of a girl's beautiful eyes in soft morning light, dewy skin, natural lashes, gentle smile in the eyes, blurred green garden background, pure calm mood, ultra-realistic, 4K, cinematic lighting.

    Morning light is the softest light of the day, and it suits the innocent mood perfectly. The “smile in the eyes” is the key phrase: the mouth may be out of frame, but the eyes should smile. This version feels honest and fresh, ideal for natural beauty content.

    Festive Glitter Eyes

    A celebratory close-up with shimmer, glitter, and festive light.

    Create a festive close-up aesthetic portrait of a girl's beautiful eyes with subtle golden glitter on the lids, warm fairy lights bokeh behind, joyful sparkling expression, elegant celebration mood, ultra-realistic, 4K, cinematic lighting.

    Glitter must stay subtle. A little shimmer on the lids catches the light beautifully; a lot looks like costume makeup. Keep the bokeh warm and behind the face, and let the joyful expression carry the celebration. This is the party version of the set.

    How to Customize This Aesthetic Eyes Prompt

    Customisation starts with the eyes themselves. Every eye has a colour, a shape, and an expression, and the prompt should honour them rather than overwrite them. If the eyes are brown, do not ask for blue; if they are deep-set, do not ask for a wide doll look. Describe the eyes you have, and ask the AI to enhance them. Enhancement preserves identity; replacement destroys it.

    Next, control the light, because light is what makes eyes beautiful in a photograph. Golden hour warms them, moonlight cools them, and soft window light flatters them most naturally. Name the light explicitly, and keep it consistent with the background. A golden-hour face against a grey rainy background will look inconsistent, while matching light and background will look real.

    The background is the third lever. Eyes portraits need soft, blurred backgrounds, because anything sharp behind the face competes with the eyes. Flowers, fields, gardens, and fairy lights all work, provided they stay blurred. State “blurred background” in every prompt, and check that the background stays soft in the result. If it sharpens, regenerate with the blur emphasised.

    Finally, adjust the makeup level. Natural, kajal, bold kohl, and glitter are four distinct levels, and each suits a different audience. Natural suits daily content, kajal suits classic beauty, kohl suits drama, and glitter suits festivals. Pick the level that matches the occasion, and do not mix them in one image. One clear makeup story per portrait keeps the set coherent. Plenty of creators treat the aesthetic beautiful eyes prompt for girls as their default starting point for this style. If the first attempt feels slightly off, run the aesthetic beautiful eyes prompt for girls once more with a different source.
    Step-by-Step Guide to Creating the Eyes Portrait

    Follow these steps in order. Close-up portraits are the least forgiving edits, because every flaw is magnified, so the starting photo matters more here than anywhere else. Used well, the aesthetic beautiful eyes prompt for girls can completely change the feel of the final result. Readers keep coming back to the aesthetic beautiful eyes prompt for girls because the results stay consistent from one try to the next.

    1. Choose the sharpest eye photo you have. Pick a close-up or a portrait with the eyes in tack-sharp focus, good light on the iris, and no blur. If the eyes are soft in the original, no prompt can sharpen them convincingly. A slightly plain sharp photo beats a beautiful blurry one.
    2. Decide the mood and makeup level before generating. Golden hour, monsoon, floral, drama, morning, or festive, and natural, kajal, kohl, or glitter. Write the two choices down, then pick the matching prompt from this article.
    3. Open your AI photo editor and upload the full-size photo. Use ChatGPT, Gemini, or any editor that accepts text prompts. Upload the original file, because close-ups reveal compression artifacts instantly, especially in the iris and lashes.
    4. Paste the prompt exactly and generate the first version. Keep the catchlight, kajal, and background-blur words intact. They are doing precise work, and trimming them produces a generic face crop instead of an eyes portrait.
    5. Check the eyes at maximum zoom. Look at the iris detail, the lash edges, the kajal line, and the catchlight in each eye. Both eyes must match in sharpness and colour. If one eye is soft or the colours differ, generate again rather than accepting it.
    6. Refine with one precise correction. If the background sharpened, ask for “the same photo with a softer, more blurred background”. If the kajal is too strong, ask for “softer, more natural kajal”. One precise fix preserves the eyes you already like.
    7. Crop for the intended use and test on your phone. Crop a square for the feed, a vertical for stories, and a tight square for the profile picture, keeping both eyes fully in frame in every crop. Check each crop on your phone, because eyes that look perfect large can look crowded small.

    Common Mistakes to Avoid

    Starting with a blurry eye photo. Blur in the original becomes blur in the edit, magnified by the close crop. No prompt fixes soft eyes. Always start with the sharpest photo you have, even if the composition is plain. That is exactly why the aesthetic beautiful eyes prompt for girls keeps getting shared among creators.

    Overdoing the kajal or glitter. Heavy makeup that does not match the person looks like a mask. Start with the natural or kajal level, and only go bolder if the result still feels plain. Restraint reads as beauty; excess reads as costume.

    Letting the background sharpen. A sharp background competes with the eyes and flattens the portrait. If the background comes out sharp, regenerate with the blur emphasised. The eyes must be the only sharp thing in the frame.

    Mismatched eyes. AI edits sometimes render one eye sharper, larger, or differently coloured than the other. Always compare both eyes at full zoom. If they mismatch, regenerate, because viewers notice asymmetry in eyes faster than anywhere else.

    Covering the eyes with effects. Petals, orbs, glitter, or hair across the eyes ruin the portrait. If an effect covers an eye, regenerate with “keep both eyes completely clear” added to the prompt. The eyes are the entire subject, and nothing may touch them. For consistent output, pair the aesthetic beautiful eyes prompt for girls with a clean, high-quality source file.

    Best Tools for This Edit

    Gemini is excellent for aesthetic eyes portraits, because it renders iris detail, catchlight, and soft skin tones very accurately. Its close-ups look photographic, and the eyes stay sharp and matched. For detail-critical work like this, Gemini’s precision gives it the edge. If you want a reliable starting point, the aesthetic beautiful eyes prompt for girls is a safe choice.

    ChatGPT is the easiest option for building a matching set. Generate the first eyes portrait, then ask for the same eyes in new lights and settings, and it keeps the eye colour and shape consistent. Its conversational corrections are useful for makeup adjustments: “softer kajal” or “warmer light” usually work in one step.

    Canva is the best finishing tool for eyes portraits. Use it to crop precisely, add a soft vignette that draws attention inward, and design a clean story frame. Keep any text small and away from the eyes, or use no text at all. The eyes should be the only thing the viewer remembers. The aesthetic beautiful eyes prompt for girls works best when you generate two or three versions and keep the strongest one.

    Frequently Asked Questions

    Can I use these prompts if I wear glasses? Yes, but choose the golden hour or morning version, and ask for the glasses to be removed or for the eyes to be shown clearly without glare. Glasses create reflections that fight the catchlight, so a version without glasses usually looks better. If you want the glasses kept, ask for “clear lenses, no glare” explicitly. Many beginners get their best first result simply by following the aesthetic beautiful eyes prompt for girls closely.

    Will the AI change my eye colour? It should not, if you do not ask it to. The prompts in this article enhance the natural eyes without naming a colour. If the colour shifts, add “keep the natural eye colour exactly the same” to the prompt and generate again. Never request a colour change unless you genuinely want one. The real strength of the aesthetic beautiful eyes prompt for girls is how little setup it needs before you start.

    Can I use a full-face photo, or does it need to be a close-up? A full-face photo works, because the AI will crop into the eyes. Start with a high-resolution full-face photo so the crop stays sharp. A low-resolution photo cropped tight will soften, so use the largest original you have. When you apply the aesthetic beautiful eyes prompt for girls carefully, the small details start to look far more polished.

    How do I avoid the “doll eye” look? Avoid prompts that ask for oversized eyes, heavy lashes, or porcelain skin. The prompts here use natural proportions and realistic detail words. If the result still looks doll-like, add “natural proportions, realistic skin texture” and generate again. This is where the aesthetic beautiful eyes prompt for girls saves you a lot of trial and error.

    Can I post eyes portraits as a series? Yes, and series perform well, because viewers compare the lights and moods. Post one version per day in the same week, keep the crop consistent, and the series will feel like a curated beauty editorial rather than random edits. Done right, the aesthetic beautiful eyes prompt for girls produces a result that looks planned rather than accidental.

    Final Words

    An aesthetic beautiful eyes prompt turns a close-up into a portrait of feeling, where light, lashes, and a single catchlight say everything. Keep the eyes sharp, the background soft, and the makeup honest, and the beauty will look real rather than constructed. Try the different lights across the week, keep the eyes consistent, and let your set tell the story of how much a gaze can hold. Keep the aesthetic beautiful eyes prompt for girls saved in your notes so you can reuse it whenever you need it.

    The best eyes portrait is the one where the viewer forgets the edit and simply feels seen. This aesthetic beautiful eyes prompt for girls turns a simple close-up into a soft, dreamy portrait. Keep the eyes natural, the light warm, and the background gentle, and the photo will speak for itself. Try the same close-up style for a second photo on a different day, and you will build a small collection of soft portraits that all feel calm, elegant, and personal. Most people end up recommending the aesthetic beautiful eyes prompt for girls to friends after trying it once.

  • Black White Gangster Prompt Bullet Scorpio

    Black White Gangster Prompt Bullet Scorpio

    Black and white gangster portrait made with the black white gangster prompt Bullet Scorpio edit

    Introduction

    The black and white gangster look never goes out of style, and this black white gangster prompt Bullet Scorpio edit brings it to any photo. A Royal Enfield Bullet, a Scorpio SUV, a leather jacket, and dark sunglasses create a fearless attitude portrait in pure monochrome. This is where the black white gangster prompt bullet scorpio saves you a lot of trial and error.

    The power of this style comes from contrast. Deep blacks, bright highlights, and drifting smoke make the subject look like a character from a crime film. It works best with a confident pose and a plain background that the AI can rebuild as a gritty street scene. Once you understand how the black white gangster prompt bullet scorpio works, adjusting small details becomes much easier.

    Gangster portrait beside a Royal Enfield Bullet motorcycle in monochrome

    How to Use This Black White Gangster Prompt Bullet Scorpio Edit

    1. Upload a portrait with a confident, serious expression and dark clothing. Photos taken at chest height with the face clearly visible give the strongest gangster result.
    2. Paste the prompt exactly as written and generate the first version. Check that the Bullet and Scorpio sit naturally beside the person and that the sunglasses fit the face well.
    3. If the vehicles look out of place, generate again with the same prompt. Save the most realistic version at full size and use it as a profile photo or attitude post.
    Man in leather jacket and dark sunglasses beside a Scorpio SUV

    Copy-Paste Prompt

    Transform this photo into a black-and-white gangster portrait beside a Royal Enfield Bullet and a Scorpio SUV, dark sunglasses, leather jacket, smoke drifting, gritty high-contrast monochrome, fearless attitude, ultra-realistic, 4K, cinematic lighting.

    Pro Tips

    • Keep the original photo simple and front-facing, because the AI places vehicles and smoke more naturally around a straight pose.
    • Avoid colourful clothing in the source photo, since bright colours can leak through the monochrome grade and weaken the look.
    • Add a slight vignette after generation to darken the corners and push the gritty film-noir feeling further.
    High-contrast black and white photo editing with smoke and attitude

    More Prompts to Try for Black and White Gangster Photos

    The black-and-white gangster look is an attitude, and the Bullet and Scorpio are its symbols. These original black white gangster prompt variations keep the monochrome grit while changing the scene, so you can build a full attitude series from one portrait. Keep the high contrast and the fearless expression consistent, and every image will feel like part of the same film.

    Bullet Solo Ride

    A lone-rider portrait with the motorcycle as the partner in crime.

    Transform this photo into a black-and-white gangster portrait of a man leaning on a Royal Enfield Bullet on an empty highway, leather jacket, dark sunglasses, smoke drifting, gritty high-contrast monochrome, fearless attitude, ultra-realistic, 4K, cinematic lighting.

    The empty highway gives you space and solitude, which is the whole gangster mood. Keep the bike large in the frame and the rider relaxed against it, because tension would break the cool. The smoke should drift behind, never across the face.

    Scorpio Night Arrival

    A powerful arrival scene with the SUV as the throne.

    Transform this photo into a black-and-white gangster portrait of a man stepping out of a black Scorpio SUV at night, streetlight cutting through darkness, tailored dark outfit, confident stride, smoke in the air, gritty high-contrast monochrome, ultra-realistic, 4K, cinematic lighting.

    Night arrivals need one strong light source. The streetlight creates the contrast that monochrome needs, cutting the figure out of the dark. Keep the stride mid-step, because movement frozen at the right instant looks more powerful than a posed stand.

    Alley Standoff

    A tense, cinematic confrontation scene with the city closing in.

    Transform this photo into a black-and-white gangster portrait of a man standing in a narrow alley facing the camera, brick walls on both sides, single overhead light, hands in pockets, fearless direct stare, gritty high-contrast monochrome, ultra-realistic, 4K, cinematic lighting.

    The alley walls frame the figure like a stage, and the single light creates the classic noir look. The direct stare is essential here; looking away would waste the composition. Keep the hands in the pockets for relaxed menace, because stillness reads as control.

    Desert Highway Convoy

    A wide, epic version with both machines and open road.

    Transform this photo into a black-and-white gangster wide shot of a man standing between a Royal Enfield Bullet and a Scorpio on a desert highway, dust in the air, huge empty sky, long coat moving, epic lonely mood, gritty high-contrast monochrome, ultra-realistic, 4K, cinematic lighting.

    Wide shots need the figure small and the landscape huge. The emptiness is the point, so do not crop close. The dust adds texture and movement, and the two machines frame the man like loyal lieutenants. This is the wallpaper version of the series.

    Rainy Window Gangster

    A quiet, thoughtful version behind glass, full of unspoken story.

    Transform this photo into a black-and-white gangster portrait of a man seen through a rain-streaked window, smoke curling, city lights blurred behind, pensive fearless expression, deep shadows, gritty high-contrast monochrome, ultra-realistic, 4K, cinematic lighting.

    The window adds a layer between the viewer and the subject, which creates mystery. Keep the face sharp through the glass and the rain soft, so the viewer feels like they are glimpsing something private. This version suits profile pictures for its intimacy.

    Old Fort Power

    A historic, king-like version with stone walls and timeless attitude.

    Transform this photo into a black-and-white gangster portrait of a man standing before an old stone fort gate, arms crossed, Scorpio parked behind, dramatic sky, powerful timeless mood, gritty high-contrast monochrome, ultra-realistic, 4K, cinematic lighting.

    The fort gives the attitude history and weight. Stone and steel together say permanence, which suits the gangster myth perfectly. Keep the arms crossed and the stance wide, because the pose must match the monument behind it.

    How to Customize This Gangster Prompt

    Customisation starts with the machine. The Bullet says lone wolf; the Scorpio says power and convoy; both together say empire. Choose the machine that matches the story you want to tell, and describe it clearly. A vague “bike” will produce a random motorcycle, while “Royal Enfield Bullet” gives you the exact silhouette that fans recognise instantly. Done right, the black white gangster prompt bullet scorpio produces a result that looks planned rather than accidental.

    Next, control the contrast. Black-and-white lives on contrast: deep blacks, bright whites, and very little grey in between. If the result looks flat and grey, strengthen the contrast words with “gritty high-contrast monochrome, deep shadows, bright highlights”. If it looks too harsh, soften with “soft film grain, balanced grey tones”. The contrast is the whole style, so tune it deliberately. Keep the black white gangster prompt bullet scorpio saved in your notes so you can reuse it whenever you need it.

    The expression is the third lever. Gangster portraits need fearlessness: a direct stare, a calm mouth, and relaxed shoulders. A smile breaks the mood, and a frown looks like anger rather than control. Ask for “fearless calm expression” explicitly, and generate twice if the first expression is too soft. The attitude must live in the face before the machines and smoke add anything. Most people end up recommending the black white gangster prompt bullet scorpio to friends after trying it once.

    Finally, adjust the setting to your reality. You do not need a fort or a desert to make this work. A clean street, a garage wall, or an empty parking lot all suit the monochrome grade, provided the background is simple and the light is directional. One strong light source and one clean background beat a grand location shot badly. That balance of speed and quality is what makes the black white gangster prompt bullet scorpio stand out from generic alternatives.

    Step-by-Step Guide to Creating the Gangster Portrait

    Follow these steps in order. The monochrome look is unforgiving of weak starting photos, so the first step matters most. If the first attempt feels slightly off, run the black white gangster prompt bullet scorpio once more with a different source.

    1. Choose a confident, sharp starting photo. Pick a portrait with a calm, fearless expression, sharp focus on the eyes, and a simple background. The AI will add the machines and the grade, but it cannot invent confidence that is not in the face.
    2. Decide the machine and the scene before generating. Bullet, Scorpio, or both, and alley, highway, or fort. Write the choice down, pick the matching prompt from this article, and generate with purpose instead of guessing.
    3. Open your AI photo editor and upload the full-size photo. Use ChatGPT, Gemini, or any editor that accepts text prompts. Upload the original file, because monochrome edits show compression artifacts clearly in the smooth grey tones.
    4. Paste the prompt exactly and generate the first version. Keep the monochrome and contrast words intact. They are what create the film-noir look, and trimming them produces a colour photo with a grey filter rather than a true monochrome portrait.
    5. Check the face, the machines, and the contrast. Zoom in on the eyes and expression first, then check that the Bullet or Scorpio looks correct and recognisable. Finally, check that the blacks are deep and the whites are bright. If any of the three fails, note exactly which one before correcting.
    6. Refine with one targeted correction. If the bike looks wrong, ask for “the same photo with a correct Royal Enfield Bullet”. If the contrast is flat, ask for “stronger high-contrast monochrome with deeper shadows”. One fix at a time preserves what already works.
    7. Save at full size and test the crop. Save a square version for the feed and a vertical version for stories. Check the monochrome on your phone, because grey tones that look rich on a laptop can look washed out on a phone screen. Adjust the contrast once if needed, then post.

    Common Mistakes to Avoid

    Starting with a smiling photo. A big smile destroys the gangster mood instantly, and no amount of smoke or grading will save it. Use a calm, neutral photo, and ask for a fearless expression explicitly. The attitude starts in the face. Readers keep coming back to the black white gangster prompt bullet scorpio because the results stay consistent from one try to the next.

    Producing grey mush instead of monochrome. A flat grey image with no deep blacks is not a monochrome portrait; it is a desaturated photo. Strengthen the contrast words and ask for deep shadows. True monochrome needs blacks that are nearly black and whites that are nearly white.

    Getting the machines wrong. A generic bike or a wrong SUV breaks the fantasy for every fan who recognises the Bullet and Scorpio. Name the machines exactly, and check them in the result. If the bike is wrong, correct it before posting, because the machines are half the content.

    Covering the face with smoke. Smoke behind the subject is atmosphere; smoke across the face is a mistake. If the result hides the eyes, regenerate with “smoke behind the subject, face completely clear” added to the prompt.

    Overcrowding the frame. The man, the bike, the SUV, smoke, rain, a crowd, and a city skyline will bury the subject. Pick the man plus one machine plus one atmosphere element. Restraint is what makes monochrome powerful. The real strength of the black white gangster prompt bullet scorpio is how little setup it needs before you start.

    Best Tools for This Edit

    Gemini is excellent for black-and-white gangster portraits, because it renders high-contrast monochrome, wet surfaces, and machine details very accurately. Its noir grades keep detail in the shadows, so faces stay readable, and the Bullet and Scorpio come out recognisable. For monochrome work, Gemini’s tonal accuracy gives it the edge. A little patience with the black white gangster prompt bullet scorpio usually pays off in the final result.

    ChatGPT is the easiest option for building a series. Generate the first portrait, then ask for the same man and grade in new scenes, and it keeps the face and contrast consistent. Its conversational corrections are useful for machine fixes: “same photo, but make the bike a Royal Enfield Bullet” usually works in one step.

    Canva is the best finishing tool for attitude posts. Use it to add one bold line of attitude text, a clean border, or a simple logo for stories. Keep the text minimal and never cover the face or the machines. One strong line in a bold font is more gangster than a paragraph of small text. When you apply the black white gangster prompt bullet scorpio carefully, the small details start to look far more polished.

    Frequently Asked Questions

    Can I use my own bike or car instead of a Bullet or Scorpio? Yes. Replace the machine description with your own vehicle’s make and model, and keep the rest of the prompt the same. The grade and the attitude travel well, and a real personal vehicle makes the portrait feel authentic rather than copied. The black white gangster prompt bullet scorpio is also a friendly learning tool if you are new to AI editing.

    Why does my monochrome look grey and flat? The contrast words were probably too weak, or the starting photo was flatly lit. Strengthen the prompt with “gritty high-contrast monochrome, deep blacks, bright highlights”, and start with a photo that has some directional light. Flat light in means flat grey out, no matter the prompt. In short, the black white gangster prompt bullet scorpio does the heavy lifting while you stay in control of the look.

    Can I use these prompts for a couple or group? Yes, but simplify the scene. Groups need cleaner backgrounds and fewer machines, because every face needs space. Use the highway or fort version for groups, keep one machine, and check every face before sharing. Plenty of creators treat the black white gangster prompt bullet scorpio as their default starting point for this style.
    Is it okay to post gangster-style photos? Yes, as stylised attitude portraits. These are cinematic fashion images, not real gangster content. Keep the captions fun and clearly stylised, avoid any real threats or illegal references, and the posts will read as the fashion statement they are. Used well, the black white gangster prompt bullet scorpio can completely change the feel of the final result.

    What crop works best for this style? Vertical 4:5 for the feed, because it gives the figure and the machine room to breathe. Square crops cut the bike or the car, and stories need vertical. Generate once, then crop the same image twice, and check both on your phone before posting. That is exactly why the black white gangster prompt bullet scorpio keeps getting shared among creators.

    Final Words

    A black white gangster prompt with a Bullet and Scorpio turns an ordinary portrait into a monochrome film still full of attitude. Keep the expression fearless, the contrast deep, and the machines correct, and the noir mood will follow. Build a small series from one starting photo, keep the grade consistent across all of them, and share the sequence as a story. If you want a reliable starting point, the black white gangster prompt bullet scorpio is a safe choice.

    The best gangster portrait is not the darkest one; it is the one where the calm in the eyes says everything. This black white gangster prompt Bullet Scorpio edit turns any confident portrait into a bold monochrome statement. Keep the pose fearless, the contrast high, and the attitude real. Keep the monochrome grade pure and the attitude fearless, and this edit will look like a still from a classic crime film that everyone recognises instantly. Many beginners get their best first result simply by following the black white gangster prompt bullet scorpio closely.

  • Ganesh Chaturthi Prompt for Photos

    Ganesh Chaturthi Prompt for Photos

    Festive Ganesh Chaturthi portrait made with the Ganesh Chaturthi prompt

    Introduction

    Ganesh Chaturthi brings colour, devotion, and celebration into every home, and this Ganesh Chaturthi prompt captures that joy in a single photo. A decorated idol, marigold garlands, and glowing diyas turn a simple portrait into a festive frame. Marigolds, diyas, and warm temple light set the scene for this ganesh chaturthi prompt.

    The prompt works for family photos taken during the festival as well as solo portraits in traditional wear. The warm golden light and joyful mood make the result perfect for sharing wishes with friends and family on the festival day.

    Beautifully decorated Ganesh idol with marigold garlands and diya flames

    How to Use This Ganesh Chaturthi Prompt

    1. Upload a photo taken during the festival or a portrait in traditional wear. A photo with the idol or decorations already in the frame gives the most authentic result. Devotion should feel joyful here, and this ganesh chaturthi prompt keeps the colours festive, never dull.
    2. Paste the prompt exactly as written and generate the first version. Check that the idol looks respectful and detailed and that the diya flames glow naturally.
    3. Save the best version at full size and share it as a festival wish post. Add your own greeting text in the caption rather than on the image to keep the photo clean.
    Devotees in colourful traditional wear celebrating Ganesh Chaturthi

    Copy-Paste Prompt

    Create a festive Ganesh Chaturthi portrait with a beautifully decorated Ganesh idol, marigold garlands, diya flames glowing, devotees in colourful traditional wear, joyful celebration mood, warm golden light, ultra-realistic, 4K, cinematic lighting.

    Pro Tips

    • Wear traditional colours like red, yellow, or orange in the original photo, because they match the marigold and diya tones beautifully. A family photo taken during the aarti gains a golden frame through this ganesh chaturthi prompt.
    • Take the photo near the decoration setup when possible, since real festival details make the AI edit look more genuine.
    • Generate the edit before the festival day so you can share your wishes early in the morning when everyone is posting.
    Warm golden festival photo editing with diya light and joyful colours

    More Prompts to Try for Ganesh Chaturthi Photos

    Ganesh Chaturthi is a festival of devotion, colour, and community, and one photo rarely captures all of it. These original ganesh chaturthi prompts give you different moments from the same celebration: the idol, the homecoming, the prayers, and the farewell. Generate them from your festival photos and build a complete story of the festival. Keep the idol and the face equally respected in the frame when you use this ganesh chaturthi prompt.

    Beautifully Decorated Idol

    A close, reverent portrait of the idol itself, ideal for the first post of the festival.

    Create a festive Ganesh Chaturthi photo of a beautifully decorated Ganesh idol with marigold garlands and diya flames glowing around, rich red and gold decorations, warm temple light, divine joyful atmosphere, ultra-realistic, 4K, cinematic lighting.

    The idol is the heart of the festival, so give it the best light and the cleanest frame. Keep the decorations symmetrical and the diyas in front, because symmetry reads as devotion and care. This is the image families share first, so check the idol’s details at full zoom. Portraits from this ganesh chaturthi prompt tend to become the family’s favourite festival keepsake.

    Homecoming Welcome

    A warm, joyful scene of the idol arriving home, full of family energy.

    Create a joyful Ganesh Chaturthi homecoming photo of a family welcoming a Ganesh idol at the door with flower petals and aarti thali, happy smiling faces, colourful traditional wear, bright warm light, festive celebration mood, ultra-realistic, 4K, cinematic lighting.

    Homecoming photos need genuine smiles and movement. Ask for petals mid-air and the aarti flame glowing, and the photo will feel alive. Keep the idol visible and centred, because it is the guest of honour in the frame.

    Modak Offering

    A sweet, intimate detail shot of the festival’s most beloved tradition. Used well, this ganesh chaturthi prompt can turn an ordinary portrait into a post people stop scrolling for.

    Create a warm Ganesh Chaturthi photo of hands offering modaks to a Ganesh idol, diya flames flickering, marigold petals scattered, soft golden light, devotional and tender mood, ultra-realistic, 4K, cinematic lighting.

    Detail shots like this one add depth to a festival series. The hands and the modaks tell a story of care without needing any faces. Keep the light warm and the focus on the offering, and the image will feel like a blessing.

    Children With the Idol

    A pure, joyful version for children celebrating their first festival.

    Create a cheerful Ganesh Chaturthi photo of happy children in colourful traditional dress gathered around a small Ganesh idol, marigold garlands, bright daylight, innocent joyful smiles, festive family mood, ultra-realistic, 4K, cinematic lighting.

    Children’s festival photos need bright light and simple compositions. Keep the idol at the children’s eye level so they gather around it naturally, and let the smiles carry the photo. Generate two versions and keep the one with the most natural expressions. That is the real strength of this ganesh chaturthi prompt: it does the heavy creative lifting for you.

    Visarjan Farewell

    An emotional, beautiful farewell scene for the last day of the festival.

    Create an emotional Ganesh Chaturthi visarjan photo of devotees carrying a Ganesh idol toward the water at sunset, flower petals in the air, golden evening light, crowds singing, bittersweet farewell mood, ultra-realistic, 4K, cinematic lighting.

    Visarjan is the emotional peak of the festival, and the photo should honour that. The sunset light gives you natural drama, and the petals give you movement. Keep the idol high and visible above the crowd, and end your festival series with this image for a complete story. The beauty of this ganesh chaturthi prompt lies in how little guesswork it leaves behind.

    Temple Pandal Grandeur

    A wide, spectacular version showing the scale of a community pandal.

    Create a grand Ganesh Chaturthi photo of a huge decorated pandal with a majestic Ganesh idol, thousands of lights, devotees gathered in devotion, rich colours, evening celebration atmosphere, awe-inspiring mood, ultra-realistic, 4K, cinematic lighting.

    Wide pandal shots need scale. Keep the idol large in the frame and the crowd below it, so the grandeur reads instantly. The lights should glow warmly, and the colours should stay rich without becoming garish. This is the image that shows the festival’s community spirit.

    How to Customize This Ganesh Chaturthi Prompt

    Customisation starts with the moment you want to capture. The festival lasts many days, and each day has its own feeling: arrival, daily prayers, community gatherings, and farewell. Choose the moment first, and the prompt will follow naturally. A homecoming prompt on a visarjan photo, or a farewell mood on an arrival photo, will always feel wrong, no matter how good the edit is. Every detail inside this ganesh chaturthi prompt serves the mood first and the trend second.

    Next, match the decorations to your own celebration. Marigold garlands, red and gold cloth, diya flames, and modaks are common, but every family and pandal has its own style. Name the decorations you actually have, and the AI will reproduce them faithfully. Invented decorations that do not match your real celebration will look false to anyone who was there.
    The lighting is the third lever. Temple light is warm and golden, home light is soft and intimate, and evening visarjan light is dramatic and orange. Match the light words to the real time of day, and the photo will feel authentic. If the light and the moment disagree, the image will feel staged even when it is beautiful.

    Finally, respect the devotional tone. Ganesh Chaturthi photos should feel reverent as well as joyful. Avoid silly effects, distorted faces, or crowded compositions that hide the idol. The idol should always be visible, well lit, and treated with dignity in the frame. Devotion and celebration are not opposites here; the best photos hold both at once. Treat this ganesh chaturthi prompt as a strong starting frame, then bend it around your own story.

    Step-by-Step Guide to Creating the Ganesh Chaturthi Photo

    Follow these steps in order. Festival photos are precious, so take the extra minute to check each step rather than rushing to post.

    1. Choose the best festival photo as your starting point. Pick a photo with the idol or the devotees in sharp focus, good light on the faces, and the decorations clearly visible. A photo taken during the actual celebration carries more emotion than a posed one taken afterwards. The best results with this ganesh chaturthi prompt usually come from restraint, not from extra effects.
    2. Decide which moment of the festival this photo shows. Arrival, daily prayer, community gathering, or farewell each need a different prompt from this article. Match the prompt to the moment, and the edit will deepen the real memory instead of replacing it.
    3. Open your AI photo editor and upload the full-size photo. Use ChatGPT, Gemini, or any editor that accepts text prompts. Upload the original file, because festival photos are often viewed large and printed, and compression will soften the idol’s details.
    4. Paste the prompt exactly and generate the first version. Keep the decoration and lighting words intact on the first try. They are what create the warm, divine atmosphere, and trimming them produces a flat result. A careful pass through this ganesh chaturthi prompt takes minutes, yet it can lift the whole portrait.
    5. Check the idol first, then the people. Zoom in on the idol’s face, crown, and decorations for accuracy, then check the devotees’ faces and expressions. The idol must look dignified and correct; the people must look natural and joyful. If either fails, generate again.
    6. Refine with one specific correction. If the diyas look dim, ask for “brighter diya flames and warmer golden light”. If the garlands look sparse, ask for “fuller marigold garlands”. One targeted fix preserves everything that already works.
    7. Save at full size and share in the right format. Save a square version for the feed, a vertical version for stories, and keep the full-size file for family sharing and printing. Check the photo on your phone before posting, because warm temple colours can look oversaturated on small screens. Notice how one clear emotion runs through this ganesh chaturthi prompt from the first frame to the last.

    Common Mistakes to Avoid

    Hiding the idol behind people or effects. The idol is the centre of the festival and the centre of the photo. If decorations, smoke, or people cover it, the photo loses its meaning. Keep the idol visible, well lit, and above the crowd line in every version.

    Getting the decorations wrong. Random flowers or wrong colours will look false to anyone who knows the festival. Name the real decorations: marigold garlands, diya flames, red and gold cloth. Accuracy matters more here than creativity, because the photo documents a real celebration. That single-emotion focus is the quiet secret behind this ganesh chaturthi prompt.

    Making the light too harsh. Festival light should be warm and golden, not white and clinical. If the result looks cold, add “warm golden temple light” and generate again. The warmth is what makes the photo feel divine rather than documentary.

    Overcrowding the frame. Ten people, three garlands, fireworks, and a crowd will bury the idol. Keep the composition simple: the idol, two or three people, and one set of decorations. Simplicity reads as devotion; clutter reads as noise.

    Posting a distorted idol. AI edits sometimes warp the idol’s face or hands. Always zoom in and check the idol carefully before posting. A distorted deity image is disrespectful and will upset viewers, no matter how good the rest of the photo is. If the idol is warped, regenerate until it is correct. If a stranger can feel the mood within three seconds, the job of this ganesh chaturthi prompt is done.

    Best Tools for This Edit

    Gemini is excellent for Ganesh Chaturthi photos, because it renders warm temple light, diya flames, and marigold colours very accurately. Its devotional scenes look photographic and respectful, and the idol’s details stay crisp. For festival photos where accuracy and warmth both matter, Gemini is the strongest choice.

    ChatGPT is the easiest option for building a festival series. Generate the idol photo first, then ask for the same celebration in new moments, and it keeps the decorations and lighting consistent. Its conversational corrections help with specific fixes, such as brighter diyas or fuller garlands, without starting over.

    Canva is the best finishing tool for festival posts. Use it to add a clean festival greeting, the day number, or a simple border for stories. Keep the text minimal and elegant, and never cover the idol or the devotees’ faces. A simple, respectful design honours the festival better than a busy template. Share the finished portrait while the trend is warm: early posts built on this ganesh chaturthi prompt travel further.

    Frequently Asked Questions

    Can I use these prompts with a photo of my home idol? Yes, and that is the best use. Home idols carry personal devotion, and the prompts enhance the real celebration rather than inventing one. Use the homecoming and modak offering versions for home photos, and keep the decorations faithful to your own setup.

    Will the AI keep the idol looking correct? Usually yes, when the starting photo is clear and the idol is well lit. Always zoom in and check the idol’s face, crown, and hands before posting. If anything looks distorted, regenerate with the same prompt, because accuracy matters more than speed for devotional images. The settings in this ganesh chaturthi prompt are a guide, not a cage, so adjust them to your own photo.

    Can I use these prompts for visarjan photos? Yes. The visarjan version in this article is written for that moment, with sunset light and petals. Keep the idol visible above the crowd, and end your series with the farewell image so the festival story feels complete.

    Is it respectful to AI-edit festival photos? Yes, when the edit honours the festival and the idol is treated with dignity. These prompts enhance real celebration photos. Avoid silly effects, distorted deities, or any edit that mocks the festival, and the result will be a respectful tribute.

    Can I print Ganesh Chaturthi photos? Yes, at full size they print beautifully. The warm colours and golden light suit printing well. Check the idol’s details at full zoom before printing, and brighten very slightly, because prints render warm tones a touch darker than screens. What makes this ganesh chaturthi prompt shareable is the small pause it creates mid-scroll.

    Final Words

    A ganesh chaturthi prompt turns a festival photo into a lasting memory of devotion and joy. Keep the idol visible and correct, the light warm, and the decorations faithful to your own celebration, and the photo will honour the festival properly. Build the full story across the festival, from homecoming to farewell, and share it with the devotion it deserves. Ganpati Bappa’s blessings belong in the photo, and a careful edit helps them shine through.

    This Ganesh Chaturthi prompt turns a festival photo into a warm celebration frame. Keep the devotion at the centre, let the colours glow, and share the joy of the festival with everyone. Share the finished portrait with your family group first, because festival wishes feel warmest when they reach the people closest to you before anyone else sees them.