Category: Tutorials

  • How to Create Viral Couple AI Image with Bing Image Creator

    How to Create Viral Couple AI Image with Bing Image Creator

    How to create viral couple AI image with Bing Image Creator romantic couple edit

    Introduction

    Learning how to create viral couple ai image with bing image creator is the easiest way to make a romantic portrait that stands out online. Bing Image Creator is free, fast, and simple, and couple themes work beautifully because outfits, settings, and moods give the AI rich detail to work with. One detailed prompt can produce an image that looks like a professional couple shoot. That popularity is exactly why so many creators search for how to create viral couple ai image with bing image creator.

    The key is writing a prompt that reads like a scene description. Name the outfits, the setting, the lighting, and the mood, and the AI will build a coherent portrait instead of a random image. Vague prompts produce generic results, while detailed prompts produce portraits that feel personal and worth sharing. A viral couple portrait starts with a detailed prompt that names the outfits, the setting, and the mood in clear, simple words. Candid poses, such as walking or laughing together, often look more natural than stiff studio poses, and soft light helps both faces stay clear. Try a few variations, and pick the one where the couple looks relaxed and happy.
    Writing a detailed couple prompt in Bing Image Creator with outfits and setting

    Quick Tutorial

    1. Open Bing Image Creator in your browser and sign in with a free Microsoft account to get your daily credits.
    2. Write a detailed couple prompt that names the outfits, the setting, the lighting, and the mood you want, such as a sunset beach in soft golden light.
    3. Generate the variations and compare all four images for natural faces, clean hands, and a believable background.
    4. Choose the most natural-looking result, refine the prompt by changing one detail, and generate again if needed.
    5. Download the image, upscale it if needed for a sharper post, and share it with a heartfelt caption and relevant hashtags.

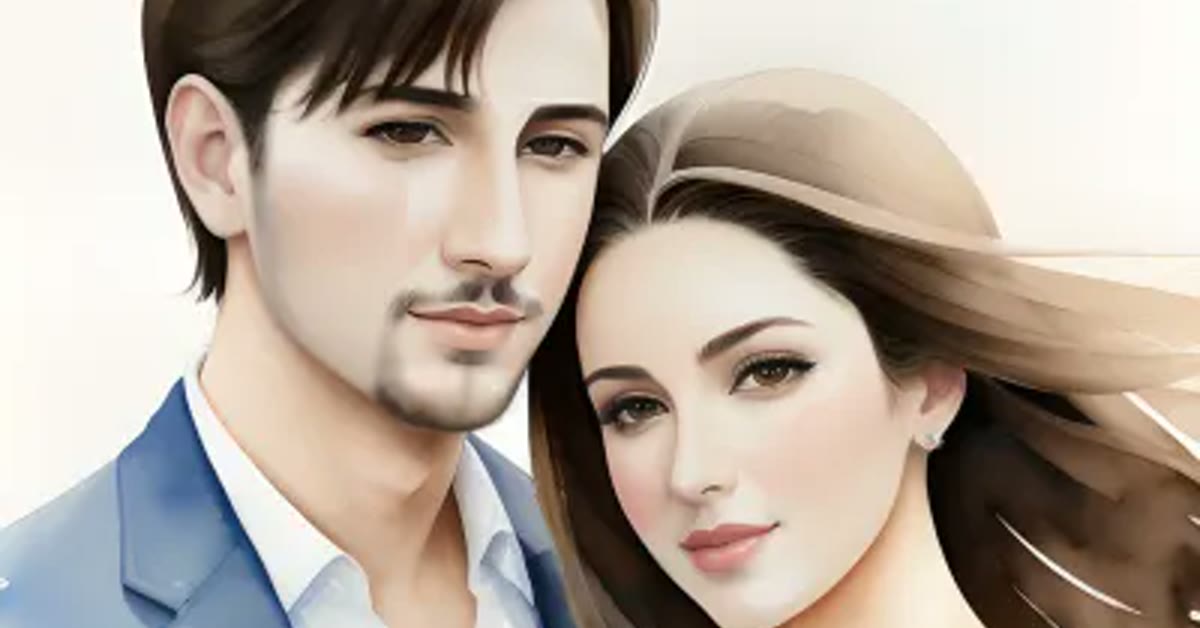
    Romantic couple AI image with natural faces and dreamy lighting from Bing Image Creator

    Pro Tips for How to Create Viral Couple AI Image with Bing Image Creator

    • Ask for candid poses like walking or laughing, since they look more natural than stiff studio poses.
    • Keep the prompt under control by changing one detail at a time between generations.
    • Check hands and faces closely, since AI images sometimes add extra fingers or blur features.

    Sharing a viral couple AI image on social media with a caption and hashtags

    These refinements matter most when you are learning how to create viral couple ai image with bing image creator for the first time.

    More Prompts to Try

    Once you master the basic workflow, these couple prompt variations show how far one detailed formula can travel: beaches, cities, festivals, and quiet moments at home. Each one follows the same recipe — outfits, setting, lighting, mood — so Bing Image Creator can build it cleanly. Every idea below builds on the basics of how to create viral couple ai image with bing image creator, changing only the scene and mood. Rotate through these variations and how to create viral couple ai image with bing image creator will never feel repetitive.

    Sunset Beach Walk

    Use this for the classic romantic portrait everyone recognises instantly.

    Create a romantic couple portrait of a young couple walking hand in hand along a sunset beach, soft waves and golden sky behind, wearing coordinated white and beige outfits. Add candid warmth, gentle wind, and a dreamy seaside mood. Keep faces natural and relaxed, ultra-realistic, sharp 4K detail, cinematic lighting.

    City Lights Evening

    Use this for a modern portrait with neon glow and urban energy.

    Create a romantic couple portrait of a young couple laughing together on a city street at night, neon signs glowing softly, and wet pavement reflections. Add modern style, playful energy, and a vibrant city mood. Keep faces natural and joyful, ultra-realistic, detailed 4K finish, cinematic lighting.

    Mountain Morning

    Use this for a fresh portrait of two travellers at altitude.

    Create a romantic couple portrait of a young couple in warm jackets standing before mountain peaks at sunrise, mist in the valley, and crisp golden light. Add adventure, closeness, and a high-altitude mood. Keep faces natural and bright, ultra-realistic, sharp 4K detail, cinematic lighting.

    Festival Celebration

    Use this for a joyful portrait full of colour and tradition.

    Create a romantic couple portrait of a young couple in festive traditional outfits among marigolds and fairy lights, joyful evening glow, and warm celebration. Add colour, laughter, and a festive togetherness mood. Keep faces natural and glowing, ultra-realistic, detailed 4K finish, cinematic lighting.

    Rainy Day Romance

    Use this for a dreamy portrait under one umbrella in soft rain.

    Create a romantic couple portrait of a young couple sharing one umbrella in gentle rain, city lights blurred behind, and soft glowing reflections. Add tenderness, calm, and a rainy-day romance mood. Keep faces natural and serene, ultra-realistic, crisp 4K detail, cinematic lighting.

    Home Sweet Home

    Use this for a warm, relatable portrait of everyday love.

    Create a romantic couple portrait of a young couple cooking together in a cosy kitchen, flour dust and laughter, warm window light, and a lived-in home. Add comfort, humour, and an everyday-love mood. Keep faces natural and happy, ultra-realistic, detailed 4K finish, cinematic lighting.

    Vintage Fairground

    Use this for a nostalgic portrait with old-world charm.

    Create a romantic couple portrait of a young couple in vintage outfits at a fairground with a carousel, warm evening bulbs, and soft nostalgic light. Add charm, whimsy, and a bygone-era mood. Keep faces natural and delighted, ultra-realistic, sharp 4K detail, cinematic lighting.

    How to Customize This Prompt

    Bing Image Creator rewards prompts that read like a short scene description, and the recipe is always the same: people, outfits, setting, lighting, mood. Start with the two people and their relationship — a young couple, a newlywed pair, two travellers — and describe them in plain words. Then name the outfits, because outfits carry the style of the whole portrait.

    Coordinated colours, such as white and beige on a beach or warm jackets in the mountains, read as a couple with shared taste. Contrasting colours, such as one dark and one bright, create drama but can split the image into two halves. For a first portrait, coordination is safer and more romantic. After learning how to create viral couple ai image with bing image creator, you can restyle the same couple in endless themes.

    The setting is the next ingredient, and one setting per prompt is the rule. A beach, a city street, a mountain viewpoint, a kitchen: each gives the AI a coherent world to build. Mixing two settings, such as a beach plus a mountain, produces an impossible backdrop that distracts from the couple. Choose one setting and support it with two concrete details: waves and golden sky, neon signs and wet pavement, peaks and valley mist. Concrete details make the world feel real, while a long list of details makes it feel crowded. Outfit changes are the quickest experiment to run after how to create viral couple ai image with bing image creator.

    Lighting decides the mood more than any other word. Golden hour light is romantic and forgiving. Soft window light is warm and intimate. Neon light is modern and energetic. Morning light is fresh and hopeful. Name one light and keep it consistent with the setting: neon belongs at night, golden light belongs at sunset, morning light belongs at dawn. When the light and the setting agree, the portrait feels photographed. When they disagree, it feels assembled, and viewers sense the wrongness even if they cannot name it.

    The pose is where candid beats posed. Walking together, laughing together, cooking together, and sharing an umbrella all look natural because they are actions, not poses. Stiff studio poses, such as both people facing the camera with fixed smiles, expose every AI weakness in faces and hands. Ask for an action in the prompt, and the bodies relax, the faces soften, and the portrait comes alive. If a pose must be still, choose a simple one: seated together, leaning close, or standing side by side in easy contact.

    Finally, keep the prompt under control by changing one thing at a time. If the beach version is nearly perfect but the outfits are wrong, change only the outfits. If the light is wrong, change only the lighting words. Single changes teach you what each prompt word does, and they protect what already works. Rewriting the whole prompt for every generation wastes credits and loses the version that was almost right. Saving your settings makes how to create viral couple ai image with bing image creator much faster the next time.

    Step-by-Step Guide

    Step 1: Open Bing Image Creator and sign in. Go to the Bing Image Creator page in your browser and sign in with a free Microsoft account. Signing in gives you daily boosts, which generate images quickly, and a daily set of free generations. Check how many boosts you have before you start, so a long session does not stall halfway through your best idea. This guide breaks down how to create viral couple ai image with bing image creator into simple, repeatable steps.

    Step 2: Gather a reference photo and an idea. If you want the portrait to resemble a real couple, choose a clear photo of them together, well lit, with both faces visible. If you want a purely fictional couple, skip the photo and write the description instead. Either way, write down the idea in one sentence first: the setting, the outfits, and the mood. One sentence keeps the portrait focused.

    Step 3: Write the prompt with the full recipe. Build the prompt in order: the couple, the outfits, the setting, the lighting, the mood, and the quality phrases. Use the variations above as templates, and change the words that matter to your idea. Keep the prompt to a few sentences: long enough to be specific, short enough to stay coherent. Read it once aloud; if it sounds like a scene, it is ready.

    Step 4: Generate the first set of four. Paste the prompt and generate. Bing Image Creator returns four images from one prompt, and the four will differ in faces, hands, and backgrounds. This is the raw material, not the finished portrait. Do not judge the prompt by the worst of the four; judge it by the best. Halfway through how to create viral couple ai image with bing image creator, pause and check the faces before adding effects.

    Step 5: Compare all four with a checklist. Look at each image in the same order every time: faces first, hands second, background third. Faces should be natural, relaxed, and consistent between the couple. Hands should have the right number of fingers and plausible contact. The background should match the setting without impossible objects. Rank the four, and keep the best two for refinement.

    Step 6: Refine one detail at a time. Take the best image’s prompt and change exactly one element: the outfits, the light, the setting detail, or the pose. Generate again and compare with the previous best. Keep the better of the two each round. Three or four rounds of single-change refinement usually produce a portrait far better than the first generation, and the process teaches you your own taste in couple imagery. Detailed prompt wording is the core skill behind how to create viral couple ai image with bing image creator.

    Step 7: Try a second setting for variety. Once one portrait is good, generate the same couple in a different setting using another variation. A beach portrait plus a city portrait gives a couple a matching pair for a profile and a cover, or for an anniversary post and a story. Two portraits in one consistent style look like a professional shoot, and they cost only a few more generations.

    Step 8: Download at full size and check closely. Download the best image at the highest available size, and inspect it at full resolution before sharing. Zoom into the faces and hands, because small previews hide errors that full size reveals. If you need a sharper result for printing or a large post, run it through an upscaler, but check the upscaled version too, since upscaling can invent detail in faces.

    Step 9: Share with a caption that tells the story. Post the portrait with a heartfelt caption and relevant hashtags, and tag the moment it celebrates: an anniversary, a trip, a festival, or simply a Tuesday that felt like love. A couple portrait with a story attached earns far more engagement than the same image posted bare, because the audience responds to the feeling, not just the picture. By the final step, how to create viral couple ai image with bing image creator should feel easy and repeatable.

    Common Mistakes to Avoid

    The first mistake is a vague prompt: “a couple” with no outfits, no setting, and no mood produces a generic image that could be anyone, anywhere. Detail is the difference between a portrait and a stock photo. The second mistake is changing everything between generations, which wastes boosts and never converges on a good image. Change one detail at a time. Most beginners rush how to create viral couple ai image with bing image creator and end up with distorted faces or hands.

    The third mistake is judging by the thumbnail. Small previews hide hand errors, face blurs, and background impossibilities that become obvious at full size. Always inspect the downloaded image closely. The fourth mistake is the stiff studio pose, which exposes every AI weakness. Candid action poses look natural and hide flaws. The fifth mistake is ignoring the background: a beautiful couple in front of a garbled beach or a melting city loses the whole portrait. Check the background with the same care as the faces. Patience is part of how to create viral couple ai image with bing image creator, since the best portrait often appears in round three or four.

    The sixth mistake is over-generating without saving. Bing Image Creator history can be hard to search, and a perfect image lost among dozens of generations is a real frustration. Download the best image from each round immediately, and give it a clear filename with the setting and the date. Avoid these traps and how to create viral couple ai image with bing image creator will give you clean results every time.

    Best Tools for This Edit

    Bing Image Creator itself is the star of this workflow: free, fast, and generous with daily credits, it produces four variations per prompt and handles couple portraits well. Its strengths are speed and simplicity; its limits are a cap on daily boosts and less control than dedicated editors. Use it for the generation stage, and refine within it by iterating prompts rather than editing pixels. The tools below pair well with how to create viral couple ai image with bing image creator for quick finishing touches.

    ChatGPT’s image tools are the natural partner when a couple portrait needs to resemble real people, because they can work from a reference photo. Generate the scene in Bing Image Creator for variety, then rebuild the best version with a reference photo in ChatGPT for likeness. The two tools complement each other: Bing for exploration, ChatGPT for resemblance. Each tool below keeps the workflow behind how to create viral couple ai image with bing image creator quick on both phone and desktop.

    After generation, CapCut is the best finishing tool for social sharing: a vertical crop for reels, a gentle brightness lift, music, and text-free transitions. Keep the finishing light, and never upscale or filter so heavily that the faces change. A couple portrait works through the tenderness it shows, and heavy effects work against it. For printing, a dedicated upscaler preserves detail better than a social editor.

    Frequently Asked Questions

    Is Bing Image Creator really free for couple portraits? Yes. A free Microsoft account gives daily boosts for fast generation and a daily allowance of free images. Boosts regenerate daily, so a steady workflow of a few portraits a day costs nothing. Heavy use beyond the free allowance runs slower, but it still works. The core steps of how to create viral couple ai image with bing image creator stay the same for every theme in this post.

    How many generations should I expect before a good portrait? Plan for three to five rounds of four images each, refining one detail per round. Some prompts land on the first try; two-face portraits usually need more. Saving the best image each round keeps the process productive instead of frustrating. Beginners usually master how to create viral couple ai image with bing image creator within one or two practice rounds.

    Why do hands look wrong in couple portraits? Hands are the hardest detail for AI image tools, and couple portraits show hands prominently: holding hands, touching faces, resting on shoulders. Keep hand contact simple, check every version closely, and generate extra rounds for hand-heavy poses. Simpler contact fails less often. No design skill is needed for how to create viral couple ai image with bing image creator, because the tool renders the scene for you.

    Can I make a couple portrait from a real photo of us? Yes, with the right tool. Bing Image Creator generates fictional couples from text. For a portrait that resembles a real couple, use an image editor that accepts a reference photo, such as ChatGPT’s image tools, and describe the scene with the same recipe: outfits, setting, lighting, mood. You can practise how to create viral couple ai image with bing image creator on both phone and desktop browsers.

    What caption and hashtags work best for a viral couple post? A short, heartfelt line about the moment, plus hashtags that mix the theme and the format: couple goals, anniversary, love, and the setting. Keep hashtags relevant and under a dozen. A caption that tells a real story earns more engagement than a generic romantic quote.

    Can I use a couple AI portrait commercially, for example for a card or a gift? Check the current terms of the tool you used, since commercial rights vary by platform and change over time. For personal sharing and gifts, AI portraits are widely used. For anything sold, verify the licence before you print or publish.

    Creative Ideas to Try

    A matching series is the most rewarding next step: the same couple in four seasons, four cities, or four festivals, shared one per week. The series builds anticipation, and followers return to see the next chapter. Another idea is a “then and now” pair: the couple’s first meeting recreated beside a present-day scene, shared side by side for an anniversary. These variations show new ways to use how to create viral couple ai image with bing image creator beyond the classic portrait.

    Try a story reel: three portraits in sequence, beach, city, and home, set to a favourite song in CapCut, with a one-line caption on each. Reels carry couple portraits further than single posts, because the sequence feels like a film. Or make a printed gift: the best portrait framed, with the prompt’s story written on the back. A framed AI portrait is a modern keepsake, and it surprises people who assume every gift photo must come from a studio. Seasonal themes are a fun extension of how to create viral couple ai image with bing image creator throughout the year.

    Troubleshooting

    When Bing Image Creator returns no images or an error, wait a few minutes and try a shorter prompt; the service occasionally throttles heavy sessions. When faces come out blurred in every version, simplify the prompt: fewer background details, calmer light, and a simpler pose. Busy scenes steal detail from faces. When the couple’s outfits keep changing colour, name the colours twice: once in the outfit description and once in the mood line. Repetition anchors the colour. If a render fails, the fixes below cover the issues that most often interrupt how to create viral couple ai image with bing image creator.

    When hands keep failing, change the pose to one with no hand contact: standing side by side, walking apart, or seated with hands in laps. When the background keeps melting, choose an indoor or simple setting: a kitchen, a window seat, a plain wall with light. Simple backgrounds fail least. When boosts run out, switch to slow generation and keep refining; the quality is the same, only the wait is longer. Most errors in how to create viral couple ai image with bing image creator come from vague prompt wording, so add more scene detail.

    Final Words

    A viral couple image starts with a detailed prompt and a little patience. Create your portrait, share it with love, and watch the reactions roll in. Share your portrait with love, and enjoy the reactions it brings. Learning how to create viral couple ai image with bing image creator gives you a repeatable way to make romantic portraits on demand.

    The recipe is simple and it never changes: outfits, setting, lighting, mood, and one change at a time. Master it with one portrait, then build a series, a reel, and a gift from the same couple and the same care. Bing Image Creator gives you the studio for free. The story is yours, and that is what makes a couple portrait go viral. Now that you know how to create viral couple ai image with bing image creator, try it with your favourite couple photo today.
  • How to Create IPL AI Photo with Bing Image Creator

    How to Create IPL AI Photo with Bing Image Creator

    How to create IPL AI photo with Bing Image Creator showing a cricket stadium edit

    Introduction

    Learning how to create ipl ai photo with bing image creator lets cricket fans build stunning team portraits for free. Bing Image Creator turns a detailed text prompt into images in seconds, and IPL themes work beautifully because team colours, stadiums, and cricket gear give the AI rich visual material. Whether you support Mumbai, Chennai, Kolkata, or any other team, one good prompt is all you need. Share your best results made with how to create ipl ai photo with bing image creator and note which version your audience likes most.

    The secret is detail. A prompt that names your team colours, the stadium setting, and the lighting will beat a vague request every time. Adding words like “photorealistic” and “cinematic lighting” pushes the result toward a professional look, while naming the jersey and the mood keeps the portrait personal and shareable. A clear prompt about team colours and stadium style will help the first images match the look you have in mind. With the right how to create ipl ai photo with bing image creator, even a simple edit can look ready to post.

    Typing an IPL themed prompt into Bing Image Creator with team colours

    Quick Tutorial

    1. Open Bing Image Creator in your browser and sign in with a free Microsoft account to get your daily credits.
    2. Type a detailed IPL-themed prompt that names your team colours, the stadium backdrop, and the style you want, such as photorealistic with cinematic lighting.
    3. Generate the options, compare all four images, and pick the one with the most natural face and the clearest team colours.
    4. Refine the prompt by changing one detail at a time, such as the jersey shade or the time of day, and generate again until the result matches your idea.
    5. Download the best image, add final touches like a crop or brightness fix in your photo editor, and share it with your team hashtag.
    Cricket fan portrait with IPL team colours and stadium lights from Bing Image Creator

    Pro Tips for How to Create IPL AI Photo with Bing Image Creator

    • Name the exact team colours in your prompt, since generic colours often produce a mixed and muddy jersey.
    • Generate during off-peak hours if the tool is slow, because credits and queues move faster then.
    • Save every good version, since the best image is often the second or third variation, not the first.
    Finished IPL AI photo with bright stadium lights ready to share on social media

    That is why so many creators start with how to create ipl ai photo with bing image creator before trying anything fancy. The examples in this guide show how flexible how to create ipl ai photo with bing image creator can be across different styles.

    Before You Start: What You Need

    Creating an IPL AI photo with Bing Image Creator needs very little: a Microsoft account, a clear idea, and a few minutes. Sign in to Bing Image Creator in your browser, and check that you can see the prompt box and your credit balance. You need no design skill, no paid plan, and no software installation. The tool runs in the browser on a phone or a computer, and it returns four images per generation, so you can compare options at once. Used with care, how to create ipl ai photo with bing image creator can lift an ordinary result into something people actually stop to look at.

    Decide your idea before you type anything. An IPL photo works best with one clear concept: you in your team’s jersey, you celebrating a win, or you with your favourite team’s colours at a stadium. Write the idea in one sentence, such as “me in blue jersey colours celebrating under stadium floodlights”. If the idea needs three sentences to explain, it is too complicated for one generation, and the result will be muddled. One idea, one image, one generation.

    Choose a base photo if you want the portrait to feature yourself. Bing Image Creator generates images from text, so it cannot edit your real photo the way a photo editor does. Instead, describe yourself in the prompt: your general appearance, the jersey colours, and the pose. The result will be an AI portrait inspired by your description, not a true photograph of you. Understanding this difference matters, because it sets honest expectations and keeps you from chasing a likeness the tool cannot guarantee.

    Check your credits before a long session. Each generation spends one credit and returns four images, and credits refill daily. Plan a session of ten to fifteen generations around one idea, refining step by step, rather than fifty random attempts. Planned credits produce better images than rushed ones, and the habit of saving favourite prompts beside favourite images makes every future session faster. With practice, working with how to create ipl ai photo with bing image creator becomes easier, and small details you once missed will stand out right away.

    Detailed Step-by-Step Tutorial

    Step 1: Sign in and open Image Creator. Open Bing Image Creator in your browser and sign in with your Microsoft account. Confirm that the prompt box is visible and that your credit balance is shown. If you are on a phone, use the browser rather than a cramped in-app view, because the larger prompt box and gallery make judging images easier. If a result looks off, go back to the basics of how to create ipl ai photo with bing image creator and change just one element at a time.

    Step 2: Write the four-part prompt. A strong prompt has four parts: subject, setting, style, and light. For an IPL photo, the subject is you as a fan or player-style portrait, the setting is the stadium, the style is photorealistic, and the light is floodlights or golden evening. Write it as one or two clear sentences, naming the team colours in plain words. Avoid naming a specific player’s face, because the portrait should feature you, not a copy of a cricketer.

    Step 3: Generate the first batch of four. Press create and wait for the four images. Study all four before judging any one. Note which face, jersey, and stadium look best, and which details went wrong. The first batch is research: it shows what the model understood and what it missed, and it guides every later change.

    Step 4: Pick the best and refine one detail. Choose the strongest image, and change exactly one thing in the prompt for the next generation: the jersey shade, the backdrop, or the lighting. One change per generation isolates cause and effect, so you learn what each word does. Changing everything at once wastes credits and teaches nothing.

    Step 5: Fix the jersey and colours. Team identity lives in the colours, so check them closely. If the jersey is the wrong shade, name the shade more precisely, such as “deep blue” or “bright yellow”, and generate again. If lettering on the jersey comes out garbled, simplify: describe colours and patterns rather than demanding exact words, and prefer versions where the jersey is clean or the lettering is absent.

    Step 6: Fix the face and the pose. If the face looks wrong, simplify the pose and the action. A standing portrait with a raised bat reads better than a complex diving catch, because the model handles simple poses far more reliably. If the face still fails, describe the person more simply: age range, general appearance, and expression, without a long list of features.

    Step 7: Build variations for the match. Once the base portrait works, generate variations for the match moments: pre-match hope, mid-match tension, and post-win celebration. Change only the backdrop and mood words between versions, keeping the person and colours consistent. A set of three matching portraits makes a far stronger post than three unrelated images.

    Step 8: Save, check, and share. Download the best versions at the highest quality, and check them at full size on a larger screen before posting. Phone screens hide flaws that laptops reveal. Add a caption naming the team and the match, and note honestly that the image is AI-generated. A fan portrait shared openly earns far more goodwill than one passed off as a real stadium photo. A quick test on a spare copy first protects your original while you experiment with how to create ipl ai photo with bing image creator.

    Writing Great IPL Prompts: Examples

    These original example prompts show the four-part structure applied to IPL themes. Use them as starting points, change one part at a time, and keep the version that feels most like you. Many readers find that how to create ipl ai photo with bing image creator work best when they start with clean, clear source material.

    Stadium Floodlights Fan

    A passionate cricket fan portrait in blue team jersey colours, arms raised in celebration, a packed stadium under bright floodlights behind, photorealistic sports photography, electric night atmosphere.

    Golden Hour Net Practice

    A determined young cricketer in team training kit practising in the nets at golden hour, dust in the air, focused expression, photorealistic sports photography, warm evening light.

    Trophy Celebration

    A joyful cricket fan holding a shining trophy replica, golden confetti falling, stadium fireworks behind, photorealistic celebration photography, bright festive light.

    Street Cricket Hero

    A cheerful street cricketer in a neighbourhood lane holding a bat, children watching, warm evening sun, photorealistic documentary photography, nostalgic golden light.

    Captain’s Portrait Readers who revisit how to create ipl ai photo with bing image creator after a short break often spot improvements they could not see before.

    A confident cricket captain portrait in team jersey holding a bat over the shoulder, stadium tunnel behind, dramatic rim lighting, photorealistic sports portrait, cinematic mood.

    Troubleshooting Common Problems

    Faces that look wrong are the most common problem, and the fix is usually simplification. Reduce the action, move the subject closer, and describe the person in fewer words. A calm standing portrait succeeds far more often than a leaping action shot, because the model handles still poses reliably and dynamic poses poorly. If faces keep failing, try a different style word, such as “cinematic portrait”, which forgives detail errors better than strict photorealism. Do not rush how to create ipl ai photo with bing image creator, because a slower and more careful pass almost always looks more professional.

    Jersey text garbles easily, because AI models draw lettering as shapes rather than typing it. The fix is to stop demanding exact words on the shirt. Describe the colours, stripes, and patterns, and accept a clean jersey without lettering. A simple jersey with right colours looks professional. A jersey with nonsense words looks broken, and viewers notice it instantly.

    Stadium backgrounds can overwhelm the subject. If the crowd, lights, and fireworks bury the person, simplify the backdrop: a blurred stadium, soft floodlights, and a calm crowd. The fan is the subject, and the stadium is the stage. When the stage outshines the actor, the portrait fails, however impressive the stadium looks.

    Slow generation usually means credits are exhausted and the request is queued. Wait for the refill, or use the slower unboosted generation for experiments. Repeatedly pressing create queues duplicates and helps nothing. If a prompt is refused, reword it toward a safer, more general description, avoiding real people’s names and sensitive content. Most refusals resolve with a simpler prompt that keeps the creative idea. In the end, how to create ipl ai photo with bing image creator reward patience far more than speed, so give each attempt a fair try.

    Team Colours and Identity Without Copying

    Team identity in an IPL portrait comes from colours, not from copied logos or real players. Name the colours precisely: the main jersey colour, the secondary colour, and any distinctive pattern such as stripes or a sash. The AI builds a plausible jersey from that description without needing a real team’s branding, and the result reads as support for the team without infringing anything. The same how to create ipl ai photo with bing image creator can produce very different results depending on the style you choose.

    Avoid asking for real team logos, real player names, or real player faces. Logos garble, names invite refusals, and copying a real player’s likeness raises issues no fan portrait needs. Your own face, your team’s colours, and your own celebration are more than enough. A portrait that is clearly you, clearly supporting your team, is the most shareable version of all, because it is honest and personal.

    If you want a specific team’s feel without its branding, describe the atmosphere instead: the colour of the crowd, the chants, the flags in the stands. Atmosphere words give the image the match-day feeling without any copied element. The crowd’s colour wash behind you says “my team” louder than any logo, and it never garbles. Whenever you feel stuck, reread the notes on how to create ipl ai photo with bing image creator above and try the simplest option first.

    Sharing Your IPL Photo: Captions and Honesty

    A great IPL photo deserves a caption that carries the match. Name the team, the occasion, and the moment: the derby, the final, the comeback win. A caption with the score and the story gets far more engagement than the same image with no words, because fans gather around shared moments, not just shared images. Add a question to invite replies, such as asking followers for their player of the match. Keep a small library of how to create ipl ai photo with bing image creator you trust, and you will finish future edits much faster.

    Honesty about AI matters more in sports than in most subjects, because fans care about what really happened. A short note that the portrait is AI-generated keeps trust intact and avoids confusion with real match photos. Audiences enjoy AI fan art when it is shared openly, and they punish it when it is passed off as real. The note costs nothing and protects everything.

    Post timing matters enormously. Publish before the match to build excitement, or immediately after a big moment while fans are still celebrating. An edit posted a week later misses the moment, however good it is. Save the best versions during the week, and release them when the tournament gives them meaning. That steady approach is what turns how to create ipl ai photo with bing image creator from a one-off trick into a reliable everyday skill.

    Frequently Asked Questions

    Can Bing Image Creator edit my real photo into an IPL portrait? No. Bing Image Creator generates new images from text descriptions; it does not edit an uploaded photo. Describe yourself, the jersey colours, and the stadium scene in the prompt, and the result will be an AI portrait inspired by your description. For editing a real photo, use a photo-editing AI tool instead. Take your time with how to create ipl ai photo with bing image creator and adjust one detail at a time until the result feels natural.

    Why does the jersey text look garbled in my image? AI models draw lettering as shapes rather than typing it, so words on clothing blur and scramble easily. Describe colours and patterns instead of demanding exact words, and prefer versions where the jersey is clean. A simple jersey with correct colours always looks better than one with nonsense text. Most beginners get better results from how to create ipl ai photo with bing image creator when they keep the changes subtle.

    How many credits does one IPL photo cost? Each generation costs one credit and returns four images. Check your current balance in the tool, because credit rules can change. Plan sessions around refining one idea over ten to fifteen generations rather than spending credits on random attempts. Save your favourite how to create ipl ai photo with bing image creator so you can reuse them whenever you need a quick edit.

    Can I use a real cricketer’s name in the prompt? Avoid it. Real people’s names can trigger refusals, and copying a real player’s likeness raises issues. Describe yourself as the fan, name the team colours, and keep the portrait personal. Your own celebration is more shareable than a copy of someone famous. If you keep short notes as you go, how to create ipl ai photo with bing image creator will get easier every single time you use them.

    What if my face looks wrong in every version? Simplify the pose and the description. A calm standing portrait with a simple backdrop succeeds far more often than an action shot. Describe the person in fewer words, move the subject closer in the frame, and try a cinematic style, which forgives detail errors better than strict photorealism. That is the real value of how to create ipl ai photo with bing image creator, steady results you can repeat whenever you need them.

    When should I post my IPL AI photo? Before the match to build excitement, or immediately after a big moment while fans are celebrating. Match-day timing matters more than any other factor for engagement. Save your best versions in advance and release them when the moment arrives.

    Final Words

    IPL season deserves a photo that shows your colours, and Bing Image Creator gives you a free, fast way to make one: open the tool, write a detailed four-part prompt, and create a team portrait worth sharing. Try a few variations, keep the version that feels brightest and most natural, and share it with honesty about the AI behind it. Once you feel comfortable, combine how to create ipl ai photo with bing image creator with your own ideas to build a signature style.

    Start with one clear idea, refine one detail at a time, and let the tournament give your portraits their moments. A fan portrait made with care, posted at the right time, with a caption that carries the match, will be remembered long after the final ball. That is what fan art is for, and Bing Image Creator puts it within everyone’s reach.

  • How to Activate BSNL SIM After Porting – Full Guide

    How to Activate BSNL SIM After Porting – Full Guide

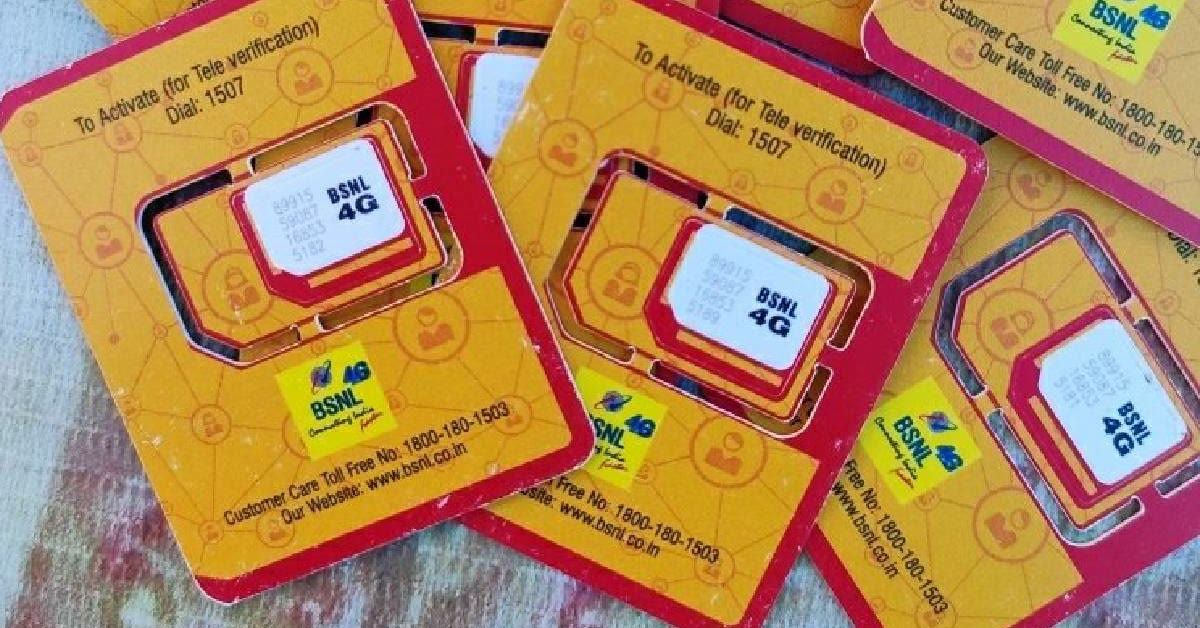
    How to activate BSNL SIM after porting with a new SIM card and mobile phone

    Introduction

    Learning how to activate bsnl sim after porting is essential once your number moves to BSNL from another operator. Porting keeps your old number, but the new BSNL SIM stays inactive until you complete the activation process. The steps are simple, yet many users get stuck because they insert the SIM too early or skip the activation SMS. That is why so many people search for how to activate bsnl sim after porting before they start.

    Activation usually takes a few hours after the porting window, and the process differs slightly for prepaid and postpaid users. Knowing the correct order of steps saves you from long waits and repeated visits to the store. This guide walks you through the full process from inserting the SIM to confirming that calls and data work. Keep the old SIM in place until the switch time arrives, and keep the porting message safe so you can check the details again. Take your time with how to activate bsnl sim after porting and the results will speak for themselves.

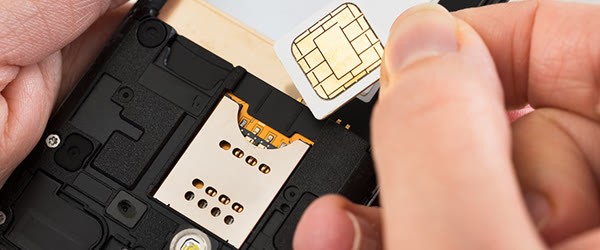
    Inserting a new BSNL SIM card into a mobile phone slot for activation

    Quick Tutorial

    1. Wait for the porting SMS confirmation that tells you the switch time, and do not insert the BSNL SIM before that window begins.
    2. Insert the new BSNL SIM into your phone and wait for the network signal to appear on the screen.
    3. Dial the activation number or send the required SMS exactly as instructed in the message from BSNL or the retailer.
    4. Restart your phone once the signal appears, then test an outgoing call and mobile data to confirm everything works.
    5. If the signal does not appear within a few hours, contact BSNL customer care or visit the store with your porting documents.
    Mobile network signal and activation SMS steps for how to activate BSNL SIM after porting

    Pro Tips for How to Activate BSNL SIM After Porting

    • Keep your old SIM active until the porting time arrives, or you may lose service in between.
    • Note down the UPC code and porting SMS, since customer care may ask for them during activation.
    • Try manual network selection in phone settings if the BSNL network does not appear automatically.
    Customer care support helping with BSNL SIM activation after porting issues

    Before You Start: The Porting Checklist

    Before you learn how to activate bsnl sim after porting in detail, gather everything the process needs so you are not running back to the store later. Keep your porting SMS safe, because it contains the switch time and often the instructions you must follow. Note down your UPC code, the unique porting code you received when you started the port, since customer care may ask for it if anything goes wrong. Keep a valid photo ID and address proof handy, the same documents you used at the retailer, because the store may ask to see them again for verification.

    Check your phone first. Make sure the handset is unlocked or already compatible with BSNL, and that the SIM slot is clean and working. If you are using a dual-SIM phone, decide which slot will hold the BSNL SIM, and remember that mobile data usually works best on the primary slot. Charge the phone well before the switch window, because you may need to restart it more than once and you do not want a dead battery in the middle of activation.

    Keep your old SIM in the phone until the switch time arrives. This is the single most common mistake in porting. Your old number keeps working on the old SIM until the port completes, and inserting the BSNL SIM too early can leave you with no service at all. Wait for the confirmation message that tells you the switch window has begun, and only then swap the SIM cards. If you are unsure whether the window has started, wait a little longer rather than swapping early.

    Step-by-Step Guide to Activate Your BSNL SIM After Porting

    Follow these steps in order, and do not skip ahead. Each step depends on the one before it, and patience between steps is part of the process.

    Step 1: Confirm the porting window. Read the SMS from your old operator or BSNL that confirms the port request and gives the switch date and time. Porting usually completes within a few working days, and the actual switch often happens overnight or early in the morning. Note the date and time, and plan to keep your phone charged and nearby during that window.

    Step 2: Wait for the old SIM to lose signal. When the port completes, your old SIM will stop showing network service. This is normal and it is the sign that the number has moved. Do not panic when the old SIM goes dead. It means the switch has happened, and the new SIM is ready to take over.

    Step 3: Insert the new BSNL SIM. Switch the phone off, remove the old SIM, and insert the new BSNL SIM in the chosen slot. Push the tray in gently and switch the phone on. Give the phone a minute or two to search for the network. The phone may show the BSNL network name, or it may show the signal bars filling in gradually.

    Step 4: Wait for the network signal. In most cases the signal appears within a few minutes. If it takes longer, be patient for at least fifteen to thirty minutes before trying fixes. The network needs time to register the new SIM, and repeated restarts in the first few minutes can slow the process rather than help it.

    Step 5: Complete the activation step. Some BSNL SIMs activate automatically once the network appears. Others need an activation SMS or a call to a number given in the message or by the retailer. Follow the instruction exactly as written, including the exact format of the SMS and the number it must go to. A small typing error in the SMS can delay activation, so read the instruction twice before sending.

    Step 6: Restart the phone. Once the signal appears and any activation step is done, restart the phone. A restart forces the phone to re-register cleanly on the BSNL network and often fixes half-working states where calls work but data does not, or the reverse. After the restart, wait again for the signal to return.

    Step 7: Test calls, SMS, and data. Make an outgoing call to confirm voice service, send a test SMS, and switch on mobile data to load a web page. Test all three, because each can fail independently. If calls work but data does not, the problem is usually the APN setting, covered below. If nothing works, wait a little longer and then move to the troubleshooting section.

    Step 8: Set up mobile data and APN. If data does not work, check the access point name in your phone settings. On Android, this is under Settings, then SIM or Mobile Network, then Access Point Names. On iPhone, it is under Settings, then Mobile Data, then Mobile Data Network. The APN for BSNL is usually set automatically, but if the field is empty or wrong, add a new APN with the details given by BSNL customer care or the retailer. Save it, select it, and restart the phone once more.

    Prepaid and Postpaid Differences

    The activation path is mostly the same for prepaid and postpaid, but a few details differ. Prepaid users usually need to recharge with a plan before or soon after activation, because a ported prepaid SIM may arrive with no active plan or balance. Check whether your first recharge was already done at the store, and if not, recharge with a suitable plan after the signal appears. Without an active plan, data and outgoing calls may stay blocked even though the SIM is active.

    Postpaid users should confirm the billing cycle and plan details with BSNL before or during porting. The first bill may include part-month charges, and the plan you selected at the store is the one that will apply. If anything on the first bill looks wrong, contact customer care promptly with your porting documents and the plan details you were given. Keep every receipt from the store, because billing disputes are much easier with written proof.

    Corporate and family connections may need extra steps. If your number belongs to a company account or a family plan, the account holder may need to approve the port, and activation may take longer. Check with the account holder before starting, and ask the retailer whether any extra document is needed for your connection type.

    Common Problems and How to Fix Them

    No signal after several hours. First, check that the SIM is inserted correctly and the tray is fully closed. Try the SIM in the other slot, or in another phone if possible, to find out whether the problem is the SIM or the handset. If the SIM works in another phone, the issue is your phone settings. If it fails everywhere, contact BSNL customer care with your UPC code and porting SMS. In practice, how to activate bsnl sim after porting is simpler than it first looks.

    Signal appears but calls fail. Try manual network selection. Go to network settings, turn off automatic selection, and choose BSNL from the list. If BSNL does not appear, the port may not have completed yet, and waiting is the right move. If it appears but calls still fail, restart the phone and test again. A little planning around how to activate bsnl sim after porting goes a long way.

    Data not working. Check the APN setting as described above, and make sure mobile data is switched on for the BSNL SIM in a dual-SIM phone. Some phones turn data off for a new SIM by default, or keep data on the old slot. Also confirm that your plan includes data and that the plan is active, since a SIM with no plan shows full signal but no internet. This is exactly where how to activate bsnl sim after porting can help you most.

    Activation SMS not sending. If the activation SMS fails, check that you have signal and that the SMS centre number is correct in your message settings. Try again after a restart. If it still fails, the retailer or customer care can usually complete the activation from their side, so visit the store with your documents rather than repeating the SMS many times. Keep these basics of how to activate bsnl sim after porting in mind and you will avoid most mistakes.

    Porting delayed beyond the expected time. Delays happen, often because of document verification or a mismatch in details. Contact customer care with your UPC code and ask for the status. Do not start a fresh port request while one is pending, because that can complicate the process. In most cases the delay resolves within a day or two once the verification issue is cleared. Done carefully, how to activate bsnl sim after porting saves both time and effort.

    How to Activate BSNL SIM After Porting on Different Phones

    On Android phones, the useful settings are SIM card manager, mobile networks, and access point names. Turn off automatic network selection only when you need to search manually, and turn it back on once the network is found. On iPhones, the key screens are Mobile Data and Network Selection. iPhones usually handle APN automatically, so data problems on iPhone are more often plan-related than settings-related. The key with how to activate bsnl sim after porting is to stay clear and specific.

    On keypad and feature phones, the process is simpler but slower. Insert the SIM, wait for the signal, and follow the SMS instruction using the keypad. Feature phones may take longer to show the network name, so give them extra time before deciding something is wrong. If the phone shows “Emergency calls only”, the SIM has not registered yet, and waiting or a restart is the right response. Many readers find that how to activate bsnl sim after porting works better than expected.

    For dual-SIM phones, remember that only one SIM usually handles data at a time. Set BSNL as the data SIM in settings if you want internet on the ported number. Also check that the SIM is not disabled in the SIM manager, since some phones disable a slot by default when a new SIM is inserted. Once you understand how to activate bsnl sim after porting, the rest becomes much easier.

    Frequently Asked Questions

    How long does BSNL SIM activation take after porting? Activation usually completes within a few hours of the switch window, though it can take longer in some cases. If the signal has not appeared after six to eight hours, check the SIM and settings, then contact customer care with your UPC code. Delays beyond a day usually need store or customer care help. That small extra effort with how to activate bsnl sim after porting pays off in the final result.

    Should I insert the BSNL SIM before the porting SMS arrives? No. Keep the old SIM in place until the switch time confirmed in the message. Inserting the new SIM too early is the most common cause of confusion, because neither SIM works properly during the gap. Wait for the signal loss on the old SIM or the confirmation message, then swap. Start with the basics of how to activate bsnl sim after porting, then build from there.

    What is the UPC code, and why does it matter? The UPC, or Unique Porting Code, is the code you received when you requested the port by SMS. It proves that the port request is genuine and links your number to the request. Keep it safe until activation is complete, because customer care may ask for it to check the status or fix a problem. That is why so many people search for how to activate bsnl sim after porting before they start.

    Why is there no signal after inserting the BSNL SIM? The usual reasons are that the port has not completed yet, the SIM is not seated correctly, or the phone has not registered on the network. Wait thirty minutes, check the SIM seating, try the other slot, and restart the phone. If it still fails, test the SIM in another phone to narrow down the cause. Take your time with how to activate bsnl sim after porting and the results will speak for themselves.

    Why does data not work even though calls work? This is almost always an APN or plan issue. Check the APN setting, confirm mobile data is on for the BSNL SIM, and check that your plan includes data and is active. A restart after fixing the APN usually brings data back. In practice, how to activate bsnl sim after porting is simpler than it first looks.

    Who do I contact if activation fails completely? Start with BSNL customer care, keeping your UPC code and porting SMS ready. If they cannot resolve it, visit the BSNL store or the retailer where you submitted the port request, carrying your ID proof and the porting documents. Avoid paying anyone extra for activation, since the process itself does not need a paid agent. A little planning around how to activate bsnl sim after porting goes a long way.

    Final Words

    Learning how to activate bsnl sim after porting is mostly about timing and patience. Wait for the switch window, insert the SIM at the right moment, complete the activation step exactly as instructed, and test calls, SMS, and data before you rely on the connection. Most problems come from swapping the SIM too early or skipping the restart, and both are easy to avoid once you know the order. This is exactly where how to activate bsnl sim after porting can help you most.

    If your activation is stuck, work through the checks in this guide one by one: SIM seating, network selection, APN, plan status, and then customer care with your UPC code in hand. Keep your documents safe until everything works, and keep the old SIM until the new one is fully active. Follow the order step by step, stay calm during the waiting period, and your ported BSNL connection should be up and running without a second visit to the store.

  • BS Win Registration – How to Sign Up Step by Step

    BS Win Registration – How to Sign Up Step by Step

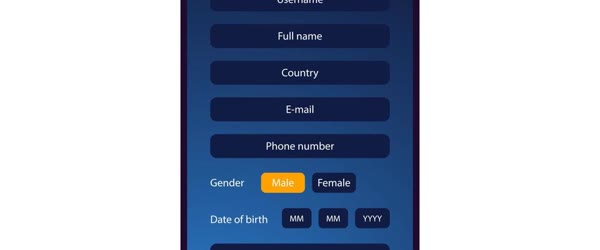
    BS Win how to register guide with a sign-up form on a phone screen

    Introduction

    Signing up for a new app should take minutes, not guesswork. This bs win how to register guide walks through the official sign-up flow in plain steps: entering your mobile number, verifying the OTP, setting a secure password, and completing your profile. Follow it in order and you will reach the dashboard without errors or repeated attempts. You can also read more background on Mobile game to understand the wider context. For most users, bs win how to register is the easiest way to get a polished result without extra effort.

    Registration problems usually come from small mistakes, such as a mistyped number, an expired OTP, or a weak password the system rejects. Knowing each step before you start removes that friction, and the tips below cover the fixes for the most common sign-up failures. Used the right way, bs win how to register can make the whole process faster and much more enjoyable. The real strength of bs win how to register is how simple it makes an otherwise complicated task.

    Entering a mobile number on the BS Win registration page for bs win how to register

    Quick Tutorial – BS Win How to Register

    1. Open the official BS Win registration page and enter your mobile number.
    2. Verify the OTP and set a secure password.
    3. Complete your profile details and log in to explore the dashboard.
    4. If the OTP does not arrive, wait sixty seconds, check your signal, and request a fresh code instead of retrying the old one.
    5. After logging in, save your credentials safely and complete any profile or verification prompts before you start using the app.

    How to Avoid Problems While You Register for BS Win

    1. Use your own active mobile number, since the OTP is the key that unlocks the whole account.
    2. Choose a password with letters, numbers, and a symbol, and avoid reusing a password from another app.
    3. Fill profile details exactly as asked, because mismatched names or numbers can block withdrawals or verification later.
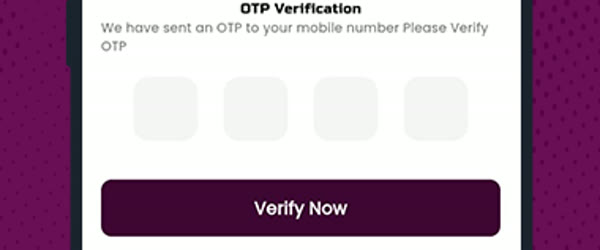
    Verifying an OTP code during bs win how to register sign-up steps

    Pro Tips

    • Register on a stable connection, because a dropped connection during OTP entry is the most common cause of failed sign-ups.
    • Never share your OTP or password with anyone, since support teams will never ask for those details.
    • If the page shows an error, refresh once and re-enter the number carefully rather than tapping submit repeatedly.
    Completed profile dashboard after bs win how to register sign-up

    Before You Register: What to Check First

    A smooth registration starts before you type anything. First, confirm you are on the official BS Win page or app, because lookalike pages are the most common way new users lose accounts before they even start. Check the address carefully, avoid links from random messages or comments, and download the app only from the official source the service itself points to. A few seconds of checking here prevents most registration horror stories.

    Second, prepare what the form will ask for: your own active mobile number, access to that phone for the OTP, and a password you have not used anywhere else. The number must be one you control long-term, because it becomes the recovery route for the account. A borrowed number, a temporary number, or a number you plan to change soon will cause problems later, often at the worst moment, such as during a withdrawal or a security check.

    Third, choose your moment. Register on a stable connection, with a charged phone and a few quiet minutes, rather than on weak public Wi-Fi in a rush. Most failed sign-ups trace back to a dropped connection during OTP entry or a mistyped number entered twice in a hurry. A calm two minutes beats a frantic ten. Many beginners get the best results from bs win how to register once they follow a few simple habits. Used the right way, bs win how to register can make the whole process faster and much more enjoyable. For most users, bs win how to register is the easiest way to get a polished result without extra effort.

    Detailed Walkthrough: Each BS Win Registration Screen Explained

    Registration flows vary slightly between versions, but the screens below cover the pattern this guide describes. Read each one before you start, and the real flow will feel familiar.

    The sign-up screen. This is where you enter your mobile number, usually with the country code already selected. Enter the number slowly, digit by digit, and read it back before tapping submit. One wrong digit sends the OTP to a stranger and locks you into a retry loop, so accuracy here saves the most time.

    The OTP screen. After submitting, a code arrives by SMS, usually within a minute. Enter it exactly as received, watching for the expiry timer. Codes are short-lived by design, so do not let the screen sit while you do something else. If the timer runs out, request a fresh code rather than retrying the old one, since expired codes are a leading cause of “invalid code” errors.

    The password screen. Choose a password with letters, numbers, and a symbol, long enough to be strong and memorable enough that you will not need to reset it tomorrow. Avoid reusing a password from another app, and avoid obvious choices such as birthdays or simple sequences. Type it twice if the form asks, and check both entries match before continuing.

    The profile screen. Fill in the details exactly as asked: name, and any other profile fields the app requires. Mismatched names or numbers can block later steps such as verification or withdrawals, so use your real details and spell them consistently. This is not the place for nicknames or jokes. In practice, bs win how to register works best when you combine it with patience and a clear plan. That is exactly why so many creators keep coming back to bs win how to register for their projects. With a little practice, bs win how to register starts to feel natural even if you are a complete beginner.

    The dashboard. After the profile is complete, the app usually lands on the dashboard with a welcome message or a short tour. Before exploring, save your credentials in a safe place, such as a password manager, and complete any profile or verification prompts the dashboard shows. Finishing setup now prevents interruptions later.

    Common BS Win Registration Problems and How to Fix Them

    OTP never arrives. Wait a full sixty seconds, check your signal and that the number was entered correctly, and confirm your inbox is not filtering the message as spam. Then request a fresh code once. Repeated rapid requests can trigger temporary blocks, so patience beats tapping.

    “Invalid OTP” errors. This usually means the code expired or an old code was entered after a new one was requested. Request a fresh code, enter it promptly, and type it digit by digit rather than pasting from an old message.

    Password rejected. Systems reject passwords that are too short, too simple, or reused patterns. Use a mix of upper and lower case letters, numbers, and a symbol, and make it at least the minimum length the form states. If the form shows a specific rule, follow it literally.

    Page errors or freezing. Refresh once, check your connection, and re-enter the number carefully. If the page keeps failing, try a different browser or the official app, and avoid tapping submit repeatedly, since duplicate submissions can create duplicate requests that confuse the flow. You do not need expensive tools to get value from bs win how to register, only the right approach. If you take a little time to understand bs win how to register, the quality of your final result improves a lot.

    Number already registered. If the system says the number is taken, it may belong to an old account of yours, or it may have been recycled from a previous owner. Use the login or recovery option instead of registering again, and contact official support through the app’s own channels if you cannot recover it.

    Profile details blocked later. If verification or a withdrawal later fails, the cause is often a name or number mismatch entered during registration. Keep your details consistent everywhere, and fix mismatches through official support rather than creating a second account, which usually makes things worse.

    Staying Safe After You Register for BS Win

    Registration is only the beginning of account safety, and the habits you build in the first week decide how secure the account stays. Never share your OTP or password with anyone, for any reason: genuine support teams never ask for those details, and anyone who does is attempting to take over your account. Treat every message asking for a code as a scam, no matter how official it looks.

    Use a password manager or a written note kept somewhere private, and never store the password in a chat, a screenshot gallery, or a shared note. Turn on any extra security the app offers, such as a PIN or biometric lock, and keep the app updated, since updates often carry security fixes. Be cautious with links promising bonuses or free credit that arrive by message: the official app’s own announcements are the only trustworthy source, and unofficial links are a common route to fake login pages.

    Finally, keep your own expectations honest. Registration guides describe how to sign up, not whether an app is a good use of time or money. Explore the dashboard, read the terms that apply to rewards and withdrawals, and decide based on what you actually experience rather than what advertisements promise. The real strength of bs win how to register is how simple it makes an otherwise complicated task. Many beginners get the best results from bs win how to register once they follow a few simple habits.

    Frequently Asked Questions About BS Win Registration

    How long does registration take? A few minutes when everything goes smoothly: number entry, OTP, password, and profile. Delays almost always come from OTP delivery or mistyped details, so a stable connection and careful typing keep it quick.

    Can I register without a mobile number? No, in the flow this guide describes the mobile number is essential, because the OTP sent to it is what verifies the account. Use your own active number, since it also becomes the recovery route if you forget your password.

    What should I do if the OTP expires? Request a fresh code and enter it promptly. Do not keep retrying the old code, and do not request codes rapidly in succession, since that can trigger temporary blocks.

    Is it safe to save my password in the browser? A dedicated password manager is safer than a browser prompt or a plain note, because it encrypts the password and fills it only on the genuine page. Whatever you choose, never share the password, and never store it where others can read it. If you take a little time to understand bs win how to register, the quality of your final result improves a lot. That small extra effort is what separates an average attempt from a great result with bs win how to register. A careful setup at the start helps bs win how to register deliver exactly the result you had in mind.

    What if I forget my password later? Use the official recovery option, which will verify you through your registered mobile number. This is another reason the number you register with must be one you control long-term.

    Can I change my registered number later? Most apps allow it through profile or security settings, sometimes with extra verification. Check the app’s own settings or official support, and complete the change before you lose access to the old number, not after.

    What Happens After Registration: Your First Week on BS Win

    Registration is the doorway, not the destination, and the first week decides whether the account stays smooth or turns frustrating. Start by completing every profile and verification prompt the dashboard shows, because half-finished setup is the most common cause of later blocks. Verification prompts are easiest when your details are fresh in your mind and your phone is beside you, so finish them on day one rather than postponing them until you need a feature that requires them.

    Next, learn the dashboard slowly instead of tapping everything at once. Open each section, read what it does, and note where settings, support, and security options live. Knowing where things are before you need them saves panicked searching later, especially for security settings and support contacts. Change your password only through the official settings if you ever suspect it was seen, and never through a link sent by message.

    During the first week, watch for messages claiming to be support or offering bonuses. Genuine announcements appear inside the official app, while scam messages arrive by SMS, chat apps, and comments, asking for codes or passwords. Treat every unsolicited message asking for credentials as hostile, no matter how official it looks, and report it through the app’s own channels when you can.

    Keep a short note of your registration date, the number you used, and any reference numbers the app gave you, stored privately. That note becomes invaluable if you ever need recovery, because support will ask exactly those details. Once you try bs win how to register on a real project, you will quickly see why it has become so popular. In practice, bs win how to register works best when you combine it with patience and a clear plan.

    Finally, set your own boundaries early. Decide how much time the app deserves, what you will and will not pay for, and what would make you leave. Writing those rules down before the app starts asking for attention keeps the decisions yours. An account that starts calm, verified, and bounded stays useful; one that starts rushed, half-verified, and pressured rarely improves with time.

    Troubleshooting Registration Issues You May Still Hit

    Even careful registrations hit snags, and most have simple fixes. If the app logs you out immediately after signing up, clear the app cache, log in again with the exact registered number, and complete any pending verification prompt before exploring. If profile changes will not save, check your connection, shorten any overly long entries, and try once more rather than tapping save repeatedly. You do not need expensive tools to get value from bs win how to register, only the right approach.

    If a verification step loops, restart the app, confirm the number and details match exactly, and contact official support with screenshots and the time the problem occurred. Support can only help with specifics, so include the screen, the error text, and what you did just before it appeared. If you suspect the number you registered belongs to someone else’s old account, stop and use the official recovery route rather than creating a second account, since duplicate accounts usually complicate recovery instead of solving it. A careful setup at the start helps bs win how to register deliver exactly the result you had in mind.

    Final Words

    Registration is simple when you follow the steps in order. Enter your number, verify the code, set a strong password, and you are ready to explore BS Win. That is exactly why so many creators keep coming back to bs win how to register for their projects. With a little practice, bs win how to register starts to feel natural even if you are a complete beginner. Once you try bs win how to register on a real project, you will quickly see why it has become so popular.

  • How to Create a Ghibli Style Photo With OpenArt AI

    How to Create a Ghibli Style Photo With OpenArt AI

    How to create a ghibli style photo with openart ai using style presets on a photo

    Introduction

    OpenArt AI is a strong choice for Ghibli-style photos because its style presets and strength slider give you real control. Learning how to create a ghibli style photo with openart ai means knowing which preset to pick, how far to push the painterly effect, and when to stop so the face stays recognisable. The workflow is quick, visual, and friendly for first-time users. That is why so many people search for how to create a ghibli style photo with openart ai before they start.

    This tutorial covers the full process in plain steps. You will upload a photo, choose a preset, tune the strength, generate variations, and download the warmest result in high resolution. No prompt-writing skill is needed, because the preset does most of the stylistic work for you. Take your time with how to create a ghibli style photo with openart ai and the results will speak for themselves.

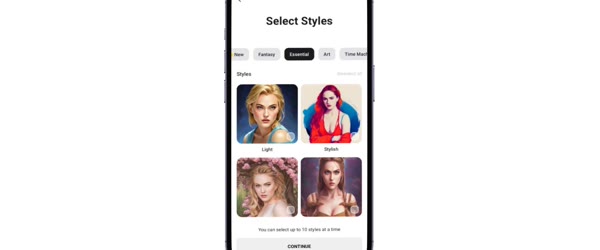
    Choosing a Ghibli-inspired style preset in OpenArt AI for how to create a ghibli style photo with openart ai

    How to Get the Best Result From This Tutorial

    1. Start with a well-lit outdoor photo, because natural light and open backgrounds convert most cleanly into painted scenes.
    2. Keep the strength slider in the middle range on your first try, then move it up or down based on that result.
    3. Generate at least four variations before choosing, since small preset differences change the mood a lot.
    Adjusting the strength slider while learning how to create a ghibli style photo with openart ai

    Quick Tutorial – How to Create a Ghibli Style Photo With OpenArt AI

    1. Open OpenArt AI, upload your photo, and choose a Ghibli-inspired style preset from the style list.
    2. Adjust the strength slider so the face stays recognizable while the scene turns painterly and soft.
    3. Generate variations, pick the warmest result, and download it in high resolution.
    4. If the background looks flat, raise the strength slightly and regenerate, keeping the face setting unchanged.
    5. Compare the final image with your original photo, and keep the version that balances likeness with storybook charm.

    Pro Tips

    • Save your favourite preset and slider setting, so your next Ghibli photo starts from a proven combination.
    • Avoid very dark or blurry starting photos, because the preset cannot recover detail that is not there.
    • Download in the highest resolution offered, since painted textures look much better large than small.
    High-resolution Ghibli-style download from how to create a ghibli style photo with openart ai

    More Ghibli Style Variations to Try in OpenArt AI

    Presets make experimentation cheap, because each preset is a complete style recipe you can apply in one click. The six variations below pair a preset direction with a photo type, so you can test a whole range of Ghibli moods without writing new prompts. Pick the variation that matches your photo’s setting, apply it, and compare the results before settling on a favourite. In practice, how to create a ghibli style photo with openart ai is simpler than it first looks.

    1. Morning Mist Preset on a Landscape A little planning around how to create a ghibli style photo with openart ai goes a long way.

    Apply a soft, misty watercolour preset to a wide landscape photo with hills and sky. The preset’s pale palette and gentle contrast suit open scenery, and the result feels like the opening shot of a quiet film. Keep the strength in the middle range so the hills stay soft without dissolving into fog. This is exactly where how to create a ghibli style photo with openart ai can help you most.

    2. Golden Meadow Preset on a Portrait Keep these basics of how to create a ghibli style photo with openart ai in mind and you will avoid most mistakes.

    Apply a warm, golden-hour preset to a portrait taken in a field or garden. The warm light flatters skin tones while the background turns painterly, and the combination feels romantic and tender. Keep the face setting on the clearer side, and let the preset warm the grass and sky around the subject. Done carefully, how to create a ghibli style photo with openart ai saves both time and effort.

    3. Rainy Window Preset on a Quiet Portrait The key with how to create a ghibli style photo with openart ai is to stay clear and specific.

    Apply a soft blue-grey rainy preset to a thoughtful indoor portrait near a window. The cool palette and gentle light create a cosy, reflective mood, and the window view gives the preset a painted scene to work with. This variation suits portraits that should feel calm rather than cheerful. Many readers find that how to create a ghibli style photo with openart ai works better than expected.

    4. Seaside Preset on a Coastal Photo Once you understand how to create a ghibli style photo with openart ai, the rest becomes much easier.

    Apply a bright, fresh coastal preset to a beach or harbour photo. The preset’s clean blues and whites suit sea and sky, and the result feels like a holiday remembered fondly. Keep the strength moderate so the water stays bright without turning flat. That small extra effort with how to create a ghibli style photo with openart ai pays off in the final result.

    5. Forest Mist Preset on a Woodland Photo Start with the basics of how to create a ghibli style photo with openart ai, then build from there.

    Apply a deep green forest preset to a woodland or hiking photo. The rich greens and filtered light create a magical, mysterious mood, and tall trees give the preset strong shapes to paint. This variation is the most forgiving of busy backgrounds, because the forest style expects layered detail. That is why so many people search for how to create a ghibli style photo with openart ai before they start.

    6. Night Glow Preset on an Evening Photo Take your time with how to create a ghibli style photo with openart ai and the results will speak for themselves.

    Apply a deep blue night preset with warm light accents to an evening photo. The contrast between cool night blue and warm window light creates the storybook night look, and the result suits quiet moments after dark. Keep the strength low enough that the subject stays visible against the dark background. In practice, how to create a ghibli style photo with openart ai is simpler than it first looks.

    How to Customize the Preset and Strength Slider

    Customization in OpenArt AI starts with the preset, and the preset you choose decides the illustration’s personality before you touch anything else. Browse the style list slowly, and look for presets described as watercolour, storybook, hand-painted, or soft illustration, since those directions match the Ghibli feeling. A preset described as comic, neon, or hyper-realistic will fight the style, no matter how you tune the slider. Choosing the right preset family is the single most important decision in the workflow.

    The strength slider is the second lever, and it controls the balance between the original photo and the painted style. Low strength keeps the photo recognisable with a light painterly touch, middle strength paints the background while keeping the face clear, and high strength turns the whole image into a painting, face included. Start in the middle, generate once, and move the slider one step at a time based on what you see. Small moves are more informative than large swings, because each step changes the face as well as the background.

    The third lever is the photo itself. A well-lit outdoor photo with open sky converts cleanly at almost any strength, while a dark or blurry photo needs low strength to survive at all. If a preset looks bad on one photo, try it on a brighter photo before blaming the preset. The photo and the preset are partners, and a mismatch between them is the most common reason a good preset produces a bad result.

    Finally, save your winning combinations. When a preset and slider setting produce a beautiful result, write down both, or save the preset as a favourite if the tool allows it. A saved combination turns every future Ghibli photo into a one-click starting point, and a set of images built from the same combination looks coherent enough to print as a series.

    Step-by-Step Guide to Ghibli Photos in OpenArt AI

    1. Choose a well-lit outdoor photo with a clear subject and an open background. Check the face is sharp and the light is soft.
    2. Open OpenArt AI and upload the photo, waiting for the upload to finish before choosing a style.
    3. Browse the style list and choose a Ghibli-inspired preset, favouring watercolour, storybook, or hand-painted descriptions.
    4. Set the strength slider to the middle range for your first attempt, so the face stays recognisable while the scene turns painterly.
    5. Generate four variations from the same preset and strength, and compare them side by side at full size. Judge the face first, then the sky, then the background.
    6. Adjust the strength one step up or down based on the comparison, and regenerate. If the background looks flat, raise the strength slightly; if the face looks too painted, lower it.
    7. Pick the warmest, most balanced variation, and download it at the highest resolution offered. Save the master file before making smaller copies.
    8. Record the preset name and slider setting that worked, so your next Ghibli photo starts from a proven combination and your sets stay consistent.

    Common Mistakes to Avoid

    The most common mistake is pushing the strength slider to maximum on the first try. Maximum strength turns the face into a watercolour blur, and users often conclude the tool is bad when the slider was simply too high. Start in the middle, and treat high strength as an experiment for landscapes only, never for portraits where recognition matters. A little planning around how to create a ghibli style photo with openart ai goes a long way.

    A second mistake is choosing the wrong preset family. A comic or neon preset will never become a Ghibli illustration, no matter how the slider is tuned, because its line work and palette point in a different direction. Browse for watercolour and storybook presets specifically, and trust the preset’s description over its thumbnail, which can mislead. This is exactly where how to create a ghibli style photo with openart ai can help you most.

    A third mistake is generating only one variation. Presets contain randomness, and the same preset and slider setting can produce a flat result and a beautiful result in consecutive generations. Generate at least four variations before judging a preset, because the comparison reveals what the preset can do at its best.

    A fourth mistake is starting with a dark or blurry photo. The preset cannot recover detail that is not in the original, and a dark photo will come out muddy at any strength. Choose a bright, sharp photo, and the preset will have good material to paint with. The photo’s quality sets the ceiling for the illustration’s quality.

    A fifth mistake is downloading at low resolution. Painted textures need pixels, and a small download looks muddy when posted or printed. Always choose the highest resolution offered, keep the master file, and make smaller copies only for sharing. Resolution is the cheapest quality upgrade in this workflow.

    Best Tools for Preset-Based Ghibli Edits

    OpenArt AI is the best tool for preset-based Ghibli edits, because its style library and strength slider give you real, visible control over the result. You can compare presets quickly, tune the balance precisely, and download at high resolution, all without writing prompts. For users who prefer sliders to sentences, OpenArt is the most comfortable way to make storybook art.

    ChatGPT is the best companion tool when a preset result needs a specific fix. Its conversational image editing lets you ask for a clearer face, a warmer sky, or a different detail in plain language, after the preset has done the heavy lifting. Use OpenArt for the style and ChatGPT for the refinement, and the two tools cover each other’s weaknesses.

    A photo editor is the best finishing tool for crops, captions, and warmth adjustments. Use it to crop the illustration to wallpaper proportions, add a small caption, or warm the colours slightly. A light manual finish costs nothing and often turns a good preset result into a polished, shareable image.

    Frequently Asked Questions

    What strength slider setting is best for portraits?

    The middle range is the best starting point for portraits, because it paints the background while keeping the face recognisable. Raise the strength only if the background looks flat, and lower it immediately if the face starts to blur into watercolour. Portraits should stay on the clearer side of the slider, while landscapes can handle higher strength.

    Can I use OpenArt AI for free?

    OpenArt AI typically offers free credits or a free tier with limits, which is enough to learn the workflow and make several illustrations. Limits change over time, so check the current free tier before planning a large set. Spend free credits on strong photos, generate a few variations per image, and save your favourite preset combinations so no credit is wasted.

    Why do two generations with the same preset look different?

    Image generation includes randomness, so the same preset and settings can produce different results each time. This is normal, and it is why generating four variations is recommended. The variation is a feature, not a fault: it gives you a choice of moods from a single recipe, and the warmest result is usually worth the extra generations.

    Can I combine a preset with a written prompt?

    Many preset tools allow an optional text prompt alongside the preset, and a short prompt naming the mood, such as “soft morning light” or “golden evening”, can steer the result usefully. Keep the added text short, since a long prompt can fight the preset. Let the preset carry the style, and use text only for mood and light.

    What photo size should I upload?

    Upload the largest, sharpest version of your photo that the tool accepts. Larger uploads give the preset more detail to paint with, and the downloaded result will be sharper. Avoid uploading a screenshot or a heavily compressed copy, since compression artefacts become visible brush-like marks in the painted result.

    Final Words

    Presets make style easy, but your eye makes it good. Tune the strength, trust the warmest variation, and enjoy your Ghibli-style photo.

    The strength slider rewards patience, so treat each Ghibli photo as a small experiment with a notebook. Write down the preset, the slider position, and the photo type for every result you love, and within a few sessions you will own a personal recipe book that makes every new illustration faster and more consistent. Share the recipe with friends who ask how you did it, because a good preset combination is a gift, and the storybook world you build from it will only get warmer as the set grows.

    Presets make style easy, but your eye makes it good. Tune the strength, trust the warmest variation, and enjoy your Ghibli-style photo.

  • How to Create Ghibli Style Images in ChatGPT

    How to Create Ghibli Style Images in ChatGPT

    How to create ghibli style images in chatgpt with a photo turning into storybook art

    Introduction

    ChatGPT makes Ghibli-style images easy, because it handles both the photo and the conversation in one place. Learning how to create ghibli style images in chatgpt takes only a clear photo, a well-written first prompt, and a few follow-up refinements. No drawing skill is needed, and no separate app is required to get a result worth sharing. That is why so many people search for how to create ghibli style images in chatgpt before they start.

    The trick is talking to the tool like a director, not a vending machine. Name the mood, the setting, and the colours you want, then refine what comes back. This tutorial walks through the full process, from the first upload to the final upscale, so your first attempt already looks polished. Take your time with how to create ghibli style images in chatgpt and the results will speak for themselves.

    Uploading a photo in ChatGPT for how to create ghibli style images in chatgpt

    How to Get the Best Result From This Tutorial

    1. Start with an outdoor photo in natural light, since open skies and greenery convert best into the Ghibli look.
    2. Write your first prompt with the mood included, such as peaceful morning, golden evening, or gentle rain.
    3. Generate three variations and compare them side by side before you spend time refining only one.
    Refining softer colours and storybook backgrounds while learning how to create ghibli style images in chatgpt

    Quick Tutorial – How to Create Ghibli Style Images in ChatGPT

    1. Upload a clear photo to ChatGPT and ask for a Ghibli-style version, naming the mood and setting you want in plain words.
    2. Refine with follow-ups for softer colours, storybook backgrounds, or specific characters, changing one element at a time.
    3. Upscale the best result and share it with credit to the style inspiration.
    4. If the face looks too painted, ask ChatGPT to keep the face clearer while the background stays soft and painterly.
    5. Save two versions, one full-size master and one compressed copy for social posts, so the detail survives uploading.

    Pro Tips

    • Keep your follow-up requests short and specific, because one clear change per message gives cleaner results than five at once.
    • Ask for watercolor skies and hand-painted warmth by name, since those phrases push the style in the right direction.
    • Avoid uploading group photos for your first try, because single subjects convert far more reliably than crowds.
    Final upscaled Ghibli-style image ready to share from how to create ghibli style images in chatgpt

    More Ghibli Prompts to Try in ChatGPT

    Once you can make one Ghibli image, the fun is trying different moods on different photos. The six prompts below cover the most loved Ghibli feelings: morning mist, golden evening, gentle rain, seaside breeze, forest magic, and starlit night. Each prompt is complete on its own, so paste it with your photo and generate. Try the one that matches your photo’s light, and the result will feel effortless.

    1. Misty Morning Hills

    A soft, quiet morning version with rolling hills, mist, and a pale watercolour sky that feels like the opening scene of a film.

    Turn this photo into a Ghibli-style illustration with rolling green hills, soft morning mist, a pale watercolor sky, and gentle light. Keep the person's face recognizable and warm, paint the background in soft hand-painted detail, and create a peaceful, nostalgic mood. Storybook art, soft colours, 4K.

    2. Golden Evening Meadow

    A warm, glowing version with tall grass, wildflowers, and long evening light that suits portraits taken near sunset.

    Turn this photo into a Ghibli-style illustration with a golden evening meadow, tall grass and wildflowers, warm honeyed light, and a glowing sky. Keep the person's face recognizable and tender, paint the background in warm hand-painted detail, and create a wistful, romantic mood. Storybook art, warm colours, 4K.

    3. Gentle Rain Window

    A cosy version with soft rain, a window view, and warm indoor light that suits quiet, thoughtful portraits.

    Turn this photo into a Ghibli-style illustration with gentle rain outside a window, soft blue-grey skies, and warm indoor lamplight. Keep the person's face recognizable and calm, paint the rain and background in soft hand-painted detail, and create a cosy, reflective mood. Storybook art, soft colours, 4K.

    4. Seaside Town Breeze

    A fresh, joyful version with pastel houses, blue sea, and white clouds that suits beach and harbour photos.

    Turn this photo into a Ghibli-style illustration with a seaside town of pastel houses, bright blue sea, white clouds, and a fresh ocean breeze. Keep the person's face recognizable and joyful, paint the background in bright hand-painted detail, and create a free, summery mood. Storybook art, fresh colours, 4K.

    5. Forest Spirit Woods

    A magical version with tall trees, mist, moss, and dappled light that suits woodland and hiking photos.

    Turn this photo into a Ghibli-style illustration with a misty forest of tall trees, soft moss, and dappled sunlight filtering through leaves. Keep the person's face recognizable and curious, paint the forest in rich hand-painted detail, and create a magical, mysterious mood. Storybook art, deep green colours, 4K.

    6. Starlit Night Train

    A calm, hopeful version with deep blue skies, warm window lights, and scattered stars that suits evening photos.

    Turn this photo into a Ghibli-style illustration with a deep blue starlit sky, warm glowing window lights, and a quiet night landscape. Keep the person's face recognizable and serene, paint the night in soft hand-painted detail, and create a calm, hopeful mood. Storybook art, night colours, 4K.

    How to Customize Your Ghibli Prompt in ChatGPT

    Customization starts with the mood, because the mood decides the light, the colours, and the feeling of the whole illustration. ChatGPT responds well to mood words, so name the feeling plainly: peaceful morning, golden evening, gentle rain, or starlit night. A prompt that names the mood produces a coherent world, while a prompt that only says “Ghibli style” leaves the tool guessing and often produces a generic wash.

    Next, customize the setting to match your photo. If the photo was taken in a field, ask for a meadow; if it was taken by the sea, ask for a seaside town; if it was taken in a forest, ask for misty woods. The setting should enhance what is already in the photo, not replace it with a world that contradicts the original. When the painted setting matches the real setting, the conversion feels seamless and believable.

    The face is the third customization, and the most important. Always ask for the face to stay recognisable and clear, with the painted treatment kept mainly to the background and sky. ChatGPT can over-paint a face into a cartoon if you do not protect it, so the phrase “keep the face recognizable and clear” belongs in every follow-up that touches the style. A portrait that loses the person has lost its purpose.

    Finally, customize the light. Ghibli light is soft and directional, and naming it transforms the image: soft morning light, warm golden light, cool rainy light, or warm lamplight against night blue. If your photo was taken under harsh midday sun, ask for the light to be softened and warmed. Light is the difference between a filter and a film still.

    Step-by-Step Guide to Ghibli Images in ChatGPT

    1. Choose a clear outdoor photo with natural light, open sky, and a single subject. Check the face is sharp and well lit before you start.
    2. Open ChatGPT, start a new chat, and upload the photo using the attachment control. Wait for the upload to finish before typing the prompt.
    3. Paste your full prompt, naming the mood, the setting, and the colour feel, and generate the first illustration.
    4. Study the result at full size. Check the face first, then the sky and landscape, then the small details, in that order.
    5. Refine with one short follow-up at a time, such as “softer colours” or “clearer face, background stays painterly”. Change one element per message.
    6. Generate two or three variations of the same photo with different moods, and compare them side by side to learn which Ghibli world suits the photo best.
    7. Save the winner at full size as your master copy, and make a compressed copy for social posts. Check the posted image once, because compression dulls painted textures.
    8. Share the illustration with credit to the style inspiration, and keep the prompt that produced it in a notes file, so your next Ghibli image starts from a proven recipe.

    Common Mistakes to Avoid

    The most common mistake is writing a vague first prompt. “Make this Ghibli” gives ChatGPT no mood, no setting, and no colour direction, so the result is a generic wash that pleases nobody. Name the mood, the setting, and the light, and the tool will build a coherent world. Specificity is free, and it is the whole difference between a good result and a great one. In practice, how to create ghibli style images in chatgpt is simpler than it first looks.

    A second mistake is stacking five fixes into one follow-up. When you ask for softer colours, a clearer face, a different sky, and a new detail all at once, ChatGPT changes everything, including the parts you liked. One fix per message keeps the illustration stable and lets you see what each change actually does. A little planning around how to create ghibli style images in chatgpt goes a long way.

    A third mistake is starting with a group photo. Crowds convert unreliably: faces blur, bodies merge, and the painterly effect smears the group into a crowd scene. Master the style on a single subject first, then try pairs, and only attempt groups once you know how the tool handles faces. Single subjects are the reliable path. This is exactly where how to create ghibli style images in chatgpt can help you most.

    A fourth mistake is accepting a face that is too painted. A watercolour face may look artistic, but if friends cannot recognise the person, the portrait has failed. Ask for a clearer face, try a different variation, and accept a slightly less painterly face in exchange for recognition. The person matters more than the paint. Keep these basics of how to create ghibli style images in chatgpt in mind and you will avoid most mistakes.

    A fifth mistake is losing the good version to an experiment. ChatGPT conversations move forward, and a wild variation can replace a result you loved. Save the winner the moment you see it, before trying anything experimental. A saved master copy costs nothing and prevents the most frustrating loss in this workflow. Done carefully, how to create ghibli style images in chatgpt saves both time and effort.

    Best Tools for Ghibli Images

    ChatGPT is the best all-round tool for Ghibli-style images, because it combines the photo upload, the conversation, and the image generation in one place. Its model understands the storybook style deeply, renders watercolour skies and soft light convincingly, and follows follow-up fixes in plain language. For most users, ChatGPT alone is enough for beautiful results.

    Gemini is the best alternative when the face must stay exactly true. It preserves facial features more faithfully while still painting the background in soft watercolour, and it handles golden-hour light beautifully. If ChatGPT over-paints your face twice in a row, try the same prompt in Gemini before changing the prompt itself.

    A photo editor, such as Canva or your phone’s gallery editor, is the best finishing tool. Use it to add a caption, adjust warmth, crop to wallpaper proportions, or upscale the winner for printing. A light manual finish costs no credits and often separates a good illustration from a great one.

    Frequently Asked Questions

    Do I need a paid ChatGPT plan for Ghibli images? The key with how to create ghibli style images in chatgpt is to stay clear and specific.

    Not necessarily. Free plans typically include a limited number of image generations, which is enough to learn the workflow and make a few illustrations. Paid plans add more generations, faster processing, and higher resolution. Start free, learn what works, and upgrade only if you find yourself hitting the limit regularly. Many readers find that how to create ghibli style images in chatgpt works better than expected.

    Why does ChatGPT sometimes refuse a Ghibli prompt? Once you understand how to create ghibli style images in chatgpt, the rest becomes much easier.

    The tool may decline prompts that ask it to reproduce a specific copyrighted character or an exact film frame. Rephrase toward the general style, describing watercolour skies, hand-painted warmth, and storybook mood, rather than naming a character or a film title. Style-inspired prompts in your own words work reliably. That small extra effort with how to create ghibli style images in chatgpt pays off in the final result.

    How do I keep the face from looking like a cartoon? Start with the basics of how to create ghibli style images in chatgpt, then build from there.

    Ask for the face to stay recognisable and clear, with the painted treatment kept to the background and sky, and generate two or three variations. If the face still over-paints, try the same photo in Gemini, which preserves facial detail more faithfully. A slightly less painterly face that still looks like you is always the better portrait. That is why so many people search for how to create ghibli style images in chatgpt before they start.

    Can I make a Ghibli image from a photo of my pet? Take your time with how to create ghibli style images in chatgpt and the results will speak for themselves.

    Yes, and pet portraits in storybook style are delightful. Use a clear photo of the pet in good light, ask for the pet to stay recognisable with a painted background, and generate several variations, since animal faces are harder for AI tools than human faces. The best variation usually appears within three or four tries. In practice, how to create ghibli style images in chatgpt is simpler than it first looks.

    What size should I export for sharing and printing? A little planning around how to create ghibli style images in chatgpt goes a long way.

    Export at the largest size ChatGPT offers, and keep that file as your master copy. Make a compressed copy for social posts, since platforms compress uploads anyway. For printing, keep the print size moderate, such as A4, where the painted texture stays crisp, and avoid enlarging a small file, which turns watercolour washes into muddy blocks. This is exactly where how to create ghibli style images in chatgpt can help you most.

    Final Words

    Ghibli style is a conversation, not a single click. Upload, describe, refine, and enjoy the moment your photo turns into a storybook scene.

    Keep a small folder of your best Ghibli results, together with the prompts that produced them, and your collection will teach you faster than any tutorial. You will see which moods suit which photos, which follow-ups fix a too-painted face, and which settings produce the warmest light. That folder is your personal style guide, and every new photo you convert starts from what already succeeded. Share the set as a carousel when you have three strong illustrations, because a storybook series tells a story a single image cannot, and the quiet, hand-painted world you build will feel like a film only you could direct.

    Ghibli style is a conversation, not a single click. Upload, describe, refine, and enjoy the moment your photo turns into a storybook scene.

  • How to Use the GCam Camera App Quick Guide

    How to Use the GCam Camera App Quick Guide

    How to use gcam camera app guide with camera settings on phone

    Introduction

    Learning how to use gcam camera app software can transform an ordinary phone into a serious camera. GCam, the Google Camera port, brings HDR+, Night Sight, and portrait processing to phones that did not ship with them. Photos gain cleaner detail, better dynamic range, and far stronger low-light results. That is the practical side of how to use gcam camera app that most people miss on their first try. Small steady practice beats one long session whenever how to use gcam camera app is the goal.

    The catch is setup. The right GCam version depends on your phone model and chipset, and the best results need a matching config file. This quick guide covers the essentials: install the correct APK, enable the key features, and test your shots. Follow the steps below and you will be shooting better photos within minutes. GCam is the famous port of Google Camera, the app that made computational photography popular. Everything here comes back to one idea, that how to use gcam camera app works best when it stays simple and repeatable. Keep notes as you go, because how to use gcam camera app improves quickly once you see what each change does.

    Installing the correct GCam APK for a phone model

    How to Use This GCam Guide

    1. Identify your phone model and chipset before downloading anything.
    2. Follow the five tutorial steps above in order, testing after each change.
    3. Keep the working APK and config file backed up so a phone reset does not cost you the setup.
    HDR and Night Sight settings inside the GCam camera app

    Quick Tutorial

    1. Find the correct GCam APK for your exact phone model and chipset from a trusted GCam port source, and allow installs from unknown sources only for this install.
    2. Install the APK, open GCam, and grant camera, microphone, and storage permissions when asked.
    3. Enable HDR+ in the top bar and open Night Sight for low-light shots, then load the config file made for your device if one is available.
    4. Take test shots in daylight and in low light, comparing them with your stock camera app to confirm the improvement.
    5. Fine-tune saturation, sharpness, and HDR strength in GCam settings to taste, then turn the unknown-sources permission back off.

    Pro Tips for How To Use Gcam Camera App

    • Night Sight needs a steady hand. Brace the phone against a wall for the sharpest results.
    • Do not install random GCam versions. A wrong port can crash or drain the battery.
    • Compare the same scene in both apps. Side-by-side tests teach you GCam strengths fastest.
    Testing daylight and low-light shots with GCam camera settings

    More Configurations to Try

    Daylight Detail Config. Friends who try how to use gcam camera app after seeing your results usually ask for this exact checklist.

    Use this when you want maximum sharpness and natural colour in bright outdoor light.

    GCam setup: HDR+ Enhanced on, AWB on, saturation slightly below default, sharpness at default, lens: main camera. Shoot in open daylight, tap to focus on the subject, and hold still for the full HDR capture.

    Night Sight Street Config

    Use this for handheld night shots where street lights and shadows need clean balance.

    GCam setup: Night Sight on, HDR+ Enhanced on, astrophotography off, AWB on, saturation at default. Brace the phone against a wall, tap the brightest area to set exposure, and hold still until the capture ring finishes.

    Portrait Mode Config

    Use this for people photos with soft background blur and accurate skin tones.

    GCam setup: Portrait mode on, HDR+ on, face retouching off, AWB on, saturation slightly below default. Keep the subject two to three metres away, tap the face to focus, and shoot in open shade for the softest light.

    Astrophotography Config

    Use this for night-sky shots on a tripod, where long exposure captures stars and the Milky Way.

    GCam setup: Night Sight on, astrophotography on, HDR+ Enhanced on, AWB off, focus set to far. Mount the phone on a tripod, point at a dark sky away from city lights, and let the full long exposure complete without touching the phone.

    Video Stability Config

    Use this when shooting walking video and you need smooth, steady footage.

    GCam setup: Video mode, stabilisation on, 1080p at 30fps, HDR off for video, AWB on. Hold the phone with both hands, walk slowly and smoothly, and avoid sudden turns that break the stabilisation.

    Indoor Low-Light Config

    Use this for dim restaurants and indoor events where the stock camera goes muddy.

    GCam setup: Night Sight on, HDR+ Enhanced on, AWB on, saturation at default, sharpness slightly above default. Brace the phone on the table, tap the subject to focus, and hold still for the full capture.

    Food and Product Config

    Use this for close-up shots where colour accuracy and fine detail matter most. If you feel stuck, return to the basics of how to use gcam camera app and rebuild from the step that last worked.

    GCam setup: HDR+ Enhanced on, AWB on, saturation at default, sharpness slightly above default, lens: main camera. Shoot near a window for soft daylight, tap the dish to focus, and keep the phone parallel to the table.

    How to Customize Your GCam Setup

    A config file is a starting point, not a finish line, and the best setup is the one tuned to your phone and your taste. Start with the basics: load a config made for your exact model, take test shots, and judge them before changing anything. Then adjust one setting at a time — saturation first, because it changes the mood most, then sharpness, then HDR strength.

    Saturation slightly below default usually looks most natural, while sharpness slightly above default suits detail-heavy scenes but can look harsh on faces. Small steady practice beats one long session whenever how to use gcam camera app is the goal. Friends who try how to use gcam camera app after seeing your results usually ask for this exact checklist.

    HDR strength is the third lever: Enhanced suits high-contrast scenes like sunsets, while standard HDR+ suits everyday shots and processes faster. Save each working combination as a named config, so a bad experiment never costs you a good setup. Keep notes on which config suits which situation — daylight, night, portrait, and astro each deserve their own file. Finally, re-test after every GCam update, because a new version can change how the same config renders. Keep notes as you go, because how to use gcam camera app improves quickly once you see what each change does. If you feel stuck, return to the basics of how to use gcam camera app and rebuild from the step that last worked.

    • Saturation: slightly below default for natural colour; default for punchy social posts.
    • Sharpness: default for faces; slightly above for landscapes, food, and products.
    • HDR strength: Enhanced for sunsets and backlight; standard for everyday speed.
    • AWB: on for consistent colour; off only for astro, where it preserves the night sky.
    • Focus: tap-to-focus for people and products; far focus for astro and landscapes.

    Step-by-Step Guide: Installing and Tuning GCam

    1. Identify your phone model and chipset. Open Settings, then About Phone, and note the exact model name and processor. The correct GCam port depends on both, and a wrong port can crash or drain the battery.
    2. Find a trusted GCam port source. Use a well-known GCam port hub that lists builds by device and chipset, and read the comments for your model before downloading anything. Avoid random APK sites, which may bundle modified or unsafe builds.
    3. Download the correct APK. Choose the build recommended for your chipset, and check the file size and version against the listing. If two builds are listed, prefer the one with recent positive reports from your exact model.
    4. Allow the install, then revoke it. Android will ask you to allow installs from unknown sources for your browser or file manager. Allow it only for this install, then turn the permission back off immediately afterwards.
    5. Install and grant permissions. Install the APK, open GCam, and grant camera, microphone, and storage permissions when asked. Denying storage permission breaks saving, so grant all three.
    6. Load a config file for your device. If a config exists for your model, download the XML file, place it in the GCam config folder, and double-tap the black area beside the shutter button to load it. Without a matching config, start with the defaults and tune manually.
    7. Enable HDR+ and Night Sight. Turn HDR+ on in the top bar, open Night Sight for low-light shots, and take your first test shots in daylight and in low light. Compare each against the stock camera app on the same scene.
    8. Fine-tune and back up. Adjust saturation, sharpness, and HDR strength one at a time, testing after each change. When the results look right, back up the working APK and config file to cloud storage, so a phone reset never costs you the setup.

    Common Mistakes to Avoid

    • Installing the wrong port. A GCam build made for a different chipset can crash on launch, overheat the phone, or drain the battery. Always match the build to your exact model and chipset, and read device comments first.
    • Skipping the config file. The default settings are generic, and the real improvement comes from a config tuned for your sensor. A matching config is the difference between a modest gain and a dramatic one.
    • Leaving unknown-sources permission on. The install permission should be revoked immediately after installing GCam. Leaving it on weakens your phone’s security for no benefit.
    • Judging GCam from one photo. GCam’s strength shows across scenes — daylight detail, low-light cleanliness, and dynamic range. Compare the same scene in both apps, in daylight and at night, before deciding.
    • Over-sharpening and over-saturating. Aggressive sharpness looks crunchy on faces, and heavy saturation looks artificial. Slightly below default saturation and default sharpness suit most people, most of the time.

    Best Tools for This Setup

    A trusted GCam port hub is the first tool, because the right build matters more than any setting. Look for a hub that lists builds by device and chipset with user reports, and stick to builds with recent positive feedback for your exact model. A config manager or file manager is the second tool: you need it to place the XML config in the GCam folder and to back up working configs, so keep one reliable file manager installed. Share your finished result and ask for feedback, because how to use gcam camera app gets better with every honest review.

    Snapseed is the best companion editor for GCam photos, because its selective adjustments and HDR filter complement GCam’s clean files without over-processing them. Use the port hub for the build, the file manager for configs, and Snapseed for finishing, and the whole workflow stays simple and repeatable. The examples above show how to use gcam camera app at its most approachable, even for complete beginners.

    Frequently Asked Questions

    Is GCam safe to install? Yes, when downloaded from a trusted port source. GCam ports are modified versions of Google’s camera app, so stick to well-known hubs, check device comments, and revoke the unknown-sources permission after installing. None of this needs special talent, because how to use gcam camera app is a skill built from small repeatable steps.

    Will GCam work on any Android phone? Most phones with a compatible chipset can run a port, but the best results need a build made for your exact model. Very old or unusual chipsets may have no stable port, so check the hub’s device list first. Write down what worked today, since how to use gcam camera app becomes much easier once your own notes guide you.

    Does GCam replace my stock camera? No. GCam installs alongside the stock camera app, and you can use either. Many people keep both: GCam for photos, and the stock app for features GCam lacks, like certain video modes. The honest secret is that how to use gcam camera app clicks into place for almost everyone around the second week.

    Why do my GCam photos look worse than stock? Usually the wrong build, a missing config, or over-aggressive settings. Load a matching config, reset saturation and sharpness near default, and compare the same scene in both apps before judging. Keep the process enjoyable, because how to use gcam camera app only sticks when it feels like progress rather than pressure.

    Do I need to root my phone? No. GCam ports install as normal APKs and need no root access. If a guide tells you to root for GCam, find a different guide — rooting is unnecessary and risks your phone’s security. Everything here comes back to one idea, that how to use gcam camera app works best when it stays simple and repeatable.

    Troubleshooting GCam

    When GCam crashes on launch, the build is almost certainly wrong for your chipset; uninstall it and download the build recommended for your exact model. If photos save slowly or the app lags, HDR+ Enhanced is working hard on a weak processor — switch to standard HDR+ and the speed returns.

    When Night Sight shots come out blurry, the phone moved during capture; brace it against a wall or use a tripod, and wait for the full capture ring. If colours look wrong, the config’s white balance does not suit your sensor; load a different config for your model or reset AWB to on. Readers looking into how to use gcam camera app usually want clear steps, and that is exactly what this guide keeps in focus.

    When the app drains the battery, a mismatched port is the usual cause — a correct build idles normally, so reinstall from the trusted source. Finally, if GCam disappears after a system update, the APK was removed by the update; reinstall the same backed-up APK and config, and the setup returns in minutes. By the end, how to use gcam camera app will feel less like a mystery and more like a routine you control.

    Creative Ideas to Try

    Push GCam beyond the basics once the standard setup works. Try a long-exposure light-trail shot on a tripod at night, using Night Sight with a slow-moving light source to paint lines across the frame. Shoot a photo series of the same street scene at dawn, noon, and dusk, and compare how GCam’s HDR handles each light — the comparison teaches more than any guide. Build a personal config library: one config per situation, named clearly, backed up to the cloud, and shared with friends who own the same model. Save this page and revisit it after a week of practice with how to use gcam camera app to notice how far you have come.

    Try GCam’s portrait mode for product photos, where the soft background blur makes handmade goods look professionally shot. Finally, run a blind test with friends: show them the same scene from GCam and the stock app without labels, and let their honest picks confirm whether your tuning is really working. Patience matters here, since how to use gcam camera app rewards small careful changes more than big rushed ones.

    Final Words

    GCam rewards ten minutes of setup with far better photos. Install the right version, load the config, and start shooting. That is the practical side of how to use gcam camera app that most people miss on their first try.

  • VN Viral Templates Guide for Trending Instagram Edits

    VN Viral Templates Guide for Trending Instagram Edits

    VN viral templates instagram complete guide trending edits reel editing

    Introduction

    The vn viral templates instagram complete guide trending edits in this post explain how trending VN edits are made. Beat-sync cuts, slow zooms, and glow transitions power most viral reels, and VN template codes make them easy to copy. This guide walks through the full workflow, from picking a style to exporting for Instagram. A small change in lighting can completely change how this vn viral templates instagram complete guide trending edits turns out, so test two versions. Most VN viral templates are built around beat-synced cuts that feel effortless.

    VN templates work because they package professional timing into a reusable code. You replace the placeholder clips with your own footage, and the cuts, zooms, and effects stay in place. With six to ten good clips and one trending song, you can finish a polished reel in minutes. You can swap the photos inside VN viral templates without breaking the timing.

    Beat-sync VN template edit with clips synced to song beats

    For background reading, see video editing on Wikipedia.

    How to Use This VN Templates Guide

    1. Save one trending VN template code that matches the style you want to learn.
    2. Follow the five steps above with your own clips, without skipping the beat-sync check.
    3. Compare your export with the original template reel, fix any mistimed cuts, and post.
    Slow zoom and glow transition styles in a VN template edit

    Quick Tutorial

    1. Pick a trending VN template style, such as beat-sync, slow zoom, or glow transition, and gather 6 to 10 clips that match the mood.
    2. Open VN, import the template code, and replace each placeholder clip with your own footage, keeping the original order.
    3. Sync the cuts to the song’s beats by nudging clip boundaries until each cut lands on a drum hit or vocal accent.
    4. Add text overlays and colour grading to match the template style, keeping text short and readable.
    5. Export in 1080×1920 at high quality, then post to Instagram Reels with the trending audio attached.
    • Shoot all clips in vertical format before you start. Mixed orientations break template layouts.
    • Use the same song version as the template. Different versions shift the beats.
    • Keep your clips slightly longer than the placeholders so you can trim to the exact beat.
    Instagram Reels export settings in the VN video editor app

    VN Template Styles Explained in Depth

    VN templates are not one style but a family of timing patterns, and each pattern suits different footage. Understanding the family helps you pick the right template before you start, instead of forcing the wrong clips into the wrong rhythm. The six styles below cover almost every viral VN edit on Instagram, with the clip counts, beat maps, and effects that define each one. Beginners like VN viral templates because every transition is already placed.

    Beat-Sync Hard Cuts

    The most common viral style: a cut on every drum hit, with no transitions at all. It needs eight to twelve short clips, each under a second, and a song with a strong, regular beat. The power comes from precision, not effects. If a single cut lands late, the whole reel feels sloppy, so this style demands careful beat mapping. It suits attitude walks, fashion changes, and sports highlights, where each clip has a clear peak moment. The audio track inside VN viral templates usually drives the whole mood.

    Slow Zoom and Glow

    A softer style built on slow push-ins and a warm glow that blooms on the chorus. It needs four to six longer clips, two to three seconds each, and a melodic song with a clear swell. The zoom must be slow and steady, about ten percent over the clip, and the glow should peak with the vocal, not the drum. It suits travel, couple, and memory footage, where the feeling matters more than the energy. Short clips work better in VN viral templates than long, slow footage.

    Velocity Speed Ramping

    A dramatic style that alternates slow motion with sudden hyper-speed bursts on the drops. It needs three to five action clips shot at 60 frames per second, because ramping needs extra frames to stay smooth. The slow sections build tension and the bursts release it. It suits dance, bike, and sports footage, where real motion exists to ramp. Low-frame-rate clips turn choppy under ramping, so shoot high frame rate first.

    Flash Frame Transitions

    A hype style built on white flash frames between clips, with maximum contrast and no fades. It needs six to ten punchy clips and a loud electronic track. The flashes hide the cuts and create a strobe energy that feels urgent. It suits gym, street, and hype content, but it can feel harsh for romantic or calm footage, so match the style to the mood. Many creators keep a folder of VN viral templates ready for daily reels.

    Photo Slideshow Ken Burns

    A gentle style for photo-only creators: slow pans and zooms across still photos, cross-dissolving on the melody. It needs eight to fifteen photos with a consistent colour grade, and a soft melodic song. The movement must be slow and consistent in direction, so the slideshow feels like one continuous camera move. It suits memory posts, travel albums, and anniversary edits. Text timing in VN viral templates matters as much as the cuts themselves.

    Split Screen Duet

    A graphic style showing two angles of the same moment side by side, syncing to the same beat. It needs paired clips shot from two angles, or one clip duplicated and cropped. The split must be clean and centred, and both halves must share the same colour grade. It suits dance, fashion, and before-and-after edits, where comparison is the point. A clean export keeps VN viral templates looking sharp after upload.

    How to Customize a VN Template

    Customization starts with choosing the right style for your footage, not the most popular style of the week. Beat-sync needs many short clips with clear peaks. Slow zoom needs fewer, longer clips with feeling. Velocity needs high-frame-rate action. Photo slideshow needs consistent photos. Forcing travel footage into a hard-cut template produces a frantic edit that fights its own material, while the same footage in a slow-zoom template feels effortless. Match the style to the footage first, and the trend second.

    Next, adjust the clip order. Templates ship with placeholder clips in a fixed order, but your footage has its own natural arc: a beginning, a peak, and an ending. Replace placeholders in an order that tells your story, even if it differs from the template’s demo. The timing pattern stays, but the narrative becomes yours. Keep the strongest clip for the chorus or the biggest drop, and never waste the peak moment on a weak opening clip. You can change the colour grade after importing VN viral templates.

    The song version is the third lever, and it is non-negotiable: use the exact same song version as the template. Different versions, remixes, and sped-up edits shift the beats by fractions of a second, and those fractions accumulate into visible mistiming by the end of the reel. If you cannot find the exact version, choose a different template whose song you can match, rather than forcing a mismatched track. Vertical videos suit VN viral templates best, since they are made for reels.

    Finally, tune the text and grading. Template demos often include bold text, but your version should keep text short, readable, and minimal: three to five words per overlay, maximum. Apply one colour grade identically to every clip, so the reel feels like one continuous piece rather than a patchwork. Change one element at a time and preview after each change, so you always know what improved the edit. The zoom punches in VN viral templates add energy to simple photos.

    • Match the template style to your footage, not to the trend of the week.
    • Keep the strongest clip for the chorus or the biggest drop.
    • Use the exact song version the template was built for.
    • Keep text minimal and grading consistent across all clips.

    Step-by-Step Guide to a Polished VN Template Reel

    1. Pick the template style that matches your footage. Review the six styles above, count your usable clips, and choose the pattern whose clip count and energy fit what you actually shot. Do not start with a template and then hunt for footage to fill it.
    2. Gather and shoot the clips you need. Shoot everything in vertical 1080×1920, in the same frame rate, and keep each clip slightly longer than the placeholder it will replace, so you can trim to the exact beat. Shoot action clips at 60 frames per second if you plan any speed ramping.
    3. Save the template code and import it into VN. Open VN, import the template code, and confirm the placeholder layout, beat markers, and effect layers load correctly before replacing anything. If the template fails to import, try the code again rather than rebuilding the timing by hand.
    4. Replace placeholders in story order. Swap each placeholder with your own clip, keeping the template’s timing intact but arranging the clips so they tell your story: setup, build, peak, close. Trim each clip’s in and out points so the action peak sits inside the placeholder window.
    5. Sync the cuts to the song’s beats. Play the timeline and nudge each clip boundary until every cut lands on a drum hit or vocal accent. Zoom the timeline to maximum and use the audio waveform as your guide: cuts belong on waveform peaks, not near them.
    6. Add text and grading sparingly. Add at most three short text overlays, three to five words each, in a clean readable font. Apply one colour grade to the whole timeline, and check that all clips match in brightness and warmth before exporting.
    7. Preview on your phone at full screen. Watch the reel once with sound, checking beat sync, and once muted, checking that the cuts still feel rhythmic. Compare it with the original template reel and fix any mistimed cuts before posting.
    8. Export and post with the trending audio. Export in 1080×1920 at the highest quality VN offers, attach the exact trending audio version on Instagram, and post with a short caption. Reply to the first comments quickly, since early engagement helps a template reel travel.

    Common Mistakes to Avoid

    Mixing orientations. Horizontal clips forced into a vertical template break the layout, crop faces badly, and waste half the frame. Shoot everything vertical from the start. A single horizontal clip can ruin an otherwise perfect template reel.

    Using a different song version. Remixes, sped-up edits, and live versions shift the beats, and the mistiming accumulates across the reel. The template’s timing was built for one exact version. Match it precisely or pick a different template. Replace every sample photo when you personalise VN viral templates.

    Skipping the beat-sync check. Template timing gets you close, but your clips have different internal rhythms than the placeholders. Every cut must be checked against the waveform and nudged by hand. Unchecked cuts are the difference between a viral reel and an amateur one. Captions added over VN viral templates should stay short and readable.

    Overloading with text. Ten text overlays in fifteen seconds make viewers read instead of watch. Three short overlays, maximum, in a clean font, is the limit. If the text matters more than the footage, the template was the wrong choice. Many editors test VN viral templates with trending audio for better reach.

    Exporting at low quality. VN offers high-quality export, and Instagram compresses everything further. Starting from a low-quality export guarantees a soft, muddy result. Always export at the highest quality and let the platform do its own compression from the best possible source.

    Troubleshooting VN Template Edits

    The template code will not import. Copy the code again carefully, character by character, and check for extra spaces or missing characters. Codes expire when trends fade, so if a code consistently fails, it may be retired; choose a current template with a working code instead of fighting a dead one. A strong first frame helps VN viral templates hold the viewer longer.

    Cuts drift out of sync halfway through. This almost always means the song version differs from the template’s version. Verify the exact track, duration, and version on the template’s original reel, and replace the audio with the matching version. Do not try to fix drift by nudging individual cuts; the error accumulates and the fix must be at the source. You can slow one section of VN viral templates for a dramatic pause.

    Clips look stretched or cropped wrong. The placeholder layout expects vertical clips of a specific aspect ratio. Re-shoot or re-crop the offending clip to 1080×1920 before replacing the placeholder, rather than stretching it to fit. Stretched faces are instantly noticeable and impossible to hide. Duplicate clips rarely work well inside VN viral templates.

    The reel looks good in VN but dull on Instagram. Instagram compresses aggressively and mutes colours slightly. Increase contrast and saturation a touch before export, and check the exported file on your phone, not only in the VN preview, before posting.

    The audio gets muted after posting. The trending song may be restricted in some regions. Keep a backup version with a similar licensed track of the same energy and beat structure, and post that version if the original is muted. Always credit the audio you actually used. The beat markers inside VN viral templates guide where each photo lands.

    Frequently Asked Questions

    Do I need a template code, or can I build the timing manually? Fresh photos make old VN viral templates feel new again.

    A code is faster and more precise, because the timing pattern is pre-built. Manual timing works too, but it requires mapping every beat by hand on the waveform, which takes much longer. Start with codes, and learn manual timing once you understand the patterns. Keep your logo small when branding VN viral templates for clients.

    How many clips does a VN template need?

    Six to ten for most styles, four to six for slow-zoom styles, and eight to fifteen photos for slideshow styles. Fewer clips than the template expects leaves empty placeholders, and more clips than expected forces rushed cuts. Match your clip count to the style you chose. Night clips with city lights suit many VN viral templates beautifully.

    Can I use VN templates for non-Instagram platforms? A simple font keeps VN viral templates easy to read on small screens.

    Yes. The same 1080×1920 export works for YouTube Shorts, Facebook Reels, and TikTok. The beat-sync timing is platform-agnostic; only the audio licensing and caption conventions change between platforms. Save your edited version of VN viral templates before exporting the reel.

    Why do my cuts feel slightly late?

    The song version is the most likely cause. Verify the exact version first. If the version matches, zoom the timeline to maximum and nudge each cut onto the waveform peak. A two-frame nudge often fixes the whole reel.

    Is VN free to use?

    VN offers a capable free version that covers template import, beat sync, and high-quality export. Some advanced effects and filters sit behind paid tiers, but the core template workflow in this guide works fully in the free version.

    Final Words

    Trending edits are timing plus taste, and with six styles understood, you can pick the right pattern for every set of clips you shoot. Learn one VN template well, match the song version exactly, sync every cut by hand, and every reel after it gets easier.

  • Romantic AI Wallpaper Guide HD 4K Download

    Romantic AI Wallpaper Guide HD 4K Download

    Romantic AI wallpaper in HD 4K made with the romantic ai wallpaper prompts for men and women hd 4k download guide

    Introduction

    This romantic ai wallpaper prompts for men and women hd 4k download guide shows how to make a dreamy HD romantic wallpaper for any phone. Pick a theme, generate the image, upscale it to 4K, and set it in minutes. This romantic ai wallpaper prompts for men and women hd 4k download guide can be adjusted with small changes to suit different moods and themes. You can bookmark this romantic ai wallpaper prompts for men and women hd 4k download guide and come back to it for your next creative project. A good romantic ai wallpaper prompts for men and women hd 4k download guide keeps the subject as the hero while the style stays soft and balanced.

    Your phone screen is your most personal space. A couple silhouette at sunset, roses in warm light, or a moonlit walk can make every unlock feel warmer, for men and women alike. Keep this romantic ai wallpaper prompts for men and women hd 4k download guide saved in your collection so you can return to it whenever you need it. This romantic ai wallpaper prompts for men and women hd 4k download guide is a smart starting point before you move on to more advanced edits.

    Romantic theme wallpaper generated for the romantic ai wallpaper prompts for men and women hd 4k download guide

    How to Use This Romantic AI Wallpaper Prompts for Men and Women HD 4K Download Guide

    1. Use one theme only. Mixing ideas crowds the wallpaper.
    2. Generate three versions and upscale only the sharpest one.
    3. Always check the wallpaper on your real phone screen before sharing it.
    Upscaled 4K wallpaper checked on a phone screen from the romantic ai wallpaper prompts for men and women hd 4k download guide

    Quick Tutorial for Romantic AI Wallpaper Prompts for Men and Women HD 4K Download Guide

    1. Pick one romantic theme, like a couple at sunset, and write it as one clear sentence.
    2. Paste it into ChatGPT or Gemini, add vertical wallpaper and dreamy light, and generate a tall 9 by 16 image.
    3. Upscale the sharpest result to 4K and check it on your phone for sharp details.
    4. Save it to your gallery, set it as your lock or home screen, and crop it so the subject sits above the clock.
    5. Share it with your partner or friends so they can make their own too.

    Pro Tips

    • Ask for vertical 9 by 16 first. Landscape crops badly on phones.
    • Keep the top third calm for your clock and notifications.
    • Use soft warm light. Harsh light makes romance feel cold.
    Saved romantic wallpaper set on a phone with the romantic ai wallpaper prompts for men and women hd 4k download guide

    More Themes to Try

    Romance has endless moods: the first meeting, the long-distance call, the rainy evening, the anniversary table, and the quiet morning. The themes below keep the dreamy light, the vertical format, and the calm top third while changing the love story, so every wallpaper can match a different chapter of your own. This romantic ai wallpaper prompts for men and women hd 4k download guide has become popular because it is quick, free and simple to customize. When you share this romantic ai wallpaper prompts for men and women hd 4k download guide with friends, they can create the same style in minutes.

    First Meeting

    The beginning of every love story. Two silhouettes meeting under soft light, the world narrowing to one glance.

    Create a dreamy vertical 9 by 16 romantic wallpaper of a couple meeting for the first time under soft warm light, gentle bokeh, calm top third for the clock, and a hopeful tender mood. Ultra-realistic detail, 4K, cinematic lighting.

    Long-Distance Call

    The modern romance. Two phones, two cities, one conversation, connected by a ribbon of warm light across the screen.

    Create a dreamy vertical 9 by 16 romantic wallpaper of a couple on a video call across two cities, connected by warm glowing light, gentle bokeh, calm top third for the clock, and a hopeful tender mood. Ultra-realistic detail, 4K, cinematic lighting.

    Rainy Evening Walk

    The cinematic romance. One umbrella, two people, rain glowing in streetlight, and a city softened by weather.

    Create a dreamy vertical 9 by 16 romantic wallpaper of a couple walking under one umbrella in gentle rain, warm streetlight glow, gentle bokeh, calm top third for the clock, and a tender cinematic mood. Ultra-realistic detail, 4K, cinematic lighting.

    Anniversary Table

    The celebratory romance. Candles, roses, and two glasses catching golden light, the table set for two and only two.

    Create a dreamy vertical 9 by 16 romantic wallpaper of a candlelit anniversary table with roses and two glasses in golden light, gentle bokeh, calm top third for the clock, and a warm celebratory mood. Ultra-realistic detail, 4K, cinematic lighting.

    Quiet Morning Together

    The everyday romance. Coffee, soft window light, and two people comfortable in silence, the love that needs no occasion.

    Create a dreamy vertical 9 by 16 romantic wallpaper of a couple sharing quiet morning coffee in soft window light, gentle bokeh, calm top third for the clock, and a peaceful tender mood. Ultra-realistic detail, 4K, cinematic lighting.

    Moonlit Walk

    The dreamiest romance. A full moon, a quiet path, and two silhouettes walking slowly, the night holding its breath.

    Create a dreamy vertical 9 by 16 romantic wallpaper of a couple walking under a full moon on a quiet path, silver-blue light, gentle bokeh, calm top third for the clock, and a serene dreamy mood. Ultra-realistic detail, 4K, cinematic lighting.

    How to Customize Your Wallpaper

    Wallpaper customization starts with the phone, not the image. Every phone has a different size, a different clock position, and a different notch or punch-hole camera, and a wallpaper that ignores those details will hide its best parts behind the clock. Before generating, note your phone’s screen ratio, usually 19.5 by 9 or 20 by 9, and where the clock sits. Then design the image around the clock: calm sky or soft bokeh at the top, the subject in the middle or lower third, and nothing important at the very edges where gestures and icons live.

    The theme is the second lever. One theme only is the rule: a couple at sunset, roses in warm light, or a moonlit walk. Mixing themes, a sunset plus roses plus a city plus a moon, crowds the wallpaper and makes it feel busy on a small screen. A single, clear theme reads instantly at a glance, which is exactly what a lock screen needs. If the first try is not perfect, run this romantic ai wallpaper prompts for men and women hd 4k download guide once more with a slightly different input. Beginners love this romantic ai wallpaper prompts for men and women hd 4k download guide because the steps are easy to follow from start to finish.

    The light is the third lever. Soft warm light is the romantic signature: golden hour, candlelight, or warm bokeh. Harsh light makes romance feel cold, and flat light makes it feel dull. Name the warm light you want, and the mood follows. Keep the brightest area away from the clock, so the time stays readable against a calm background.

    The couple is the fourth lever. Silhouettes are the most versatile choice: they suit every viewer, they never look like strangers, and they read beautifully at small size. Detailed faces can feel like someone else’s romance, while silhouettes invite you to imagine your own. If you want faces, keep them soft and distant rather than sharp and close.

    Finally, the wallpaper must work as a pair. Lock screen and home screen are seen together, and a matching pair, same theme, same light, slightly different compositions, feels intentional and premium. Generate the lock screen first with a calm top third, then generate the home screen with the subject centered and the icons in mind, and the pair will greet every unlock as one coherent piece of art.

    Step-by-Step Guide

    Follow these steps to create a romantic wallpaper that is sharp, dreamy, and perfect on your real phone. Sharing the final result from this romantic ai wallpaper prompts for men and women hd 4k download guide is easy because the output is ready for social media.

    1. Pick one romantic theme. Choose a single clear sentence: a couple silhouette at sunset, roses in warm light, or a moonlit walk. One theme only. Write it down before you open any tool, because a clear sentence produces a clear image.
    2. Open ChatGPT or Gemini. Both generate beautiful wallpapers. ChatGPT’s romantic light is warmer and dreamier, while Gemini’s compositions are cleaner and its vertical framing more precise. Try ChatGPT first for the dreamy mood.
    3. Write the full prompt with the format included. Add “vertical 9 by 16 wallpaper, calm top third for the clock, dreamy warm light” to your theme sentence. The format instructions are as important as the theme, and forgetting them produces a landscape image that crops badly.
    4. Generate three versions. Never settle for the first generation. Generate three versions of the same theme, and compare them side by side: which has the calmest top third, the sharpest subject, and the warmest light? The best wallpaper is chosen, not generated.
    5. Upscale the sharpest version to 4K. Use the upscaler built into your generation tool, or a dedicated upscaler like Upscayl or the enhancement feature in your photo app. Upscale only the winner, and check that the upscale sharpened the subject without adding artifacts to the bokeh.
    6. Check it on your real phone. Save the wallpaper, set it as your lock screen, and look at it in real use: is the clock readable, is the subject clear, does anything hide behind the notch? A wallpaper that looks perfect on a monitor can fail on a phone, and only the real screen tells the truth.
    7. Adjust the crop. If the subject sits behind the clock, crop the image slightly or regenerate with “subject in the lower two-thirds.” If the edges feel crowded, crop a few percent from each side. Small crop adjustments fix most wallpaper problems.
    8. Set both screens and share the pair. Set the lock screen and a matching home screen, then share the pair with your partner or friends so they can make their own. A shared wallpaper becomes a shared ritual, and every unlock becomes a small reminder of the person you love.

    Common Mistakes to Avoid

    Generating in landscape. A landscape image cropped to a phone screen loses its sides and often its subject. Always ask for vertical 9 by 16 first, before anything else in the prompt. This romantic ai wallpaper prompts for men and women hd 4k download guide also works nicely when you want a matching set of edits for a full series.

    Crowding the top third. The clock and notifications live at the top. A busy, bright top third makes the time unreadable and the screen feel chaotic. Keep the top calm: soft sky, gentle bokeh, or a smooth gradient.

    Mixing themes. Two or three romantic ideas in one wallpaper compete and confuse. One theme, one mood, one light: that is the whole recipe for a wallpaper that reads instantly.

    Harsh light. Bright, cold, direct light makes romance feel clinical. Soft warm light is the signature. If the result feels cold, ask for “soft warm golden light” and regenerate.

    Skipping the phone check. A wallpaper judged only on a monitor is a guess. The real phone, with its clock, notch, and icons, is the only true test. Always check on the real screen before sharing.

    Best Tools for This Wallpaper

    ChatGPT is the finest wallpaper generator because its romantic light is warm and dreamy, its bokeh is soft and believable, and its vertical compositions are well balanced. For the dreamy, cinematic version of a romantic wallpaper, start with ChatGPT. You do not need advanced skills to use this romantic ai wallpaper prompts for men and women hd 4k download guide well, just follow the steps in order.

    Gemini is the best alternative, especially when precise vertical framing and clean compositions matter most. Its wallpapers are sharper at the edges, its top thirds are calmer, and its subjects sit more reliably in the lower two-thirds. Use Gemini when ChatGPT’s framing keeps hiding behind the clock.

    Upscayl is a free, excellent upscaler that sharpens wallpapers to 4K without the artifacts that some built-in enhancers add. It runs locally, keeps your image private, and produces clean, crisp results. Use it for the final upscale before setting the wallpaper.

    Frequently Asked Questions

    What size should a phone wallpaper be? Thousands of creators look for a reliable romantic ai wallpaper prompts for men and women hd 4k download guide because it delivers consistent results.

    For most modern phones, 1440 by 3200 pixels or higher is ideal, in a vertical ratio near 9 by 16 or 19.5 by 9. Generate at the highest resolution your tool offers, then upscale to 4K, so the image stays sharp on large, high-density screens. A clear romantic ai wallpaper prompts for men and women hd 4k download guide like this one removes the guesswork from the whole editing process.

    Can I use a photo of my partner and me? The best part is that this romantic ai wallpaper prompts for men and women hd 4k download guide works with free tools, so anyone can try it right away.

    Yes, and it is the most personal wallpaper of all. Upload your photo and ask the tool to transform it into a dreamy vertical wallpaper with soft warm light, keeping your faces natural. The result is a wallpaper that is unmistakably yours. You can reuse this romantic ai wallpaper prompts for men and women hd 4k download guide again and again and get a fresh look every single time.

    Why does my wallpaper look blurry on my phone? A well written romantic ai wallpaper prompts for men and women hd 4k download guide can save you time and still give you a clean, professional finish.

    Blur usually means the source image was too small or the upscale added softness instead of detail. Generate at the highest resolution, upscale only the sharpest version, and check the file size: a good 4K wallpaper is usually several megabytes, not a few hundred kilobytes. If you are new to this style, this romantic ai wallpaper prompts for men and women hd 4k download guide keeps the whole process simple and beginner friendly.

    Can I make matching wallpapers for two phones? Many creators start with this romantic ai wallpaper prompts for men and women hd 4k download guide and then adjust the small details to match their own style.

    Yes. Generate the same theme twice, once framed for each phone’s ratio, and the pair will match while fitting each screen perfectly. Matching wallpapers are a lovely gesture for couples, and they photograph beautifully side by side.

    How often should I change my wallpaper?

    Whenever the season or the mood changes. Many people change wallpapers monthly, with the seasons, or on anniversaries. A fresh wallpaper is a small, daily joy, and generating a new one takes only minutes.

    Final Words

    Pick a theme you love, make it sharp, and let romance greet every unlock. Generate the sunset silhouette for the lock screen, the moonlit walk for the home screen, and the rainy evening for the anniversary, and let each one turn an ordinary glance at your phone into a small moment of warmth.

    The wallpaper is the most personal art you own: it is the first thing you see in the morning and the last thing you see at night, and it deserves to be beautiful. Make it dreamy, make it sharp, make it yours, and let love be the first thing your screen says, every single time. This romantic ai wallpaper prompts for men and women hd 4k download guide is a great choice when you want a polished result without spending hours on manual editing.

  • 15 August Patriotic Bike Edit Tutorial

    15 August Patriotic Bike Edit Tutorial

    Patriotic bike edit made with the 15 August patriotic bike edit tutorial

    Introduction

    A bike ride with the national flag is a classic Independence Day reel, and this 15 August patriotic bike edit tutorial shows you how to make it look professional. A steady bike pass, tricolour smoke, and drum-beat cuts turn a simple ride into a proud celebration video.

    The edit works with any bike and any phone camera. Film one clean pass, add the smoke and the cuts in the editor, and grade it warm like morning light. The steps below take you from filming to posting without any advanced skills.

    Bike pass with national flag mounted riding in morning light

    How to Use This 15 August Patriotic Bike Edit Tutorial

    1. Mount the flag securely before filming and test it at slow speed, because a flag that folds or slips will ruin the best shots.
    2. Film two or three passes from different angles so you have enough clean footage to cut on the beat without repeating the same shot.
    3. Edit with the steps above, export vertical, and share the reel early on Independence Day morning for maximum views.
    Tricolour smoke overlays with drum-beat cut pattern in a bike edit

    Quick Tutorial

    1. Film a slow bike pass with the flag mounted firmly and the camera steady. Ride past the camera at a calm, even speed and keep the flag flying fully open for the whole pass.
    2. Import the clip into your editor and add tricolour smoke overlays behind the bike. Keep the smoke soft and behind the rider so the flag stays clearly visible.
    3. Cut the clip to a drum-beat pattern, placing a cut on every strong beat. Short clips of two to three seconds each keep the energy high and the reel moving.
    4. Grade the video with warm morning tones, add a flag-wave transition at the end, and export in vertical format. Watch it once with sound to confirm every cut lands on the beat.
    5. Add a short Independence Day caption and post it on the morning of 15 August, when patriotic reels get their highest reach of the year.

    Pro Tips

    • Film in the early morning when the light is warm and the roads are quiet, because golden light makes the flag colours glow.
    • Keep the bike speed slow and steady, since fast riding makes the footage shaky and the flag hard to follow.
    • Ride safely and keep the flag mount legal and secure, because no reel is worth a dangerous ride or a falling flag.
    Patriotic bike video editing with warm tones and flag wave transition

    Before You Film: Flag Mounting, Safety, and Planning

    The tutorial’s first step, mounting the flag firmly, deserves a full section of its own, because a bad mount ruins footage and a loose flag is dangerous. Start with the mount itself. Use a purpose-made flag holder that clamps to the bike’s rear or pillion footrest, never tape or loose string. The holder must grip the pole tightly enough that the flag cannot rotate, slide, or slip at riding speed.

    Test it by hand first: pull the pole firmly in every direction, and if it moves at all, tighten or replace the mount before you ride. Used well, the 15 august patriotic bike edit tutorial can make the whole result feel more polished and professional. Used well, the 15 august patriotic bike edit tutorial can make the whole result feel more polished and professional. Used well, the 15 august patriotic bike edit tutorial can make the whole result feel more polished and professional.

    Choose the flag size carefully. A flag that is too large will catch the wind, pull the bike sideways, and fold over itself, hiding the colours. A flag roughly the size of a large hand towel, mounted high enough to fly clear of the bike and the rider, is ideal for reels. The flag must fly fully open for the whole pass, so test it at slow speed on a quiet road first. Ride at the speed you plan to film, watch the flag in a mirror or ask a friend to watch, and adjust the mount angle until the flag streams cleanly behind the bike without wrapping around the pole.

    Safety comes before footage, always. Ride at a calm, even speed, wear a helmet, and keep both hands on the handlebars except for the brief moments the shot requires. Never ride one-handed at speed to hold a flag, never ride on a busy road for a reel, and never mount a flag in a way that blocks your mirrors, lights, or number plate.

    Check local rules about flags on vehicles, because some areas restrict flag sizes or mounting positions, and a legal, secure mount protects you as well as the footage. Film on a quiet road in the early morning, when traffic is light and the light is warm, and bring a friend to watch the road while you focus on the ride.

    Plan the shoot like a small film. Decide the route: a straight, clean stretch of road with a good background, such as trees, a wall, or open fields, and no parked cars or clutter. Walk the route first and note where the light falls, because a pass filmed into the sun will silhouette the rider, while a pass filmed with the sun behind the camera will glow. Plan two or three camera positions: a front three-quarter view as the bike approaches, a side view at the closest point, and a rear view as it rides away. Each angle gives you a different cut for the drum-beat edit, and together they make the reel feel professionally shot.

    Expanding the Filming Steps: Angles, Settings, and Takes

    The tutorial says to film two or three passes from different angles. Here is exactly how to shoot each angle so the footage cuts together cleanly. For the front three-quarter angle, place the camera at the side of the road, about ten metres ahead of the bike’s path, angled to catch the approach. The bike should enter the frame from the distance, grow larger, and pass the camera.

    This angle shows the flag flying toward the viewer, which is the most powerful opening shot. That is exactly why the 15 august patriotic bike edit tutorial has become a favourite with so many creators. That is exactly why the 15 august patriotic bike edit tutorial has become a favourite with so many creators. That is exactly why the 15 august patriotic bike edit tutorial has become a favourite with so many creators.

    For the side angle, place the camera perpendicular to the road at the midpoint of the pass, at about waist height. The bike should cross the frame from one side to the other in two to three seconds. This is the shot that carries the drum-beat cuts, because the crossing motion matches the music’s energy. Keep the camera perfectly still for this angle; a moving camera will make the crossing feel seasick.

    For the rear angle, place the camera behind the bike’s path, catching the rider moving away with the flag streaming behind. This angle closes the reel beautifully, because the flag recedes into the distance and the video feels like a departure into the celebration. Film all three angles at the same speed and in the same light, so the cuts match. If the light changes between passes, the grade will not save the mismatch, and viewers will feel the edit even if they cannot name why.

    Camera settings matter more than camera quality. Shoot in 1080p at 60fps, which gives you smooth slow-motion options and clean vertical crops. Lock the exposure and focus before each pass, so the brightness does not pump up and down as the bike moves. If your phone offers it, lock the white balance to daylight, because auto white balance will shift the flag’s colours as the bike passes through shade. Shoot vertical 9:16 natively if your editor supports it, or shoot horizontal and crop carefully, keeping the rider and flag centred in the vertical frame.

    Film more takes than you think you need. Three clean passes per angle is the minimum, because the first pass usually has a wobble, the second has a flag fold, and the third is the keeper. Between takes, check the flag, check the mount, and check the footage on the phone before riding again. Thirty seconds of checking between takes saves an hour of editing around a flaw you only notice at home.

    Deep Dive: Tricolour Smoke, Beat Cuts, and Grading

    The smoke overlays are the signature effect of this edit, and they need care. Add the smoke in your editor as an overlay layer above the bike clip, and set its blend mode to Screen or Lighten, so the dark parts of the smoke disappear and only the coloured glow remains. Place the smoke behind the bike in the frame, not across it, by positioning the overlay low and wide, and masking the rider if your editor allows it.

    The smoke should trail behind the bike like a celebration, never cover the flag or the rider’s face. With a little practice, the 15 august patriotic bike edit tutorial becomes quick and easy to repeat. With a little practice, the 15 august patriotic bike edit tutorial becomes quick and easy to repeat. With a little practice, the 15 august patriotic bike edit tutorial becomes quick and easy to repeat.

    Use three separate smoke clips, one for each colour, rather than one pre-mixed tricolour clip. Separate clips let you control the position of each colour: saffron high, white in the middle, green low, matching the flag’s order. Keep each smoke layer’s opacity between forty and sixty percent, because full-strength smoke looks like a filter pasted over the video. Soft, translucent smoke that drifts and fades reads as atmosphere; opaque smoke reads as an error.

    The drum-beat cuts are the heartbeat of the reel. Import the music first, and use your editor’s beat detection or tap along to mark every strong beat. Place a cut on every strong beat, and make each clip two to three seconds long, as the tutorial says.

    But do not cut mechanically: the cut must land on a moment of motion, such as the bike entering the frame, the flag snapping open, or the rider passing the camera. A cut on a beat with no motion feels empty, while a cut on a beat with motion feels electric. If a beat falls on a dull moment, shift the clip by half a second so the motion and the beat arrive together.

    Grading ties the whole reel together. Apply a warm morning grade: lift the warmth, deepen the shadows slightly, and add a gentle golden tint to the highlights. The flag’s colours should glow, so increase the saturation of oranges and greens very slightly, but never so much that the skin turns orange. Grade every clip identically, and compare them side by side before exporting. If one angle looks cooler than the others, fix it now, because mismatched grades break the illusion of one continuous ride.

    The flag-wave transition at the end deserves attention. Use a transition that mimics the flag’s own movement, such as a gentle wave or a soft zoom into the waving flag, and place it on the final beat. The transition should close the reel, not interrupt it, so keep it slow and let the final frame hold for a full beat before the video ends. Export in 1080 by 1920, watch the whole reel with sound on a phone, and confirm every cut lands on a beat before posting.

    Variations: Group Rides, Night Edits, and Different Bikes

    Once the basic solo bike edit works, these variations let you reuse the same skills for different Independence Day reels all week. The 15 august patriotic bike edit tutorial works best when you keep the setup simple and follow the steps in order. The 15 august patriotic bike edit tutorial works best when you keep the setup simple and follow the steps in order. The 15 august patriotic bike edit tutorial works best when you keep the setup simple and follow the steps in order.

    Group Ride Formation

    Film three or four bikes riding in formation, flags flying, on a wide road. The formation is the visual payoff, so rehearse the spacing before filming: bikes in a staggered line, each flag visible, no bike hiding another. Film from the front three-quarter angle so the formation approaches the camera together. Cut on the beat as the formation passes, and the reel will feel like a parade.

    Night Flag Ride

    Film at dusk with the bike’s lights on and the flag lit by a small clip-on light. The dark background makes the flag glow, and the headlight beam adds drama. Keep the ride slow and the road empty, because night filming is less forgiving of wobbles. The night version suits the evening of 15 August, when the day’s celebrations turn reflective.

    Scooter and Cycle Versions

    The same tutorial works for scooters and bicycles, with one change: the speed is lower, so the flag needs a smaller size to fly fully open. A small flag on a cycle, filmed from a low angle with the same drum-beat cuts, produces a charming, accessible reel that younger viewers can copy. The democratisation is the point: anyone with any ride can make a proud reel.

    Vintage Bike Tribute

    Film a classic or vintage bike with the flag, in warm sepia-leaning tones, for a nostalgic tribute to the freedom struggle. The vintage bike and the warm grade together evoke history, and the reel suits captions about the journey to freedom. Keep the pace slower and the cuts gentler than the standard version, because nostalgia needs room to breathe.

    Troubleshooting Common Problems

    The flag keeps folding. The flag is too large, the mount angle is wrong, or the speed is too low. Try a smaller flag, angle the mount slightly upward so the wind catches the flag’s top edge, and ride a touch faster on a quiet road. If the flag still folds, film the pass with the wind behind you, so the breeze holds the flag open. Many beginners start with the 15 august patriotic bike edit tutorial because the results look clean and natural. Many beginners start with the 15 august patriotic bike edit tutorial because the results look clean and natural.

    The footage is shaky. The camera was handheld at the wrong height, or the bike was too fast. Use a small tripod or rest the phone on a stable surface for the side angle, and slow the bike to a calm, even pace. Stabilisation in the editor helps, but it cannot rescue violently shaky footage, so fix the filming first.

    The smoke covers the flag. The overlay is positioned too high or its opacity is too strong. Lower the smoke layer, reduce its opacity below sixty percent, and mask the flag area if your editor allows it. The smoke must stay behind and below the flag, never across it.

    The cuts feel off-beat. The clips were cut to the timeline, not to the music. Re-mark the beats with the editor’s beat detection, and nudge each cut until it lands exactly on a strong beat with a moment of motion. Half a second of nudging transforms a reel from amateur to professional.

    The grade looks different across angles. The light changed between passes, or the white balance shifted. Re-grade the outlier clips to match the hero angle, using the flag’s colours as your reference. If the difference is severe, refilm the outlier angle in the same light rather than fighting the grade.

    Best Tools for This Edit

    CapCut is the best editor for this tutorial, because its overlay system handles the tricolour smoke easily, its beat detection marks the drum pattern, and its transitions include flag-wave styles. The free version covers everything, including speed controls and warm grading presets. Use the phone app for quick checks and the desktop version for precise beat cutting. A careful pass with the 15 august patriotic bike edit tutorial can lift an ordinary attempt into something special. A careful pass with the 15 august patriotic bike edit tutorial can lift an ordinary attempt into something special.

    VN Video Editor is a strong alternative for editors who want manual control over the smoke masking and the grade. Its multi-layer timeline handles three separate smoke colours cleanly, and its colour curves let you build the warm morning grade precisely. VN suits the group ride and night versions, where masking and grading need more care.

    Canva is useful for the caption card and the cover frame. Design a simple cover with the sharpest flag frame and one line of patriotic text, and keep it consistent if you post a series across the week. A clean cover helps the reel get opened, and the edit itself does the rest.

    Frequently Asked Questions

    Is it legal to mount a flag on a bike? Rules vary by location, so check local regulations before filming. In general, a small, securely mounted flag that does not block lights, mirrors, or the number plate is acceptable for a short celebratory ride. Ride safely, keep speeds low, and remove the flag after filming if you are unsure. Once you try the 15 august patriotic bike edit tutorial, you can adjust the small details to match your own style. Once you try the 15 august patriotic bike edit tutorial, you can adjust the small details to match your own style.

    What if I do not have a bike? The same edit works for scooters, cycles, and even walking with a flag. The tutorial’s principles, steady movement, smoke behind the subject, drum-beat cuts, and warm grading, apply to any moving flag shot. A walking flag reel filmed with the same care will perform just as well. In short, the 15 august patriotic bike edit tutorial keeps the whole process fast, free and fun. In short, the 15 august patriotic bike edit tutorial keeps the whole process fast, free and fun.

    Can I use a different song? Yes, provided it has a strong, regular drum beat. Patriotic songs, drum-heavy instrumentals, and folk beats all work. Avoid slow or lyric-heavy songs, because the cuts need a beat to land on. Test the song by tapping along: if you can tap a steady beat, the song will cut well. For a reliable finish, save the 15 august patriotic bike edit tutorial and reuse it whenever you need this look. For a reliable finish, save the 15 august patriotic bike edit tutorial and reuse it whenever you need this look.

    How early on 15 August should I post? Early morning, between 6 and 9 am, when patriotic content gets its highest reach and the feed is fresh. Schedule the reel the night before if your app allows it, so it posts automatically at dawn. Morning posts also catch school and office audiences before their day begins. That simple approach is what makes the 15 august patriotic bike edit tutorial so popular right now. That simple approach is what makes the 15 august patriotic bike edit tutorial so popular right now.

    Why does my reel look amateur even after following the steps? Almost always the answer is one of three things: shaky footage, off-beat cuts, or mismatched grades. Fix the filming first, then the beat timing, then the grade, in that order. Most reels become professional with those three fixes alone, and no new effects are needed. Shared widely by creators, the 15 august patriotic bike edit tutorial keeps delivering consistent results. Shared widely by creators, the 15 august patriotic bike edit tutorial keeps delivering consistent results.

    Final Words

    This 15 August patriotic bike edit tutorial proves a proud reel needs only a flag, a bike, and clean cuts. Film steady, cut on the beat, and let the flag fly high. Keep the finished reel saved in your camera roll as well as posted, so you can share the same proud edit again next year without filming the whole ride again. Plan the mount carefully, scout the road in the morning light, and the reel will honour the day as it deserves.

    The flag has flown for decades; your edit is simply the newest way to carry it forward, and a careful edit carries it well. If you want a dependable option, the 15 august patriotic bike edit tutorial is hard to beat for this style. If you want a dependable option, the 15 august patriotic bike edit tutorial is hard to beat for this style.