Category: Photo Prompts

  • Cinematic Night Sunlight Photo Edit Prompts

    Cinematic Night Sunlight Photo Edit Prompts

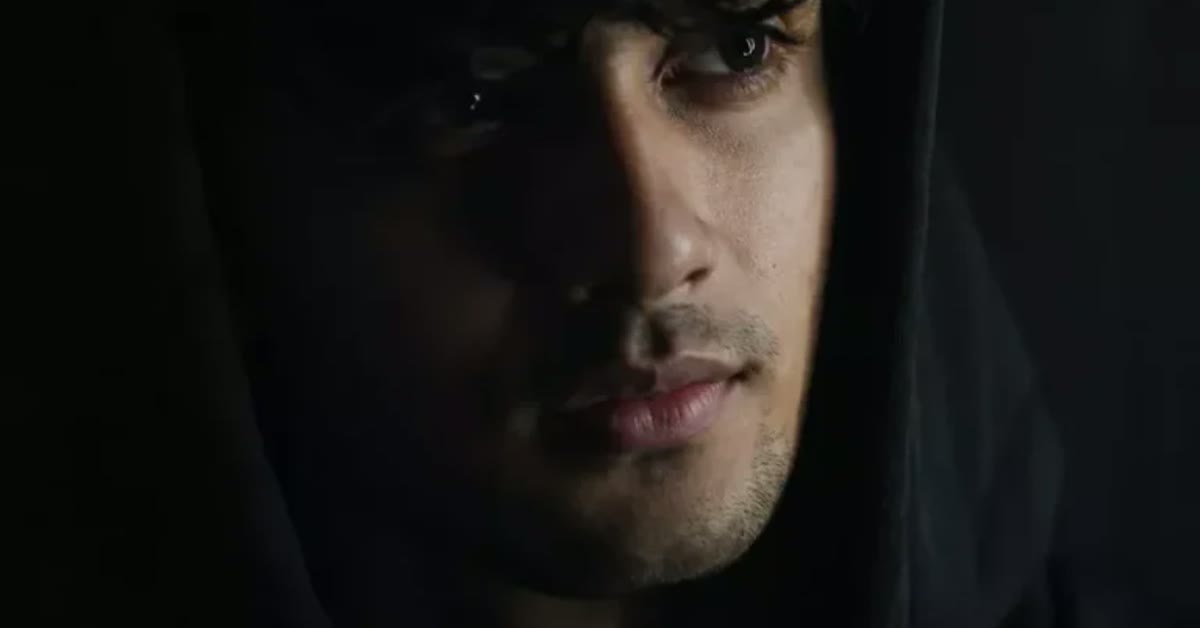
    Viral Cinematic Night Sunlight Photo Editing Prompts example

    Introduction

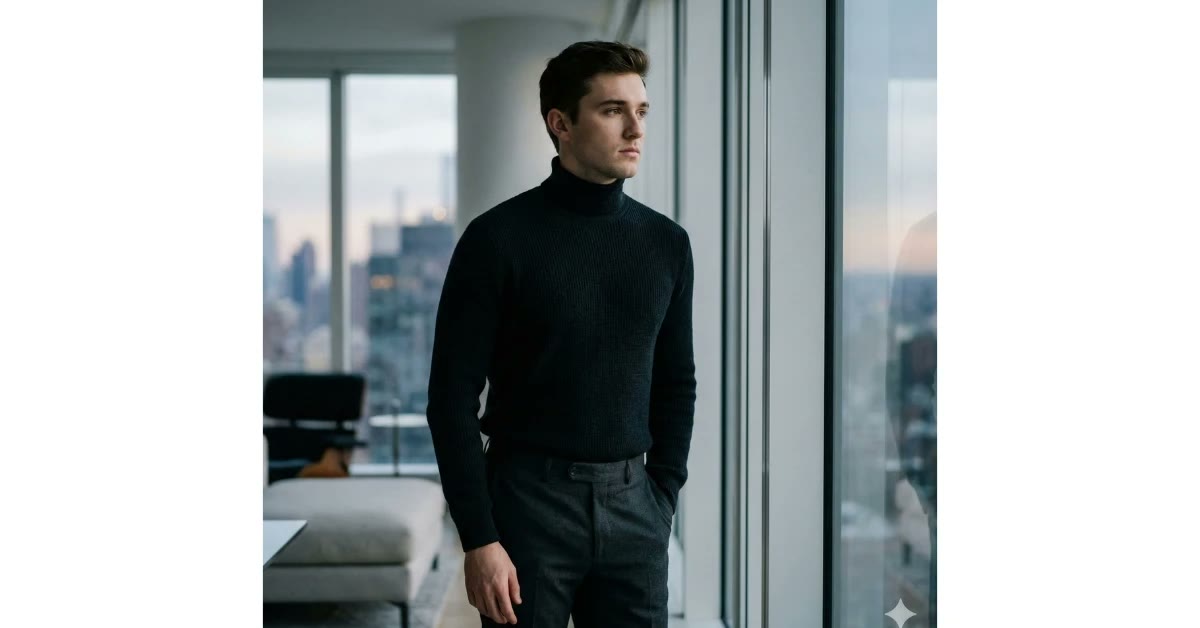
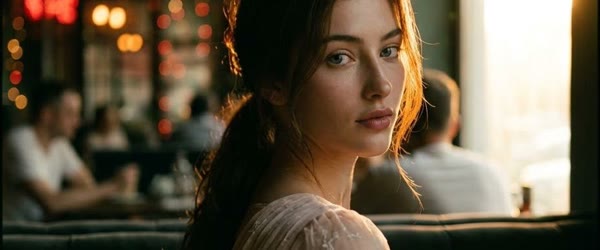
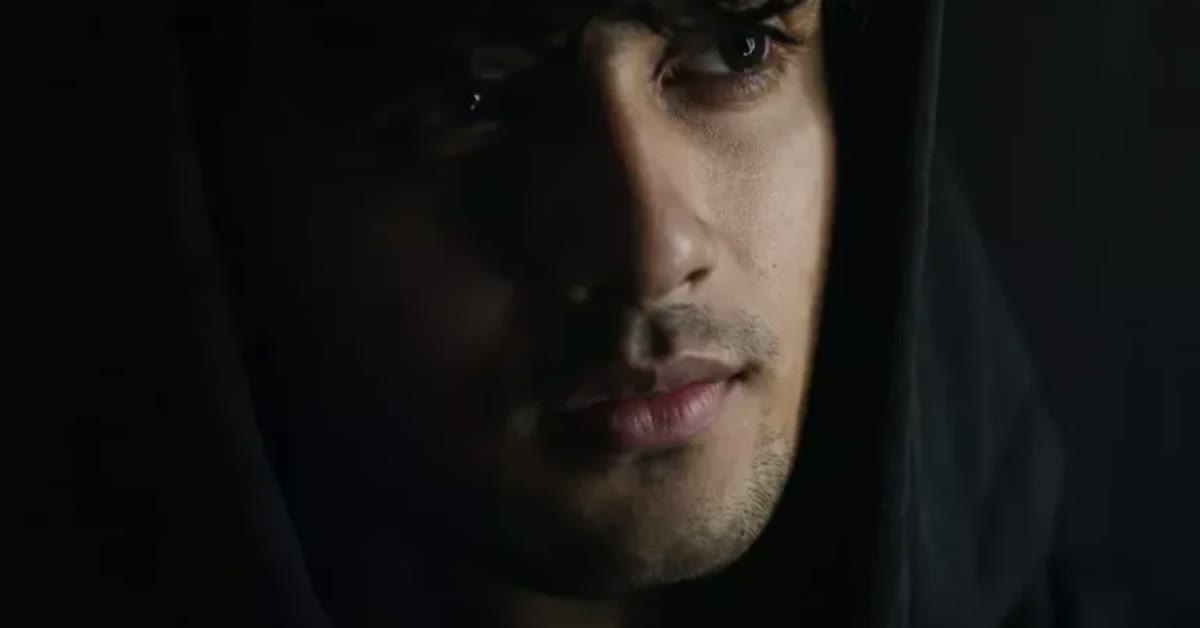
    The viral cinematic night sunlight photo editing prompts build a striking contrast: warm sunlight breaking through a dark night scene. Glowing highlights on the face sit against deep blue shadows, and the result feels like a still from a thoughtful film. This viral cinematic night sunlight photo editing prompts makes the whole process feel simple from start to finish.

    This look suits a quiet, thoughtful expression and a simple street background. It works best on photos where the subject is already separated from a darker backdrop, so the light has a stage to perform on. For more background, see Night photography. With a good viral cinematic night sunlight photo editing prompts, you can get a polished result in just a few minutes.
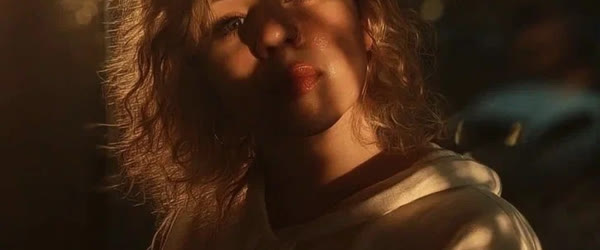
    Warm sunlight highlights on a face against deep blue night shadows

    How to Use These Viral Cinematic Night Sunlight Photo Editing Prompts

    1. Choose a photo with a dark background. A night shot or a shaded portrait gives the sunlight effect room to stand out.
    2. Paste the prompt with your photo. Keep the wording as written for the first result, so the warm highlights and blue shadows balance together.
    3. Tune the contrast. If the shadows swallow detail, ask for slightly softer darkness. If the glow feels weak, ask for stronger sunlight.
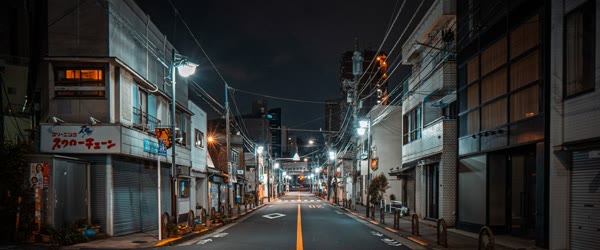
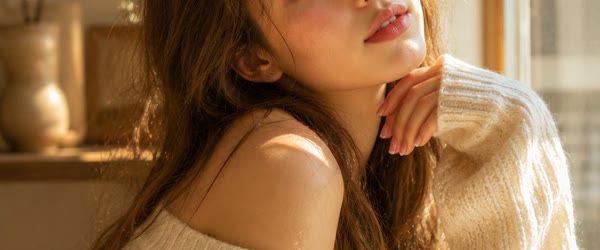
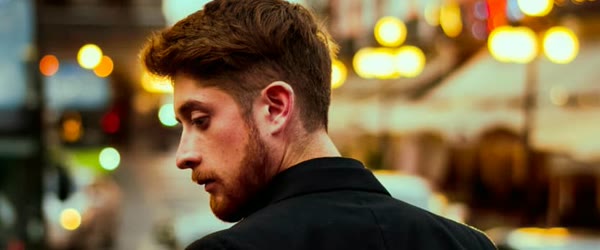
    Quiet street background with gentle haze and thoughtful expression

    Copy-Paste Prompt

    Create a cinematic night portrait lit by warm sunlight breaking through darkness, with glowing highlights on the face and deep blue shadows behind. Add gentle haze, a quiet street background, and a thoughtful expression. Keep the contrast dramatic yet natural, with ultra-realistic skin texture, 4K detail, and cinematic lighting.

    Pro Tips

    • Keep the expression thoughtful. A calm, looking-away gaze suits the night mood better than a direct smile.
    • Use haze lightly. Gentle haze softens the scene, while heavy haze hides the contrast that makes the look work.
    • Crop for the mood. A wider crop with the dark street visible sells the night setting better than a tight face crop.
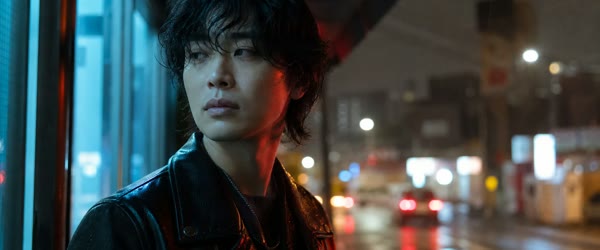
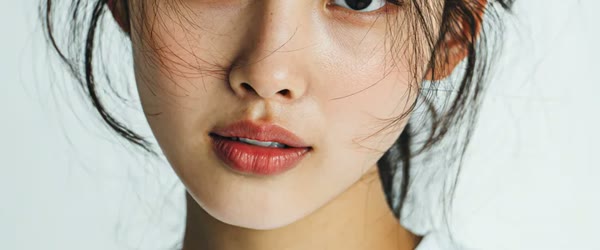
    Dramatic night portrait with natural contrast and cinematic light

    More Prompts to Try

    The night-sunlight idea — warm light breaking through darkness, glowing highlights, deep blue shadows — is a lighting pattern that works in many settings. The variations below are original prompts that keep the pattern and change the place, so one lighting idea produces a whole series of dramatic night portraits. Each prompt keeps the contrast dramatic yet natural, the skin texture realistic, and the expression thoughtful.

    Streetlamp night portrait. Use this for a portrait under a single streetlamp with pools of warm light. You can reuse this viral cinematic night sunlight photo editing prompts for many different photos and clips.

    Create a cinematic night portrait lit by a single streetlamp, with glowing highlights on the face and deep blue shadows behind. Add gentle haze, a quiet street background, and a thoughtful expression. Keep the contrast dramatic yet natural, with ultra-realistic skin texture, 4K detail, and cinematic lighting.

    Window-light night portrait. Use this for an indoor portrait lit by warm window light against a dark room.

    Create a cinematic night portrait lit by warm light through a window, with glowing highlights on the face and deep blue shadows behind. Add gentle haze, a quiet room background, and a thoughtful expression. Keep the contrast dramatic yet natural, with ultra-realistic skin texture, 4K detail, and cinematic lighting.

    Neon night portrait. Use this for a city portrait with neon signs providing the warm and cool light.

    Create a cinematic night portrait lit by neon signs, with glowing highlights on the face and deep blue shadows behind. Add gentle haze, a quiet neon street background, and a thoughtful expression. Keep the contrast dramatic yet natural, with ultra-realistic skin texture, 4K detail, and cinematic lighting.

    Candlelight night portrait. Use this for a portrait lit by candle flame with flickering warm highlights.

    Create a cinematic night portrait lit by candlelight, with glowing highlights on the face and deep blue shadows behind. Add gentle haze, a quiet dark background, and a thoughtful expression. Keep the contrast dramatic yet natural, with ultra-realistic skin texture, 4K detail, and cinematic lighting.

    Moonlight night portrait. Use this for an outdoor portrait under moonlight with cool silver highlights.

    Create a cinematic night portrait lit by moonlight, with glowing highlights on the face and deep blue shadows behind. Add gentle haze, a quiet open background, and a thoughtful expression. Keep the contrast dramatic yet natural, with ultra-realistic skin texture, 4K detail, and cinematic lighting.

    Firelight night portrait. Use this for a portrait beside a small fire with dancing warm light.

    Create a cinematic night portrait lit by firelight, with glowing highlights on the face and deep blue shadows behind. Add gentle haze, a quiet camp background, and a thoughtful expression. Keep the contrast dramatic yet natural, with ultra-realistic skin texture, 4K detail, and cinematic lighting.

    How to Customize This Prompt

    Customizing a night-sunlight prompt means protecting the contrast while changing the light source. The prompt’s identity is the pattern: one warm light breaking through darkness, glowing highlights on the face, deep blue shadows behind. Change the light source — streetlamp, window, neon, candle, moon, fire — and keep the pattern, and every version will feel like the same lighting idea in a new place.

    Start with the light source, since it decides the colour and the shape of the highlights. A streetlamp gives a round pool of warm light; a window gives a rectangular shaft; neon gives coloured edges; candlelight gives flicker. Name the source concretely and describe its shape, because the shape of the light is what the viewer reads first. This viral cinematic night sunlight photo editing prompts is a handy option when you need a quick but striking result.

    Next, set the background to stay dark and quiet. The deep blue shadows need a background that recedes: a quiet street, a dark room, an open night sky. Avoid busy, bright backgrounds, which compete with the highlights and flatten the contrast. The background’s job is to be dark enough that the warm light has something to break through. For anyone short on time, this viral cinematic night sunlight photo editing prompts keeps things fast and simple.

    Then tune the contrast to stay dramatic yet natural. “Dramatic yet natural” is a deliberate balance: the shadows should be deep but not empty, the highlights glowing but not blown. If the face vanishes into shadow, ask for “slightly softer shadows.” If the highlights blow out, ask for “gentler highlights.” One adjustment per follow-up keeps the balance controlled. This viral cinematic night sunlight photo editing prompts is easy to customize, so every result can look a little different.

    Finally, protect the skin texture and the expression. Night portraits tempt over-smoothing, because darkness hides detail and the AI fills it with plastic skin. Ask for “ultra-realistic skin texture” in every version, and keep the expression thoughtful — the night mood depends on a face that seems to be thinking, not performing. Plenty of beginners start with this viral cinematic night sunlight photo editing prompts because the steps never feel confusing.

    Step-by-Step Guide

    1. Choose a photo with a visible face and a relatively dark background. Night edits work best when the source already has some darkness to build on; a bright midday photo fights the pattern at every step.
    2. Pick the light source that fits the story. Streetlamp for city, window for indoor, neon for urban energy, candle for intimacy, moon for solitude, fire for warmth. The source decides the portrait’s genre.
    3. Paste the prompt unchanged with your photo. Judge the first result on the light pattern alone: one warm source, glowing highlights, deep blue shadows. If the pattern is there, the portrait works.
    4. Check the face at full size. The highlights should model the face — forehead, cheek, jaw — without blowing out, and the shadows should hold detail. Zoom in before judging, since night detail hides at thumbnail size.
    5. Refine the contrast in one follow-up. Adjust the shadows or the highlights, never both at once, so you can see what each change does to the balance.
    6. Build the series with variations. Run two or three light-source variations on the same photo to create a matching night series. Shared contrast and mood make the series feel like one night.
    7. Check the series at post size. Night portraits are often viewed on bright phone screens, where deep shadows can look muddy. View the set at normal brightness, not full brightness, to judge honestly.
    8. Save the prompt family together. Keep the main prompt and the variations you used in one note, so the next night portrait starts from a proven lighting pattern.

    Common Mistakes to Avoid

    The most common mistake is starting with a bright, flat photo. Night-sunlight editing needs darkness to work with, and a noon-bright source forces the AI to darken everything artificially, producing a muddy result. Choose the darkest clear photo you have, or accept a softer, dusk-like version instead. Once you try this viral cinematic night sunlight photo editing prompts, saving and posting your edit takes almost no time.

    Another mistake is pushing the contrast until the shadows go empty. Deep shadows should still hold a hint of detail — the edge of a collar, the shape of the background. Pure black holes in the frame read as errors, not drama. Ask for “deep but detailed shadows” if the darkness swallows the portrait. This viral cinematic night sunlight photo editing prompts makes the whole process feel simple from start to finish.

    A third mistake is letting the highlights blow out. Glowing highlights are the signature, but blown highlights erase the skin and turn the face into a white mask. If the forehead or cheek loses all detail, ask for “gentler, softer highlights” and regenerate. With a good viral cinematic night sunlight photo editing prompts, you can get a polished result in just a few minutes.

    A fourth mistake is mixing light sources. A streetlamp plus neon plus moonlight in one portrait produces conflicting shadows and a confused mood. One light source per portrait is the rule; the pattern’s power comes from its singularity. Many creators pick this viral cinematic night sunlight photo editing prompts when they want a trending look without extra effort.

    A fifth mistake is over-smoothing the skin in the dark. Night portraits hide texture, and the AI often fills the darkness with waxy smoothness. Insist on realistic skin texture in every version, and check the skin at full size before calling the portrait done. The nice thing about this viral cinematic night sunlight photo editing prompts is that beginners can follow it with ease.

    Best Tools for This Edit

    ChatGPT’s image tools are a strong first choice for night-sunlight portraits, because they render dramatic light, haze, and deep shadows confidently in one pass. They are especially good at the glowing-highlight pattern, which is the hardest part of the look to fake. Use ChatGPT when you want the boldest, most cinematic night result from an ordinary photo. This viral cinematic night sunlight photo editing prompts gives you a strong starting point that you can adjust freely.

    Google Gemini is a good alternative when the source photo must stay recognisable and the edit should feel like a better version of the real picture. Its low-light rendering stays natural and its skin texture holds up in shadow. The drama may come out softer in Gemini, so add “stronger contrast” if the first result feels too gentle.

    CapCut is the finishing tool for turning night portraits into reels and stories. Its glow, fade, and slow-zoom tools extend the night mood into motion, and its crop tools reframe the portrait for stories and feeds. Export the portrait at the highest quality first, then do all motion and text work in CapCut so the still and the video share one grade.

    Frequently Asked Questions

    Will this prompt work on a daytime photo? Partly. The AI will darken the scene and add the night pattern, but a bright source fights the transformation and the result often looks like a filter rather than a night portrait. For the strongest result, start from the darkest clear photo you have. Many creators pick this viral cinematic night sunlight photo editing prompts when they want a trending look without extra effort.

    Why does my edit look muddy instead of dramatic? The shadows probably went empty or the highlights went flat. Ask for “deep but detailed shadows” and “gentler highlights,” and check the result at normal screen brightness, where muddiness shows most honestly. The nice thing about this viral cinematic night sunlight photo editing prompts is that beginners can follow it with ease.

    Can I use this for a couple portrait? Yes, if both faces catch the same light source. Ask for the warm light to fall on both faces evenly, and check both at full size — night light that flatters one face can leave the other in darkness. Try this viral cinematic night sunlight photo editing prompts once and you will see how quickly the edit comes together.

    Is the haze necessary? It helps, because haze makes the light visible — the beam, the glow, the atmosphere. But it must stay gentle. Heavy haze veils the face; light haze frames it. Ask for “gentle haze” and pull back if the face softens. A well-built viral cinematic night sunlight photo editing prompts saves time while still leaving room for your own style.

    How do I keep the blue shadows from looking cold and dead? Keep a hint of warmth in the shadows by asking for “deep blue shadows with a warm undertone.” Pure cold blue reads as lifeless; blue with warmth reads as night. Sharing the final result of this viral cinematic night sunlight photo editing prompts is easy on any social platform.

    Final Words

    One warm light, deep blue shadows, and a thoughtful face are all this pattern needs. Try it on a dark, clear portrait and watch the night come alive around the light. This viral cinematic night sunlight photo editing prompts also works well when you want to add your own text and colors.

    Build the series light source by light source, keep the contrast dramatic yet natural, and the night portraits will feel like frames from one long, quiet film. That consistency is what turns a lighting trick into a style. If you want a clean and modern finish, this viral cinematic night sunlight photo editing prompts is a smart place to start.

    Warm light against deep blue dark is the whole idea. Try it on a night portrait and watch an ordinary photo turn cinematic. Every step in this viral cinematic night sunlight photo editing prompts is designed to stay clear for first-time users.

    Try the prompt on a rainy night photo as well, since wet streets reflect the warm light and double the cinematic effect. If you want a series, shoot three portraits in the same dark street at different hours and grade them identically, so the set feels like frames from one film. A wider crop with the street visible sells the setting better than a tight crop, so keep the background in the frame. When the contrast feels too harsh on a phone screen, ask for a slightly softer version for posting. This viral cinematic night sunlight photo editing prompts keeps the workflow light, so you can focus on the creative side.
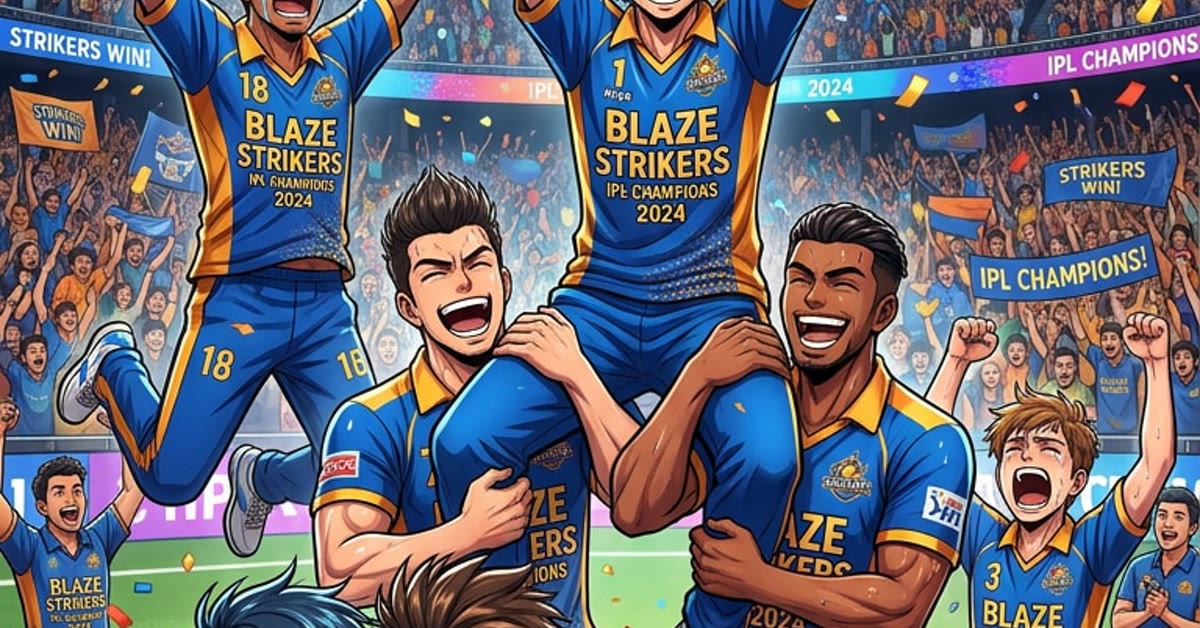
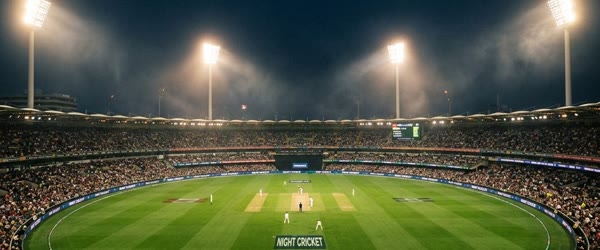
  • IPL Photo Editing Prompts for Cricket Fans

    IPL Photo Editing Prompts for Cricket Fans

    IPL AI Photo Editing Prompts Gemini ChatGPT example

    Introduction

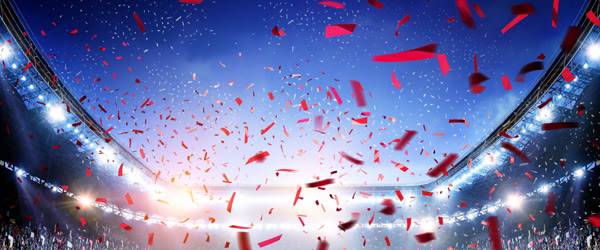
    IPL AI photo editing prompts for Gemini and ChatGPT turn a simple photo into a stadium moment. Team colours, floodlights, confetti, and a roaring crowd give the edit the energy of a match night, and the prompt below builds all of it in one pass. This guide walks you through the ipl ai photo editing prompts gemini chatgpt in a clear and friendly way. This ipl ai photo editing prompts gemini chatgpt makes the whole process feel simple from start to finish.

    This style is made for fans. Whether you support a team or just love the game, the edit works best when the expression is full of excitement and pride, like a celebration frozen mid-shout. With a good ipl ai photo editing prompts gemini chatgpt, you can get a polished result in just a few minutes.

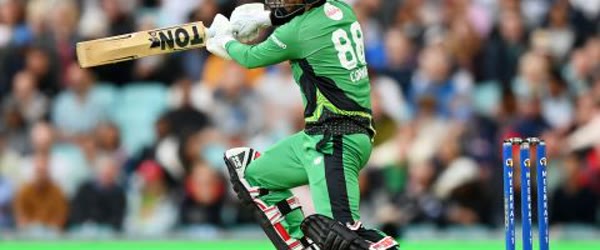
    Cricket fan in team colours holding a bat in a stadium

    How to Use These IPL AI Photo Editing Prompts for Gemini and ChatGPT

    1. Pick a photo with energy. An action pose or a cheering expression gives the stadium edit something real to amplify.
    2. Paste the prompt with your photo. Name your team colours in place of the general wording if you want a specific team look.
    3. Tune the crowd and confetti. If the background feels busy, ask for a stronger blur. If the celebration feels flat, ask for more confetti.
    Confetti and crowd blur in a bold cricket photo edit

    Copy-Paste Prompt

    Create an energetic IPL cricket fan photo edit with the subject in team colours, holding a bat, in a packed stadium under floodlights. Add confetti, dramatic crowd blur, and bold contrast. Keep the expression full of excitement and pride, with ultra-realistic detail, 4K sharpness, and cinematic stadium lighting.

    Pro Tips for the Best IPL AI Photo Editing Prompts Gemini ChatGPT

    • Keep the face clear. Confetti and crowd blur should frame the subject, never cover the expression.
    • Use bold contrast. Strong contrast is what makes stadium lights feel bright and the night feel electric.
    • Try it on match day. Posting the edit during a live match gives it the audience it deserves.
    Determined cricket pose with dramatic contrast and floodlight glow

    More Prompts to Try

    Cricket fandom has endless moments — the six, the wicket, the trophy lift, the painted face in the crowd — and each one is a different photo edit. The variations below are original prompts in the same energetic language: team colours, stadium floodlights, confetti, crowd blur, and bold contrast. Each one changes the moment while keeping the excitement and pride, so the set feels like a whole match day rather than one pose.

    Batsman cover drive. Use this for a classic batting shot with the bat mid-swing and the crowd blurred behind. You can reuse this ipl ai photo editing prompts gemini chatgpt for many different photos and clips.

    Create an energetic IPL cricket fan photo edit with the subject in team colours, playing a cover drive with a bat, in a packed stadium under floodlights. Add confetti, dramatic crowd blur, and bold contrast. Keep the expression focused and proud, with ultra-realistic detail, 4K sharpness, and cinematic stadium lighting.

    Trophy celebration. Use this for a trophy-lift moment with golden confetti and teammates cheering.

    Create an energetic IPL cricket fan photo edit with the subject in team colours, lifting a trophy in a packed stadium under floodlights. Add golden confetti, dramatic crowd blur, and bold contrast. Keep the expression full of joy and pride, with ultra-realistic detail, 4K sharpness, and cinematic stadium lighting.

    Face-paint fan. Use this for a crowd-fan portrait with tricolour or team face paint and a flag.

    Create an energetic IPL cricket fan photo edit with the subject in team colours and face paint, waving a team flag in a packed stadium under floodlights. Add confetti, dramatic crowd blur, and bold contrast. Keep the expression full of excitement and pride, with ultra-realistic detail, 4K sharpness, and cinematic stadium lighting.

    Bowler’s delivery stride. Use this for a fast-bowling action shot with dust and drama.

    Create an energetic IPL cricket fan photo edit with the subject in team colours, mid-delivery stride with a cricket ball, in a packed stadium under floodlights. Add confetti, dramatic crowd blur, and bold contrast. Keep the expression intense and proud, with ultra-realistic detail, 4K sharpness, and cinematic stadium lighting.

    Wicketkeeper’s dive. Use this for a diving catch behind the stumps with gloves outstretched.

    Create an energetic IPL cricket fan photo edit with the subject in team colours and wicketkeeping gloves, diving for a catch in a packed stadium under floodlights. Add confetti, dramatic crowd blur, and bold contrast. Keep the expression full of focus and pride, with ultra-realistic detail, 4K sharpness, and cinematic stadium lighting.

    Victory lap. Use this for a post-win lap of honour with the flag held high.

    Create an energetic IPL cricket fan photo edit with the subject in team colours, holding the team flag high on a victory lap in a packed stadium under floodlights. Add confetti, dramatic crowd blur, and bold contrast. Keep the expression full of triumph and pride, with ultra-realistic detail, 4K sharpness, and cinematic stadium lighting.

    How to Customize This Prompt

    Customizing a cricket fan prompt starts with the team, because the colours are the identity. Name the team colours explicitly — the jersey colour, the flag colour, the face-paint colours — in every version, since “team colours” alone lets the AI guess and guess wrong. A blue jersey with a yellow flag and a red helmet is a description; “team colours” is a hope. Specificity is what makes the edit read as support for a real team rather than a generic sports photo.

    Next, choose the moment, because the moment decides the pose and the props. A cover drive needs a bat and a swing; a trophy lift needs the trophy and both hands; a fan portrait needs the flag and the paint. Name the prop and the action together, in one phrase, so the pose and the object agree. A bat in a trophy-lift pose, or a flag in a batting stance, reads as a mistake even to viewers who cannot name why. This ipl ai photo editing prompts gemini chatgpt is a handy option when you need a quick but striking result.

    Then set the stadium atmosphere as a set: floodlights, crowd blur, confetti, and bold contrast belong together. Floodlights give the hard, bright light; crowd blur gives the scale; confetti gives the celebration; contrast gives the punch. If you remove the crowd blur, the stadium feels empty; if you remove the confetti, the celebration feels quiet. Keep the atmosphere set intact and change only the moment. For anyone short on time, this ipl ai photo editing prompts gemini chatgpt keeps things fast and simple.

    Finally, protect the face and the likeness. “Keep the expression full of excitement and pride” is the mood anchor, and the face must stay recognisably the person’s. In action poses the face can distort, so check it first on every result, and if it drifts, regenerate with the face-protection idea restated — “keep the original face unchanged” — before changing anything else. This ipl ai photo editing prompts gemini chatgpt is easy to customize, so every result can look a little different.

    Step-by-Step Guide

    1. Pick the team and the moment before you prompt. Decide the jersey colours and whether the edit is a batting, bowling, celebration, or fan portrait. The team and the moment decide everything else.
    2. Choose a clear, well-lit source photo. An action edit needs a sharp face and a visible upper body; a blurry or dark selfie will not survive the stadium transformation.
    3. Write the prompt around team, moment, stadium, and expression. Name the colours, the action, the floodlights, and the pride, in that order, so the instruction reads like a match report.
    4. Generate the first version and check the jersey and the face first. Are the colours right? Is the face still the person’s? Jersey errors and face drift are the two failures that matter most, so judge them before the confetti.
    5. Refine one element at a time. Fix the colours first, then the action, then the atmosphere. Single changes keep the edit controlled and teach you what each phrase does.
    6. Build the set across moments. Once one moment works, try a second — cover drive, trophy lift, fan portrait — keeping the team colours identical so the set reads as one supporter.
    7. Check the images at post size. Cricket edits are usually seen small, in feeds and stories, so confirm the jersey colours and the expression read instantly at thumbnail size.
    8. Save the prompt family with the images. Record the team colours and the moment wording for each keeper, so next season’s edits start from a proven set.

    Common Mistakes to Avoid

    The most common mistake is vague team colours. “Team colours” without naming them produces a random jersey that supports nobody. Name the colours every time, in every prompt and every follow-up, and the edit will support the right team. Once you try this ipl ai photo editing prompts gemini chatgpt, saving and posting your edit takes almost no time.

    Another mistake is an impossible action. A cover drive while holding a flag, or a trophy lift while batting, breaks the viewer’s belief instantly. Keep the action and the props consistent — one moment, one set of props — and the edit will feel like a real photograph. Plenty of beginners start with this ipl ai photo editing prompts gemini chatgpt because the steps never feel confusing.

    A third mistake is a dead stadium. A sharp, empty background behind a celebrating fan reads as a practice ground, not a final. The crowd blur, floodlights, and confetti are not decoration; they are the evidence of the occasion. Keep the atmosphere set intact in every version. This ipl ai photo editing prompts gemini chatgpt makes the whole process feel simple from start to finish.

    A fourth mistake is losing the face in the action. Fast poses and dramatic angles can distort the face, and a fan edit where the supporter is unrecognisable defeats its purpose. Check the face first on every result, and protect it with explicit wording in every follow-up. With a good ipl ai photo editing prompts gemini chatgpt, you can get a polished result in just a few minutes.

    A fifth mistake is overdoing the contrast until the jersey colours clip. Bold contrast is the style, but crushed blacks and blown whites destroy the jersey detail the edit exists to show. Keep the contrast bold but controlled, and check the jersey colours at full size before calling the edit done. Many creators pick this ipl ai photo editing prompts gemini chatgpt when they want a trending look without extra effort.

    Best Tools for This Edit

    ChatGPT’s image tools are a strong first choice for cricket fan edits, because they render action poses, stadium environments, and confetti confidently in one pass. They are especially good at the atmosphere set — floodlights, crowd blur, bold contrast — which is the hardest part of a stadium edit to fake. Use ChatGPT when you want the most dramatic, poster-like result from an ordinary photo. This ipl ai photo editing prompts gemini chatgpt gives you a strong starting point that you can adjust freely.

    Google Gemini is a good alternative when the source photo must stay recognisable and the edit should feel like the same person at the match. Its face preservation is reliable and its floodlight rendering is clean. The action may come out tamer than in ChatGPT, so name the pose explicitly if the first result feels static. The nice thing about this ipl ai photo editing prompts gemini chatgpt is that beginners can follow it with ease.

    CapCut is the finishing tool for turning cricket edits into reels and stories. Its slow-zoom, text, and music tools build match-day hype videos from still edits, and its crop tools reframe the portrait for stories and feeds. Add team names and scores in CapCut, since AI-rendered text is unreliable and a misspelled team name on a fan post is easily avoided.

    Frequently Asked Questions

    Can I use a real team’s jersey and logo? For personal fan posts, yes, and naming the team colours is expected. For commercial use, check the team’s and the league’s licensing rules, since logos and trademarks carry restrictions that personal posts do not. When in doubt, use the colours without the logo. Many creators pick this ipl ai photo editing prompts gemini chatgpt when they want a trending look without extra effort.

    Will the action pose look realistic? It can, when the pose and props agree and the source photo has a clear body position to build from. Start from a photo with a similar stance — a throwing pose for bowling, a standing pose for a trophy lift — and the transformation stays believable. The nice thing about this ipl ai photo editing prompts gemini chatgpt is that beginners can follow it with ease.

    Why does my stadium look empty? The crowd blur or confetti is probably missing or too weak. Ask for “packed stadium, dramatic crowd blur, falling confetti” explicitly, and check the background at full size — the crowd should read as a sea of colour, not an empty stand. Try this ipl ai photo editing prompts gemini chatgpt once and you will see how quickly the edit comes together.

    Can I make a whole team photo from one portrait? Not convincingly in one edit. The prompt is written for one subject; duplicating the person into a team produces clones. Edit one portrait at a time and combine real photos for group images. A well-built ipl ai photo editing prompts gemini chatgpt saves time while still leaving room for your own style.

    How do I keep the set consistent across a season? Fix the team colours and the atmosphere words, and change only the moment. A shared prompt skeleton — same colours, same floodlights, same finish — makes a season of edits read as one supporter’s story. Sharing the final result of this ipl ai photo editing prompts gemini chatgpt is easy on any social platform.

    Final Words

    Team colours, one clear moment, a packed stadium, and pride on the face: that is the whole cricket fan formula. Name the colours, pick the moment, and let the floodlights do the rest. This ipl ai photo editing prompts gemini chatgpt also works well when you want to add your own text and colors.

    Build the set moment by moment, save the wording that works, and next season starts from a proven kit. A supporter’s gallery, built with care, is part of the fun of the game itself. If you want a clean and modern finish, this ipl ai photo editing prompts gemini chatgpt is a smart place to start.

    Team colours, floodlights, and pure excitement are all this edit needs. Make yours before the next match and share the energy. Every step in this ipl ai photo editing prompts gemini chatgpt is designed to stay clear for first-time users.

    Post the edit during a live match, when fans are scrolling between overs and the energy is highest. If your team colours are specific, name them in the prompt instead of the general wording, so the jersey and lighting match your team exactly. Try a second version with a batting pose and another with a celebration pose, and use them across the match week. Keep the face clear of confetti in every version, because the expression is what fans connect with first. This ipl ai photo editing prompts gemini chatgpt keeps the workflow light, so you can focus on the creative side.
  • Mini Cartoon Style Photo Prompts for ChatGPT

    Mini Cartoon Style Photo Prompts for ChatGPT

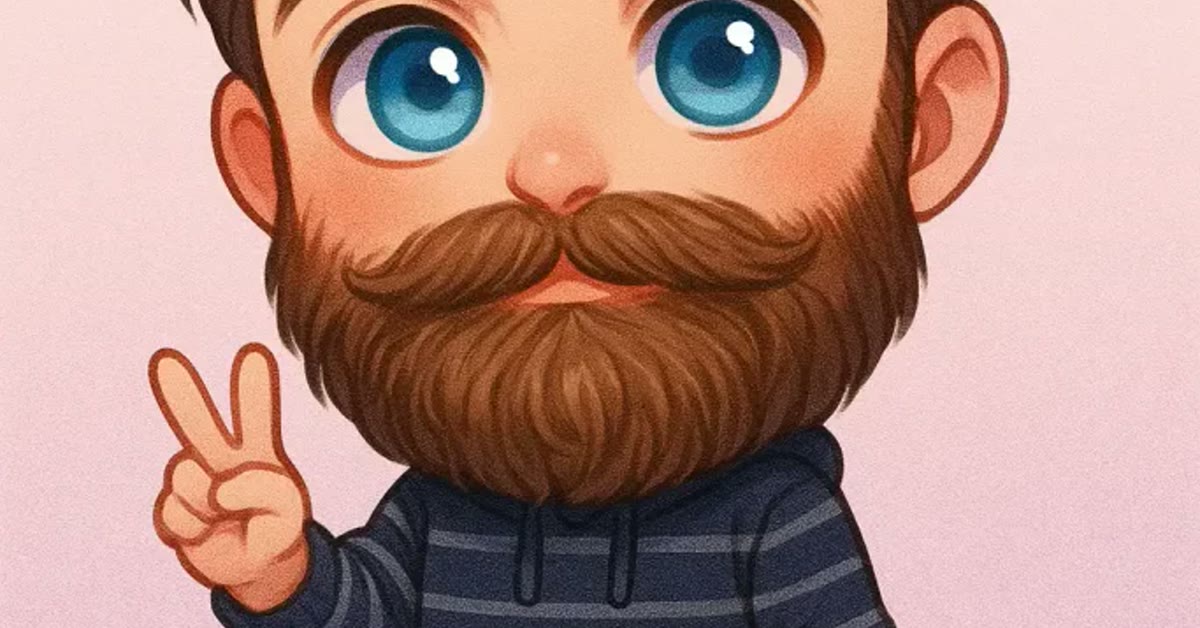
    Cute mini cartoon portrait made with a ChatGPT photo prompt - viral mini cartoon style chatgpt photo editing prompts

    Introduction

    The viral mini cartoon style ChatGPT photo editing prompts turn a normal photo into a cute, chibi-like cartoon. The look is easy to spot: a slightly oversized head, big expressive eyes, soft rounded features, and bright cheerful colours on a simple pastel background. A mini cartoon version of a selfie makes a fun profile picture.

    This style is made for joy. It works best on smiling photos, and it is a favourite for profile pictures, stickers, and gifts, because the result is charming without losing who the person is.

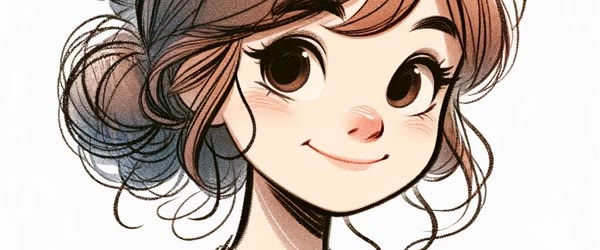
    Mini cartoon portrait with big eyes and soft rounded features

    How to Use These Mini Cartoon Style ChatGPT Photo Editing Prompts

    1. Pick a smiling photo. A happy expression gives the cartoon version the joyful mood the prompt asks for.
    2. Paste the prompt with your photo. Keep the wording as written for the first result, so the proportions and colours come through together.
    3. Tune the background. If the pastel feels plain, ask for a simple prop or pattern. If the face feels too small, ask for a closer crop.
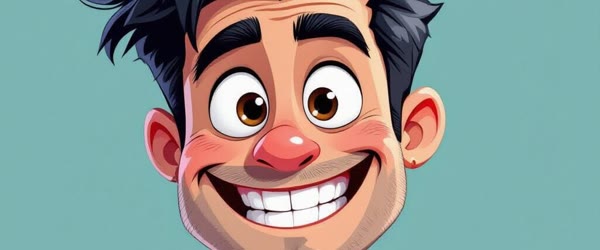
    Bright cheerful cartoon portrait with pastel background

    Copy-Paste Prompt

    Transform this photo into a cute mini cartoon style portrait with a slightly oversized head, big expressive eyes, and soft rounded features. Use bright cheerful colours, a simple pastel background, and playful shading. Keep the original outfit and hairstyle recognisable, with a joyful mood, crisp outlines, 4K clarity, and vibrant cinematic lighting.

    Pro Tips for Viral Mini Cartoon Style Chatgpt Photo Editing Prompts

    • Keep the hairstyle and outfit recognisable. Those details are what make the cartoon feel like the real person.
    • Ask for crisp outlines. Clean lines keep the cartoon style sharp instead of blurry at small sizes.
    • Try it as a profile picture. The big eyes and bright colours stay readable even in a tiny circle crop.
    Playful cartoon portrait with crisp outlines and joyful mood

    More Prompts to Try

    The mini cartoon style is a flexible, joyful language: oversized head, big expressive eyes, soft rounded features, bright colours, and a simple pastel background. The variations below keep that language and change the scene, the outfit, or the joke, so one style produces a whole set of portraits. Each prompt keeps the outfit and hairstyle recognisable and the mood joyful, and changes only the setting or the gag.

    Mini cartoon picnic. Use this for an outdoor version with a picnic blanket, snacks, and sunshine.

    Transform this photo into a cute mini cartoon style portrait at a picnic, with a slightly oversized head, big expressive eyes, and soft rounded features. Use bright cheerful colours, a simple pastel park background, and playful shading. Keep the original outfit and hairstyle recognisable, with a joyful mood, crisp outlines, 4K clarity, and vibrant cinematic lighting.

    Mini cartoon superhero. Use this for an action version with a cape and a heroic pose played for laughs.

    Transform this photo into a cute mini cartoon style portrait as a tiny superhero, with a slightly oversized head, big expressive eyes, and soft rounded features. Use bright cheerful colours, a simple pastel city background, and playful shading. Keep the original outfit and hairstyle recognisable, with a joyful mood, crisp outlines, 4K clarity, and vibrant cinematic lighting.

    Mini cartoon winter. Use this for a snowy version with a scarf, snowflakes, and rosy cheeks. This mini cartoon look keeps facial features cute and recognisable.

    Transform this photo into a cute mini cartoon style portrait in winter, with a slightly oversized head, big expressive eyes, and soft rounded features. Use bright cheerful colours, a simple pastel snowy background, and playful shading. Keep the original outfit and hairstyle recognisable, with a joyful mood, crisp outlines, 4K clarity, and vibrant cinematic lighting.

    Mini cartoon beach. Use this for a seaside version with sunglasses, sand, and a bright sky.

    Transform this photo into a cute mini cartoon style portrait at the beach, with a slightly oversized head, big expressive eyes, and soft rounded features. Use bright cheerful colours, a simple pastel sea background, and playful shading. Keep the original outfit and hairstyle recognisable, with a joyful mood, crisp outlines, 4K clarity, and vibrant cinematic lighting.

    Mini cartoon detective. Use this for a mystery version with a magnifying glass and a curious expression.

    Transform this photo into a cute mini cartoon style portrait as a little detective, with a slightly oversized head, big expressive eyes, and soft rounded features. Use bright cheerful colours, a simple pastel background, and playful shading. Keep the original outfit and hairstyle recognisable, with a joyful mood, crisp outlines, 4K clarity, and vibrant cinematic lighting.

    Mini cartoon birthday. Use this for a celebration version with a party hat, balloons, and confetti.

    Transform this photo into a cute mini cartoon style portrait at a birthday party, with a slightly oversized head, big expressive eyes, and soft rounded features. Use bright cheerful colours, a simple pastel party background, and playful shading. Keep the original outfit and hairstyle recognisable, with a joyful mood, crisp outlines, 4K clarity, and vibrant cinematic lighting.

    How to Customize This Prompt

    Customizing a mini cartoon prompt is about protecting two things: the likeness and the cuteness. The likeness lives in the phrases “keep the original outfit and hairstyle recognisable,” and the cuteness lives in the proportions — slightly oversized head, big eyes, soft rounded features. Change the scene freely, but keep those phrases identical in every version, so the set reads as one cartoon world.

    Start with the expression, since cartoon comedy is facial. Big expressive eyes do the work in this style, and the expression word sets the joke: “joyful” is the default, “curious” suits a detective, “delighted” suits a picnic. Keep the expression within the cheerful family and avoid “serious” or “dramatic,” which fight the style.

    Next, choose one gag per portrait. A picnic gets snacks, a detective gets a magnifying glass, a birthday gets balloons. One clear gag reads instantly at small size, while three gags compete and blur. Name the gag concretely and place it near the face or hands, where the eye goes first.

    Then set the background simply. Cartoon backgrounds should be flat and uncluttered: one pastel colour field, one or two simple shapes, and the playful shading. A busy, realistic background behind a flat cartoon character looks pasted together. Ask for “simple pastel background” in every version, and name at most two background elements.

    Finally, keep the colours bright and cheerful. Words like “bright,” “cheerful,” and “vibrant” belong in every version, and words like “muted,” “realistic shading,” or “photorealistic” must stay out. If a result comes out too realistic, the usual cause is a missing style phrase — put the proportions and colour phrases back in and regenerate.

    Step-by-Step Guide

    1. Pick a photo with a clear, cheerful face. Front-facing shots with a visible smile adapt best, since the cartoon style exaggerates the expression it finds.
    2. Paste the main prompt unchanged with your photo. Judge the first result on two things only: is the outfit and hairstyle recognisable, and does it look like a cartoon rather than a filtered photo?
    3. Check the proportions and colours. A slightly oversized head, big eyes, and bright flat colours are the style’s signature. If the result looks like a normal photo with a filter, the style phrases need repeating more firmly.
    4. Refine the gag in one follow-up. If the playful details are missing or wrong, name the exact gag — “add a party hat and balloons” — and repeat the recognisability phrase.
    5. Build the set with variations. Run three or four scene variations on the same photo to create a matching cartoon series for a profile collection or a sticker set.
    6. Compare the series at small size. Cartoon portraits are often used as avatars and stickers, so check that the face and the gag both read clearly at thumbnail size. If the gag vanishes when small, make it bigger and simpler.
    7. Export at high quality and keep the backgrounds clean. The bright colours compress well, but re-saving the same JPEG repeatedly softens the outlines. Export once at the highest quality and work from that file.
    8. Save the prompt family together. Keep the main prompt and the variations you used in one note, so the next cartoon portrait starts from a proven style rather than a fresh guess.

    Common Mistakes to Avoid

    The most common mistake is losing the recognisability. A cartoon that keeps neither the outfit nor the hairstyle is just a cartoon, not a portrait. The recognisability phrase must stay in every prompt and every follow-up, and the source photo must be clear and front-facing.

    Another mistake is mixing cartoon and realistic styles in one prompt. Asking for “cartoon style with realistic shading” pulls the AI in two directions and usually produces an uncanny middle ground. Commit to the cartoon language — oversized head, big eyes, flat colours, simple background — and let realism stay out of it.

    A third mistake is overloading the scene. Five gags, three backgrounds, and a crowd of characters in one portrait produce clutter that reads as noise at small size. One gag, one background idea, one expression: that is the whole recipe, and it scales from avatar to poster without changes.

    A fourth mistake is using a dark or blurry source photo. Cartoon conversion needs clear facial features to exaggerate, and a dark photo hides the eyes and smile the style depends on. Choose the brightest, sharpest photo available, even if the pose is plain.

    A fifth mistake is adding realistic text or logos. Cartoon lettering drawn by the AI often misspells, and brand logos rendered in cartoon style look unofficial. Keep text out of the portrait, and add captions or names afterwards in an editor where every letter is controlled.

    Best Tools for This Edit

    ChatGPT’s image tools are a natural home for this prompt, since they handle style transfer — photo to mini cartoon — confidently and keep the outfit and hairstyle recognisable while redrawing the rest. They are strong at the big eyes, soft features, and bright colours this style needs, and their conversational follow-ups make gag refinements easy. Use ChatGPT when you want the most cartoon-like result from an ordinary photo.

    Google Gemini is a good alternative when the source photo must stay close to the original. It preserves proportions more conservatively, which helps recognisability, though the cartoon effect may come out gentler. If the first Gemini result looks too photographic, repeat the style phrases — “slightly oversized head, big expressive eyes, bright cheerful colours” — more firmly in the follow-up.

    CapCut is the finishing tool for turning mini cartoon portraits into stickers, avatars, and reel covers. Its background remover, sticker maker, and text tools let a cartoon portrait become a chat sticker or a profile badge in minutes. Export the portrait at the highest quality first, then do all sticker and text work in CapCut so the outlines stay crisp.

    Frequently Asked Questions

    Will the cartoon portrait still look like me? Yes, if the prompt keeps the outfit and hairstyle recognisable and the source photo is clear and front-facing. The style exaggerates proportions — bigger head, bigger eyes — but the outfit, hair, and expression stay yours. Check the first result against the photo before building a series.

    Can I use this style for a group photo? It works, but each face needs room. On a crowded group photo the cartoon faces can blur together. Crop to two or three people at most, or edit each person separately and combine them afterwards.

    Why does my result look like a filter instead of a cartoon? The style phrases were probably too weak or the source photo too realistic. Repeat “slightly oversized head, big expressive eyes, soft rounded features, bright cheerful colours” explicitly, simplify the background, and ask for a “flat cartoon illustration” finish.

    Is this style suitable for kids’ content? Yes, it is one of the safest and most cheerful styles for children’s profiles, birthday posts, and school content. Keep the gags kind and the expressions joyful, and avoid any scary or mocking variations.

    Can I print the cartoon portrait? Yes. Export at the highest resolution the tool offers and print from that file. The bright colours print cleanly, and the crisp outlines stay sharp at poster size, which makes this style a good choice for birthday banners and room decor.

    Final Words

    A slightly oversized head, big expressive eyes, and one good gag are all this style needs. Try it on a cheerful photo and let the cartoon do the talking.

    Build the series one scene at a time, keep the outfit and hairstyle recognisable in every version, and the collection will feel like a cartoon show starring you. That is the whole charm of the style — familiar faces, drawn cute, in a world of their own.

    Big eyes, bright colours, and a joyful mood are all this style needs. Try it on a smiling photo and enjoy the cute result.

    Make a matching set for friends by running the same prompt on each of their smiling photos, since the shared style turns individual portraits into a collection. The cartoon versions also work well as chat stickers, because the big eyes and bright colours read clearly at sticker size. If the background feels empty, ask for one simple prop, such as a balloon or a star, rather than a busy scene. Keep the original photo beside the cartoon when you share it, because the before-and-after comparison is half the fun.

  • Hanuman Jayanti Photo Prompts for Devotees

    Hanuman Jayanti Photo Prompts for Devotees

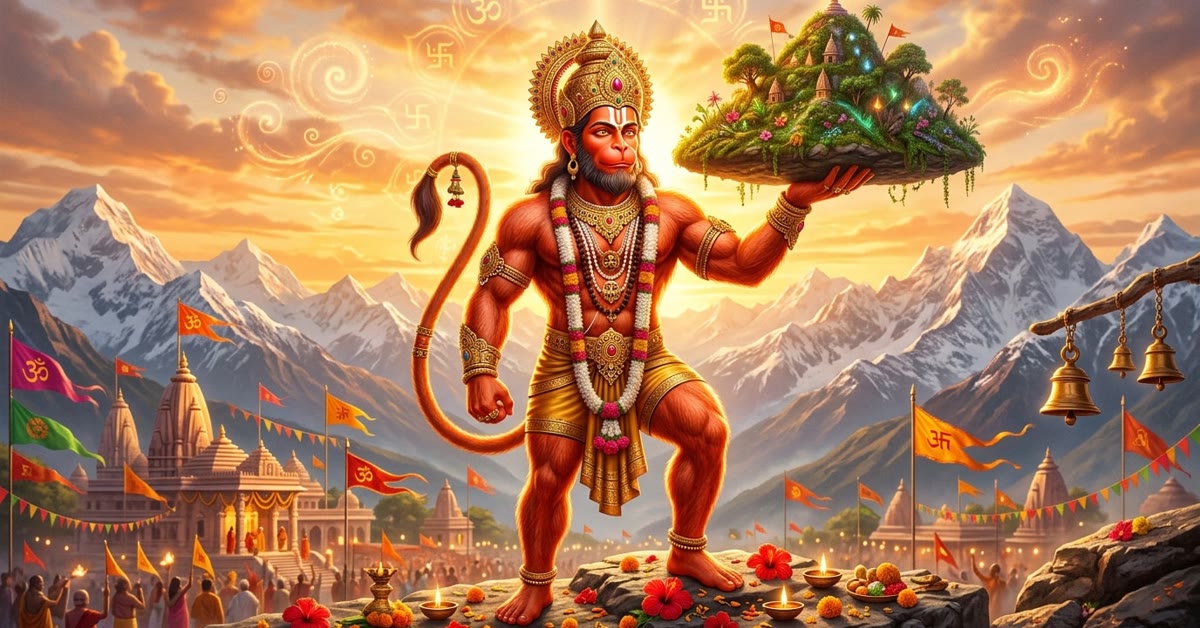
    Devotional Hanuman Jayanti portrait with temple backdrop - hanuman jayanti photo prompts

    Introduction

    Hanuman Jayanti photo prompts should feel peaceful and reverent. The festival honours strength guided by devotion, so the portraits work best with prayerful poses, temple light, and warm, sacred colours rather than loud effects. Hanuman Jayanti is celebrated with prayers, fasting and temple visits.

    The prompt below places the subject in traditional attire, hands folded, before a glowing temple backdrop, with marigold garlands and soft diya light. It is made for devotees who want a feed post that reflects the devotion of the day.

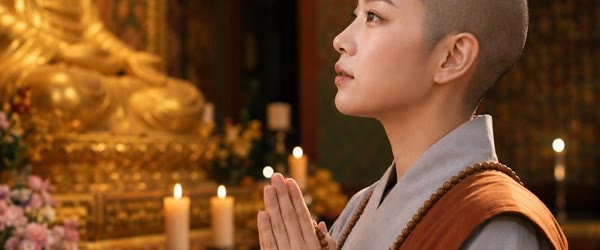
    Prayer portrait with folded hands before a glowing temple

    How to Use These Hanuman Jayanti Photo Prompts

    1. Choose a calm, respectful photo. A front-facing portrait with a gentle expression gives the devotional edit a sincere base.
    2. Paste the prompt with your photo. Keep the wording as written for the first result, so the temple light and saffron tones balance together.
    3. Adjust the glow. If the diya light feels too strong, ask for a softer flame. If the haze feels heavy, ask for a clearer finish.
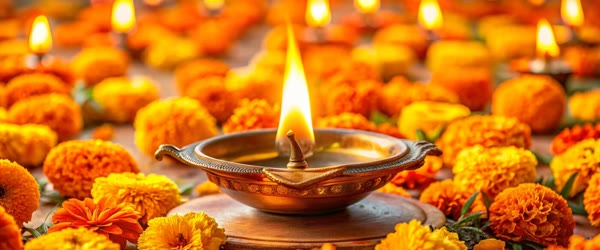
    Marigold garlands and warm diya light in a devotional photo

    Copy-Paste Prompt

    Create a devotional Hanuman Jayanti portrait with the subject in traditional attire, hands folded in prayer before a glowing temple backdrop. Add marigold garlands, warm diya light, soft incense haze, and saffron tones. Keep the mood peaceful and reverent, with ultra-realistic detail, 4K clarity, and cinematic lighting.

    Pro Tips

    • Keep the pose simple. Folded hands and a calm gaze read as devotion, while dramatic poses distract from it.
    • Use saffron and gold sparingly. Warm sacred tones work best as accents against a calm, darker backdrop.
    • Pair the post with a short prayer line. A single devotional line adds meaning without cluttering the image.
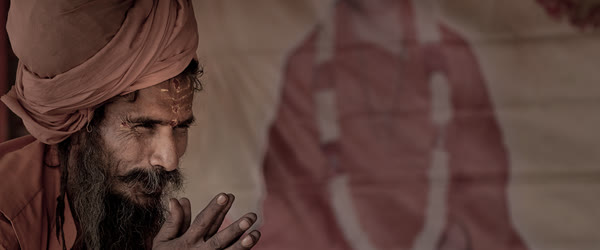
    Peaceful portrait with saffron tones and incense haze

    More Prompts to Try

    A devotional portrait set should cover the many ways devotees observe the day: the temple visit, the home prayer, the festive gathering, and the quiet moment of reflection. The variations below are original prompts in the same devotional language — traditional attire, temple light, marigold garlands, diya flame, saffron tones — each one changing the scene while keeping the mood peaceful and reverent. On Hanuman Jayanti, devotees gather early in the morning for aarti.

    Temple courtyard portrait. Use this for a portrait in a temple courtyard with morning light and flower sellers nearby.

    Create a devotional Hanuman Jayanti portrait with the subject in traditional attire, standing in a temple courtyard with marigold garlands and soft morning light. Add warm diya glow, gentle incense haze, and saffron tones. Keep the mood peaceful and reverent, with ultra-realistic detail, 4K clarity, and cinematic lighting.

    Home prayer portrait. Use this for a quiet home-prayer portrait with a small altar and lamp light. Families share sweets and flowers during Hanuman Jayanti celebrations.

    Create a devotional Hanuman Jayanti portrait with the subject in traditional attire, hands folded before a small home altar with a glowing diya. Add marigold garlands, warm lamp light, soft incense haze, and saffron tones. Keep the mood peaceful and reverent, with ultra-realistic detail, 4K clarity, and cinematic lighting.

    Festival procession portrait. Use this for a portrait amid a festive procession with flags and flower showers.

    Create a devotional Hanuman Jayanti portrait with the subject in traditional attire, walking in a festive procession with saffron flags and falling flower petals. Add marigold garlands, warm sunlight, and joyful devotion. Keep the mood peaceful and reverent, with ultra-realistic detail, 4K clarity, and cinematic lighting.

    Evening aarti portrait. Use this for an evening portrait lit by aarti flames and rows of diyas. Many temples hold special processions on Hanuman Jayanti every year.

    Create a devotional Hanuman Jayanti portrait with the subject in traditional attire, holding an aarti plate with flames, before a glowing temple backdrop at dusk. Add marigold garlands, warm diya light, soft incense haze, and saffron tones. Keep the mood peaceful and reverent, with ultra-realistic detail, 4K clarity, and cinematic lighting.

    Meditation portrait. Use this for a calm meditation portrait in a quiet garden with temple bells implied by the stillness.

    Create a devotional Hanuman Jayanti portrait with the subject in traditional attire, seated in meditation in a quiet garden with soft morning light. Add marigold flowers, gentle haze, and saffron tones. Keep the mood peaceful and reverent, with ultra-realistic detail, 4K clarity, and cinematic lighting.

    Family celebration portrait. Use this for a portrait of the subject with family in festive attire, sharing prasad and smiles. Devotional songs fill the streets on the morning of Hanuman Jayanti.

    Create a devotional Hanuman Jayanti portrait with the subject in traditional attire, celebrating with family in festive dress before a decorated home shrine. Add marigold garlands, warm diya light, soft incense haze, and saffron tones. Keep the mood peaceful and joyful, with ultra-realistic detail, 4K clarity, and cinematic lighting.

    How to Customize This Prompt

    Customizing a devotional prompt means adjusting the scene while protecting the reverence. The fixed elements are the traditional attire, the folded hands or prayerful pose, the temple light, the marigold garlands, the diya flame, and the saffron tones. The variable elements are the specific setting and the time of day. Change the setting, keep the reverence, and every version will feel appropriate for the occasion. The best hanuman jayanti photo prompts keep the temple setting calm and respectful.

    Start with the setting, choosing from places that carry devotional meaning: a temple, a home altar, a courtyard, a procession route, or a quiet garden. Name the setting concretely, with one sensory detail — “incense haze in the morning air,” “rows of glowing diyas” — so the scene feels real rather than generic. Grand, fantastic temples cheapen a devotional image; simple, real ones dignify it.

    Next, adjust the attire and the pose together. Traditional attire should be named specifically — kurta, dhoti, saree, with colours — and the pose should stay prayerful: folded hands, a bowed head, a calm gaze. Avoid casual poses, sunglasses, and modern streetwear in a devotional portrait, since they clash with the mood at every level. Children enjoy the festive decorations prepared for Hanuman Jayanti.

    Then set the light for the time of day. Soft morning light suits temple visits, warm lamp light suits home prayer, and flame light suits evening aarti. Name the light source plainly and keep it warm. Harsh light, neon light, and dramatic shadows all push the mood away from devotion and toward spectacle.

    Finally, keep the wording simple and respectful in every version. Avoid superlatives, exclamation, and playful language in the prompt, because the prompt’s tone leaks into the image’s mood. Plain, calm words produce plain, calm images, and that restraint is itself a form of devotion. People exchange warm wishes with neighbours on Hanuman Jayanti.

    Step-by-Step Guide

    1. Choose the devotional scene that fits your post. A temple portrait suits the main post, a home prayer suits a personal post, and an evening aarti suits the closing post of the day.
    2. Pick a respectful source photo. A calm, front-facing portrait with a composed expression adapts best. Avoid casual selfies, sunglasses, and playful poses, which fight the reverent mood.
    3. Write the prompt around attire, pose, setting, and light. Name the traditional attire, the prayerful pose, the temple setting, and the warm light, and include the marigold and saffron elements.
    4. Generate the first version and judge the tone before the details. Ask whether the image feels peaceful and reverent at a glance. If the mood is right, refine the details; if it is wrong, rewrite the prompt rather than patching the image.
    5. Refine one element at a time. Adjust the garlands, then the light, then the background, checking the tone after each change. Stop as soon as the image feels right; over-refining a devotional image often adds decoration that cheapens it.
    6. Check the image at the size it will be shared. Festival posts are often viewed as small thumbnails, so confirm the portrait reads clearly and the saffron tones stay warm and calm at small size.
    7. Add the greeting separately, in your own words. Keep it respectful and brief, and add all text in a posting or design tool rather than asking the AI to render lettering, which is unreliable.
    8. Save the prompt with the finished portrait. A proven devotional prompt, reused with care each festival, keeps the observance consistent and spares you rebuilding it from scratch.

    Common Mistakes to Avoid

    The most serious mistake is using playful effects or party colours. Bright confetti, neon grades, cartoon styles, and casual poses all clash with a devotional occasion, no matter how technically good the image is. Keep the palette saffron and warm, the pose prayerful, and the effects minimal.

    Another mistake is over-decorating the scene. A temple, garlands, flags, crowds, fireworks, and glowing effects in one image produce clutter, not devotion. Choose two or three meaningful elements — garlands and diya light, for example — and leave the rest of the frame quiet. Empty space is part of the reverence. Simple hanuman jayanti photo prompts with soft morning light usually give the cleanest results. Orange flags and marigold garlands are common sights on Hanuman Jayanti.

    A third mistake is using a casual source photo. A beach selfie or a party photo carries its original mood into the edit, and no prompt fully erases it. Start with the most composed photo available, even if it is older, and the portrait will feel grounded.

    A fourth mistake is asking for fantasy effects. Glowing halos, divine beams, and floating divine light turn a devotional portrait into a fantasy poster and break the realism that gives it sincerity. Keep the light natural — morning sun, lamp light, diya flame — and let the real details carry the emotion. Reading the Hanuman Chalisa is a cherished Hanuman Jayanti tradition.

    A fifth mistake is rushing the greeting. A reverent image paired with a careless caption undermines itself. Write the greeting slowly, check names and festival details, and keep it brief. The image honours the occasion; the caption should do the same.

    Best Tools for This Edit

    Google Gemini is a strong first choice for devotional portraits, because it preserves the source face faithfully and renders warm temple light and natural skin tones cleanly. Its restraint suits the occasion: it enhances rather than reinvents, which is exactly what a sincere devotional image needs. Use Gemini when the source photo is a real portrait of a devotee. Community feasts are organised in many towns for Hanuman Jayanti.

    ChatGPT’s image tools are useful when the portrait is a scene rather than a single face — a temple courtyard, a procession, a decorated shrine. They build environments confidently and handle the saffron palette well. Check the result for fantasy drift, and pull back any glowing or exaggerated effects with a follow-up asking for a natural, realistic finish.

    Canva is the right finishing tool for festival posts. Its text tools let you add the festival greeting in a clean, dignified typeface, and its templates keep the layout calm and centred. Add all lettering in Canva rather than in the AI tool, since AI-rendered text is unreliable and a misspelled greeting on a devotional post is a serious error.

    Frequently Asked Questions

    Is it appropriate to use AI images for a religious festival? Yes, when the image is respectful and the intent is devotion. Keep the portrait dignified, avoid playful effects, and be honest if asked: the image is an AI-assisted tribute. What matters is the sincerity in the image and the greeting, not the tool that made it. A calm temple backdrop suits Hanuman Jayanti portraits beautifully.

    Should the portrait show the deity or the devotee? Both are common. A portrait of the devotee in prayer suits personal posts; a scene centred on the deity suits organizational posts. Whichever you choose, keep the treatment reverent and the imagery faithful — never distort a sacred figure for effect.

    What colours are appropriate for Hanuman Jayanti? Saffron, orange, and warm gold are traditional, with marigold flowers as the floral accent. Avoid neon grades, party palettes, and rainbow effects, which clash with the devotional tone.

    Can I post more than one devotional image in a day? Yes, and a small series works well: a morning temple portrait, a midday home prayer, and an evening aarti. Keep the palette and tone consistent across the series so the day reads as one observance.

    How do I write a respectful festival greeting? Keep it brief, warm, and traditional. Name the festival, offer a simple blessing in one or two plain sentences, and avoid slang and excessive hashtags. Read the greeting aloud once to hear whether it sounds sincere.

    Final Words

    Traditional attire, folded hands, temple light, and saffron tones are all a devotional portrait needs. Keep the wording simple and the mood reverent, and the image will honour the occasion on its own.

    Build the set once, hold the palette warm and the light soft, and reuse the proven prompts each festival. A consistent, sincere tribute is the best way to mark the day, online and off.

    Prayer, temple light, and warm saffron tones are all this portrait needs. Create it with devotion, and share it with peace.

    Share the portrait early on the festival morning, when devotees are scrolling for blessings and the post can set the tone for their day. Pair it with a single prayer line rather than a long message, since a quiet caption suits the reverent mood. If you make one for family members, keep the same temple backdrop across all of them, so the set feels like a shared prayer. Save a copy without any text overlay, so the portrait can be reused for prints or family groups later.

  • Boys Cinematic Photo Editing Prompt Trend

    Boys Cinematic Photo Editing Prompt Trend

    Bold cinematic portrait for boys made with a trending photo editing prompt - trending boys cinematic photo editing prompt

    Introduction

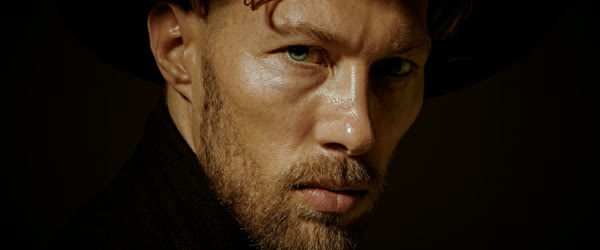
    The trending boys cinematic photo editing prompt is built on attitude. Dramatic low-key lighting, a dark blurred background, and a confident stance turn an everyday photo into a film still, and the teal and orange grade gives it the colour of a modern action poster. This trending boys cinematic photo editing prompt gives portraits a bold movie poster feel.

    This style suits a strong, calm expression and a stylish outfit. It works best on photos with a clear subject and a little room around the shoulders, so the smoke and background blur have space to show. A trending boys cinematic photo editing prompt works best with strong side light.

    Dramatic low-key portrait with dark blurred background

    Table of Contents The look borrows from classic cinematography, where light and colour do the storytelling. Many creators use a trending boys cinematic photo editing prompt for attitude style portraits.

    1. Choose a photo with a confident pose. A standing or half-body shot with a relaxed, strong stance gives the prompt the most to work with.
    2. Paste the prompt with your photo. Keep the wording as written for the first result, so the light, smoke, and grade balance together.
    3. Tune the intensity. If the smoke hides the outfit, ask for less. If the grade feels strong, ask for a lighter teal and orange balance.
    Confident stance portrait with stylish outfit and subtle smoke

    Copy-Paste Prompt

    Transform this photo into a bold cinematic portrait for boys, with dramatic low-key lighting, a dark blurred background, and a confident stance. Add sharp jawline definition, stylish outfit details, subtle smoke, and a teal-and-orange grade. Keep the attitude strong and film-like, with ultra-realistic skin texture, 4K detail, and cinematic lighting.

    Pro Tips

    • Keep the outfit sharp. Clean, stylish clothing reads as cinematic, while wrinkled or busy clothes fight the grade.
    • Use a calm expression. A steady gaze feels more film-like than a forced smile in this style.
    • Crop tall for posters. A vertical crop with the subject slightly off centre looks like a character poster.
    Film-like portrait with teal and orange grade and strong attitude

    More Prompts to Try

    One bold cinematic prompt is enough to learn the look, but a set of variations is what turns a single edit into a signature style. The prompts below are original variations on the same bold idea: dramatic low-key lighting, a dark background, a confident stance, and a teal-and-orange grade. Each one changes the setting or the attitude while keeping the cinematic language intact, so the results feel like frames from different films. With this trending boys cinematic photo editing prompt, dark backgrounds look dramatic and clean.

    Rainy street attitude. Use this for a rain-soaked, neon-lit version with wet reflections.

    Transform this photo into a bold cinematic portrait for boys in the rain, with dramatic low-key lighting, wet reflections, and a dark blurred street background. Add a confident stance, stylish outfit details, and a teal-and-orange grade. Keep the attitude strong and film-like, with ultra-realistic skin texture, 4K detail, and cinematic lighting.

    Desert warrior. Use this for a warm, epic version with golden light and open space. The trending boys cinematic photo editing prompt keeps facial details sharp and natural.

    Transform this photo into a bold cinematic portrait for boys in a desert at sunset, with golden rim light, drifting dust, and a vast blurred dune background. Add a confident stance, rugged outfit details, and a warm cinematic grade. Keep the attitude strong and film-like, with ultra-realistic skin texture, 4K detail, and cinematic lighting.

    Neon city night. Use this for a cyberpunk version with pink and blue light.

    Transform this photo into a bold cinematic portrait for boys in a neon city at night, with pink and blue rim lighting, deep shadows, and a blurred futuristic background. Add a confident stance, modern outfit details, and subtle haze. Keep the attitude strong and film-like, with ultra-realistic skin texture, 4K detail, and cinematic lighting.

    Forest mist mystery. Use this for a quiet, mysterious version with fog and green tones. A trending boys cinematic photo editing prompt can make a simple selfie look like a film still.

    Transform this photo into a bold cinematic portrait for boys in morning forest mist, with soft diffused light, deep green shadows, and a blurred woodland background. Add a thoughtful stance, rugged outfit details, and drifting fog. Keep the attitude strong and film-like, with ultra-realistic skin texture, 4K detail, and cinematic lighting.

    Vintage film hero. Use this for a retro version with grain and faded warmth.

    Transform this photo into a bold cinematic portrait for boys in vintage film style, with warm faded colours, visible film grain, and soft window light. Add a confident stance, retro outfit details, and a blurred old-town background. Keep the attitude strong and film-like, with ultra-realistic skin texture, 4K detail, and cinematic lighting.

    Rooftop dusk. Use this for a skyline version with the last light of the day. This trending boys cinematic photo editing prompt suits bike and travel photos very well.

    Transform this photo into a bold cinematic portrait for boys on a rooftop at dusk, with a glowing city skyline behind, purple and orange sky tones, and gentle wind. Add a confident stance, stylish outfit details, and rim light on the face. Keep the attitude strong and film-like, with ultra-realistic skin texture, 4K detail, and cinematic lighting.

    How to Customize This Prompt

    The boys’ cinematic prompt is built from four ingredients: low-key light, dark background, confident stance, and the teal-and-orange grade. Changing any one of them changes the film the portrait belongs to, while changing all four at once usually breaks the look. Start with the background, because it fixes the story: a rainy street says thriller, a desert says epic, a rooftop says ambition. Name the background concretely, with one texture word — “wet asphalt,” “dune sand,” “neon signs” — so the setting feels real. Deep colors are the signature of a trending boys cinematic photo editing prompt result.

    Next, match the grade to the background. Teal and orange suits city nights and action posters, but it fights with a forest or a vintage scene. For green settings, ask for deep greens and soft golds; for vintage settings, ask for warm faded tones and film grain. The grade is the colour script of the portrait, and it should agree with the location rather than compete with it.

    Then adjust the stance and attitude words. “Confident stance” is the default, but “relaxed lean,” “arms crossed,” and “walking toward camera” each tell a different story. Keep the stance consistent with the setting: a walking pose suits a street, a still pose suits a rooftop, a lean suits a wall. One well-chosen stance word does more than a paragraph of extra adjectives. Using a trending boys cinematic photo editing prompt takes only a few seconds.

    Finally, control the smoke and atmosphere. Subtle smoke adds depth to a dark portrait, but heavy smoke hides the face and the outfit details the prompt worked to build. Ask for “subtle smoke” in every version, and if the atmosphere feels heavy, ask for it lighter rather than removing it entirely. Atmosphere should frame the subject, never bury him. A trending boys cinematic photo editing prompt pairs nicely with black outfits.

    Step-by-Step Guide

    1. Pick a photo with a clear subject and space around him. Half-body or head-and-shoulders shots work best, because the dark background and the stance need room to show.
    2. Check the existing light direction. Photos taken near a window or a street light already have the directional light this prompt expects, and they adapt most naturally.
    3. Paste the prompt unchanged with your photo. Keep the wording as written for the first attempt so you learn the baseline cinematic look before changing it.
    4. Review the four ingredients separately. Look at the light, the background, the stance, and the grade one at a time, and decide which one is weakest. Naming the weak ingredient stops you from rewriting a prompt that is mostly working.
    5. Refine one ingredient per follow-up. If the shadows hide the jawline, ask for slightly softer light. If the grade feels strong, ask for a lighter balance. Single changes keep the edit controlled.
    6. Try a variation prompt on the same photo. Once the main look works, run one or two variations to build a matching set. The shared cinematic language makes them feel like frames from one shoot.
    7. Crop for the poster feel. Use a tall crop with the subject slightly off centre and a little extra space above the head. Check the result at post size, since cinematic detail can vanish in a small thumbnail.
    8. Save the prompt and the best version together. Note the exact wording, the tool, and the date. A cinematic style you can repeat is worth more than a single lucky result.

    Common Mistakes to Avoid

    The biggest mistake is starting with a busy, cluttered photo. The cinematic prompt needs to rebuild the background, and a photo full of people and objects gives the AI too much to erase. Choose a photo with a simple background and one clear subject, and the transformation will be far cleaner. This trending boys cinematic photo editing prompt adds a soft glow around the subject.

    Another mistake is overdoing the grade and the smoke together. A maximum grade plus heavy smoke turns the portrait into a foggy poster where the face disappears. Keep one of the two restrained: strong grade with subtle smoke, or soft grade with more atmosphere, never both at maximum. For profile pictures, a trending boys cinematic photo editing prompt creates a strong first impression.

    A third mistake is a weak or silly expression. The cinematic look depends on confidence and calm; a goofy grin or a pout breaks the film mood instantly. Choose a source photo with a neutral, confident expression, or ask for a “calm, confident expression” and accept a compromise. The trending boys cinematic photo editing prompt keeps the mood intense without looking fake.

    A fourth mistake is ignoring the jawline and hair edges. Rim light and sharp definition only work when the subject separates from the background, and in a dark portrait a dark-haired subject can melt into a dark backdrop. If that happens, ask for “stronger rim light on the hair and jawline” to carve the outline back out. A trending boys cinematic photo editing prompt works on both indoor and outdoor shots.

    A fifth mistake is exporting at low quality. Cinematic edits live in the shadows, the smoke, and the grain, and heavy compression crushes exactly those details. Export at the highest quality the tool offers, and avoid re-saving the same JPEG multiple times. Golden hour photos shine with a trending boys cinematic photo editing prompt like this.

    Best Tools for This Edit

    ChatGPT’s image tools are the natural home for this prompt, since they handle the dramatic grade, the background rebuild, and the smoke confidently in one pass. They are strong at the full transformation and their conversational follow-ups make mood tuning easy. Use ChatGPT when you want the boldest, most poster-like result from an ordinary photo. This trending boys cinematic photo editing prompt is popular in reels and status updates.

    Google Gemini is a good alternative when the source photo must stay recognisable and the edit should feel like a better version of the real picture. Its face preservation is reliable and its low-key light rendering is clean. The grade may come out softer in Gemini, so add “stronger teal and orange grade” if the first result feels too gentle.

    CapCut is where the cinematic portrait becomes content. Use it to crop the portrait to poster and story formats, add a title in a bold film font, and animate a slow zoom for reels. Keeping the grade consistent between the still portrait and the video version makes the whole post feel like one production. A trending boys cinematic photo editing prompt can rescue a dull and flat photo.

    Frequently Asked Questions

    Does this prompt work on full-body photos? It can, but the look is strongest on head-and-shoulders or half-body shots, where the face and the grade dominate. On full-body photos the background takes over. Crop to half-body first for the most poster-like result. Sharp contrast makes a trending boys cinematic photo editing prompt result stand out.

    Why does my edit look too dark? The prompt asks for low-key lighting and deep shadows, and on a photo that is already dark the result can go muddy. Ask for “slightly softer shadows” or “a touch more light on the face,” and start from the brightest clear photo you have. This trending boys cinematic photo editing prompt keeps skin texture real and detailed.

    Can I use this prompt for a group photo? It is written for one subject. On group photos the grade applies unevenly and faces at the edges often distort. Edit one person at a time for consistent results. A trending boys cinematic photo editing prompt is a favorite among young creators.

    Will the teal and orange grade suit every skin tone? It suits most, but on very deep or very fair skin it can shift colour noticeably. If the skin looks off, ask for “natural skin tones with a lighter grade” — the cinematic light stays, and the skin returns to a believable colour. Street style portraits suit a trending boys cinematic photo editing prompt perfectly.

    How do I turn the portrait into a poster? Ask for a taller crop with empty space at the top, export at high quality, then add the title in a design app. AI-generated text is unreliable, so always add lettering yourself. This trending boys cinematic photo editing prompt gives every frame a premium finish.

    Final Words

    Strong light, a confident stance, and a dark background are all this look needs. Try it on a favourite portrait and see how quickly an everyday photo turns cinematic. A trending boys cinematic photo editing prompt also works for group photos with friends.

    Run the variations on the same photo to find your favourite genre, then keep that prompt as your signature style. A consistent cinematic look across your posts is what turns single edits into a recognisable feed.

    Strong light, a dark background, and a confident stance are all this look needs. Try it on a favourite photo and see the film still appear.

    For a matching profile set, run the prompt on a second portrait from the same shoot and use one as your DP and the other as a banner, since the shared grade ties them together. If the smoke feels too heavy for a clean feed, ask for a version with the smoke removed but the light kept, and compare the two. The style also suits posters, so try a tall crop with the subject low in the frame and empty dark space above for a title. Keep the expression consistent across versions, because the attitude is the brand of this look.

  • Bairan Song Photo Edit With a Soft Glow

    Bairan Song Photo Edit With a Soft Glow

    Soft romantic portrait made with a Bairan song photo edit - bairan song photo editing

    Introduction

    Bairan song photo editing is about a mood: tender, nostalgic, and a little wistful. The prompt below builds that feeling with warm evening light, gentle haze, and a dreamy blurred background, so the portrait feels like a memory rather than a snapshot. Good photo editing starts with clean light and a clear subject.

    This style suits a thoughtful expression and an elegant outfit. It works best on photos taken in soft light, where the glow has something real to build on. Simple photo editing can turn an ordinary snapshot into a warm evening portrait.

    Warm evening light portrait with gentle haze and dreamy background

    How to Use This Bairan Song Photo Editing Prompt

    1. Choose a photo with a thoughtful expression. A calm, looking-away gaze suits the nostalgic mood better than a direct smile.
    2. Paste the prompt with your photo. Keep the wording as written for the first result, so the haze and tones balance together.
    3. Tune the glow. If the haze feels heavy, ask for a lighter touch. If the mood feels flat, ask for warmer evening light.
    Elegant outfit portrait with thoughtful expression and soft glow

    Copy-Paste Prompt

    Create a soft romantic photo edit inspired by a soulful song mood, with warm evening light, gentle haze, and a dreamy blurred background. Style the subject in an elegant outfit with a thoughtful expression, floating dust particles, and muted cinematic tones. Keep the feeling tender and nostalgic, with ultra-realistic detail, 4K sharpness, and cinematic lighting.

    Pro Tips

    • Shoot toward the light. Backlight or side light gives the haze a natural glow that front light cannot copy.
    • Keep the outfit elegant and simple. Flowing fabric and muted colours suit the song mood better than busy prints.
    • Use dust particles sparingly. A few floating specks feel dreamy, while a cloud of them looks like noise.
    Nostalgic cinematic portrait with muted tones and dust particles

    More Prompts to Try

    A soulful song mood is a whole palette: warm evening light, gentle haze, dreamy blur, and a tender, nostalgic feeling. The variations below are original prompts in that palette, each one changing the scene or the story while keeping the soft glow and the muted cinematic tones. Use them to build a matching set of romantic edits for a feed, a profile collection, or a series of song-inspired posts. Most beginners learn photo editing by practising on one image at a time.

    Evening balcony romance. Use this for a quiet balcony portrait with city lights below and warm haze. Careful photo editing keeps skin tones natural and pleasing.

    Create a soft romantic photo edit with warm balcony light, gentle evening haze, and a dreamy blurred city background. Style the subject in an elegant outfit with a thoughtful expression, floating dust particles in the light, and muted cinematic tones. Keep the feeling tender and nostalgic, with ultra-realistic detail, 4K sharpness, and cinematic lighting.

    Monsoon romance portrait. Use this for a rain-softened portrait with wet light and cool-warm contrast. This kind of photo editing works well for music themed portraits.

    Create a soft romantic photo edit in gentle monsoon light, with rain-softened air, warm lamp glow, and a dreamy blurred background. Style the subject in an elegant outfit with a wistful expression, fine rain mist, and muted cinematic tones. Keep the feeling tender and nostalgic, with ultra-realistic detail, 4K sharpness, and cinematic lighting.

    Vintage song portrait. Use this for a retro, film-like portrait with faded warmth and grain.

    Create a soft romantic photo edit with vintage film warmth, gentle grain, and a dreamy blurred background. Style the subject in a classic elegant outfit with a soft smile, warm evening light, and muted cinematic tones. Keep the feeling tender and nostalgic, with ultra-realistic detail, 4K sharpness, and cinematic lighting.

    Garden dusk romance. Use this for a garden portrait at dusk with fireflies and soft floral tones. Balanced colors are the heart of pleasing photo editing results.

    Create a soft romantic photo edit in a garden at dusk, with firefly light, soft floral haze, and a dreamy blurred green background. Style the subject in a flowing elegant outfit with a peaceful expression, floating petals, and muted cinematic tones. Keep the feeling tender and nostalgic, with ultra-realistic detail, 4K sharpness, and cinematic lighting.

    Window-light longing portrait. Use this for a quiet indoor portrait with window light and a thoughtful mood. Mobile apps have made photo editing easy for everyone.

    Create a soft romantic photo edit beside a large window, with soft evening light, gentle haze, and a dreamy blurred room background. Style the subject in an elegant outfit with a longing expression, dust particles in the light beam, and muted cinematic tones. Keep the feeling tender and nostalgic, with ultra-realistic detail, 4K sharpness, and cinematic lighting.

    Seaside sunset romance. Use this for a coastal portrait with sunset glow and sea breeze. A little photo editing can bring back the mood of a favorite song.

    Create a soft romantic photo edit at the seaside at sunset, with warm golden light, gentle sea haze, and a dreamy blurred ocean background. Style the subject in a flowing elegant outfit with a serene expression, wind in the hair, and muted cinematic tones. Keep the feeling tender and nostalgic, with ultra-realistic detail, 4K sharpness, and cinematic lighting.

    How to Customize This Prompt

    Customizing a song-mood prompt means protecting its softness while changing its scene. The prompt’s identity is the combination of warm light, gentle haze, dreamy blur, and muted tones; if you change the light to harsh noon sun or the tones to saturated neon, the song mood collapses even if the words look similar. Change the setting first — balcony, garden, seaside, window — and keep the light warm and the tones muted in every version. The heart of bairan song photo editing is mood, so protect the soft light in your source photo.

    Start with the light source, since warm light is the foundation. Evening light, lamp glow, sunset, and window light all work; direct midday sun does not. If your source photo was taken in harsh light, expect the AI to soften it, and judge the first result on the mood rather than the exact background. A follow-up asking to “soften the harsh light” can rescue a sunny source photo. Sharp details make any photo editing result look professional.

    Next, choose the haze and atmosphere elements and keep them gentle. Dust particles, mist, and soft blur are atmosphere; heavy fog, smoke, and glare are effects that overwhelm. One atmosphere element per portrait is enough — dust in the light, or mist in the air, or petals drifting — and the element should sit in the background or the light beam, never across the face. Soft shadows add depth to this style of photo editing.

    Then adjust the outfit and expression to match the scene. Elegant, flowing outfits suit the song mood because they move with the haze and the light; stiff, structured outfits fight it. The expression should be thoughtful, serene, or softly smiling — never broad or comic. The song mood is tender, and the face must agree with the light.

    Finally, control the colour grade. Muted cinematic tones mean the colours are present but restrained: warm golds, soft ambers, dusty roses, never neon or primary brights. If the result looks too colourful, ask for “more muted tones.” If it looks grey, ask for “slightly warmer tones.” The grade should feel like a memory — coloured, but softened by time. Many creators share their photo editing steps with followers online.

    Step-by-Step Guide

    1. Choose a photo with a thoughtful or serene expression. The song mood depends on the face agreeing with the light, so a calm, wistful photo adapts far better than a laughing or shouting one.
    2. Paste the prompt unchanged with your photo. Judge the first result as a set — light, haze, tones, and mood together — rather than fixing one detail immediately.
    3. Check the light and the face first. The warm glow should fall on the face gently, and the expression should still read as tender. If the glow washes the face out, ask for it softer.
    4. Tune the haze in one follow-up. If the atmosphere feels heavy, ask for “lighter haze.” If the image feels flat and digital, ask for “a little more haze and glow.” One atmosphere change per message keeps the mood controlled.
    5. Build the set with variations. Run two or three scene variations on photos from the same shoot to create a matching romantic series. Shared light and tones make the series feel like one song.
    6. Check the series at feed size. Song-mood portraits are usually seen small, in a grid, so view the set as thumbnails. The portraits should read as warm and calm even when small; if one stands out as too dark or too bright, regrade it to match.
    7. Export at the highest quality. Soft glow and haze compress poorly, and repeated JPEG saves blur the glow into mush. Export once at maximum quality and keep that file as the master.
    8. Save the prompt family together. Keep the main prompt and the variations you used in one note with the finished images, so the next song-inspired series starts from a proven set.

    Common Mistakes to Avoid

    The most common mistake is starting with a loud, high-energy photo. The song mood asks for tenderness, and a shouting, jumping, or brightly grinning source photo fights the prompt at every step. Choose the calmest, most thoughtful photo you have, and the edit will have far less work to do. Patient photo editing gives a cleaner finish than rushed filters.

    Another mistake is overdoing the haze and glow until the face disappears. Atmosphere should frame the face, not bury it. If you cannot see the eyes clearly, the haze is too heavy; ask for it lighter and for the face to stay sharp. Good bairan song photo editing keeps skin tones warm and natural instead of orange. Warm tones suit this photo editing style especially well.

    A third mistake is saturating the colours. The prompt asks for muted tones, and adding “vivid” or “bright colours” in a follow-up breaks the nostalgic feeling instantly. If the image looks dull, warm it rather than saturating it — warmth restores feeling without breaking the mood. Photo editing feels easier when the original picture is bright and clear.

    A fourth mistake is mixing song moods within one series. A tender Bairan-style portrait beside a loud party portrait in the same grid reads as confusion, not variety. Finish one mood series before starting another, and let each series own its feeling. Small contrast changes can lift the whole photo editing result.

    A fifth mistake is adding bold text or stickers on top of the edit. The song mood depends on clean visuals and soft light, and loud overlays shatter it. If the portrait needs a caption, put it in the post text, not on the image.

    Best Tools for This Edit

    ChatGPT’s image tools are the natural home for this prompt, and they handle the soft grade, the haze, and the background blur as a balanced set. They are forgiving with follow-up language — “a little warmer,” “slightly softer” — and they render the tender, nostalgic mood reliably. Use ChatGPT when you want the dreamiest version of a portrait and you are happy to iterate conversationally. This photo editing approach keeps the background calm and uncluttered.

    Google Gemini is a strong choice when the source photo must stay recognisable and the edit should feel like a gentle enhancement rather than a reinvention. Its skin tones stay natural and its warm-light rendering is clean. The haze may come out subtler in Gemini, so add “gentle haze and soft glow” explicitly if the first result looks too plain. Natural looking photo editing always respects the original expression.

    CapCut is the finishing tool for turning song-mood portraits into reels and stories. Its slow-zoom, fade, and music tools let a still portrait become a short song video, and its crop tools reframe the portrait for every format. Export the portrait at the highest quality first, then do all framing and music work in CapCut so the still and the video share one mood. Even one tap presets cannot replace thoughtful photo editing.

    Frequently Asked Questions

    Will this prompt work on a photo taken in daylight? Yes, and often beautifully, because daylight gives the AI clean detail to soften. The prompt will warm and haze the daylight into evening mood. The hardest source is a dark, noisy night photo; choose the brightest clear photo you have for the cleanest result. Festive portraits benefit from gentle photo editing and soft glow.

    Can I use this for a couple portrait? Yes, and it suits couples well, because the tender mood flatters two people at once. Ask for both faces to stay unchanged, keep the framing wide enough for two, and use the same warm grade across the set so the series matches. With regular practice, photo editing becomes quick and enjoyable.

    Why does my result look grey instead of warm? The grade went too far toward muting. Ask for “slightly warmer tones” and name one warm colour, such as amber or gold. The named colour anchors the warmth and stops the image drifting into grey.

    Is the haze supposed to cover the face? Never. Haze belongs in the background and the light, not across the eyes. If the face is veiled, ask for “the face sharp and clear, haze only in the background.”

    Can I use these portraits as a song-video cover? Yes. Ask for a tall crop with clean space at the top for the song title, export at high quality, and add the title in your video editor rather than in the AI tool, since AI-rendered text is unreliable.

    Final Words

    Warm light, gentle haze, and a tender expression are all this song mood needs. Try it on a quiet portrait and let the feeling do the talking.

    Keep the tones muted, the glow soft, and the face clear, and the series will feel like one long song. That consistency is what turns single edits into a mood your audience recognizes instantly.

    Warm light, gentle haze, and a thoughtful expression are all this edit needs. Try it on a quiet portrait and let the mood speak.

    Pair the finished portrait with a short lyric or line from the song in your caption, since the reference gives viewers the context the image alone cannot. If the haze feels too dreamy for a profile picture, ask for a clearer version with the same light, and keep both, one for posting and one for your DP. Try the prompt on a black-and-white original as well, because the warm grade over monochrome creates a timeless sepia mood. When you share it, tag the moment honestly, such as evening or monsoon, so the nostalgia feels earned.

  • Crayon Shin-chan Cartoon Photo Prompt Fun

    Crayon Shin-chan Cartoon Photo Prompt Fun

    Playful Crayon Shin-chan cartoon portrait made with an AI photo prompt - crayon shin chan character ai photo prompt

    Introduction

    The Crayon Shin-chan character AI photo prompt turns a normal photo into a cheeky cartoon portrait. The style is easy to recognise: bold outlines, bright flat colours, and a mischievous expression that keeps the person recognisable underneath the cartoon look. This guide covers this crayon shin chan character ai photo prompt in a simple and practical way. This crayon shin chan character ai photo prompt is designed to give you a polished result in just a few minutes.

    This edit is pure fun, and it works best on photos with a clear expression. A grin, a raised eyebrow, or a silly pose gives the cartoon style something to exaggerate, which is where the humour comes from. Many creators start with this crayon shin chan character ai photo prompt and then tweak the small details to match their own style.

    Cartoon style portrait with bold outlines and bright flat colours

    How to Use This Crayon Shin-chan Character AI Photo Prompt

    1. Pick a photo with a fun expression. A smile or a cheeky look gives the cartoon version a personality to build on.
    2. Paste the prompt with your photo. Keep the wording as written for the first result, so the bold outlines and flat colours come through together.
    3. Adjust the background next. If the doodles feel busy, ask for a plainer background. If the face feels lost, ask for a closer crop.
    Cheeky cartoon expression with comic shading and doodle details

    Copy-Paste Prompt

    Transform this photo into a playful Crayon Shin-chan cartoon style portrait, keeping the person's face recognisable with bold outlines, bright flat colours, and cheeky expressions. Set it against a simple colourful background with comic shading and fun doodle details. Keep the mood cheerful and mischievous, with crisp cartoon lines, 4K clarity, and vibrant cinematic lighting.

    Pro Tips – Crayon Shin Chan Character AI Photo Prompt

    • Keep the outfit simple in the photo. Loud patterns fight with the cartoon shading and make the result look messy.
    • Protect the likeness. Asking to keep the face recognisable is what separates a fun portrait from a random cartoon.
    • Try it on a group photo. The style works well for friends and family, since each face gets the same playful treatment.
    Colourful cartoon background with fun comic style details

    More Prompts to Try

    The Shin-chan style is a flexible cartoon language: bold outlines, flat colours, cheeky expressions, and simple backgrounds. The variations below keep that language and change the scene, the outfit, or the joke, so one style produces a whole set of portraits. Each prompt keeps the face recognisable and the mood cheerful, and changes only the setting or the gag — which is exactly how cartoon comedy works.

    Shin-chan school day. Use this for a classroom version with a uniform, a chalkboard, and a mischievous grin.

    Transform this photo into a playful Crayon Shin-chan cartoon style portrait in a classroom, keeping the person's face recognisable with bold outlines, bright flat colours, and a cheeky expression. Add a chalkboard, a school desk, and fun doodle details. Keep the mood cheerful and mischievous, with crisp cartoon lines, 4K clarity, and vibrant cinematic lighting.

    Shin-chan superhero. Use this for an action version with a cape and a heroic pose played for laughs.

    Transform this photo into a playful Crayon Shin-chan cartoon style portrait as a tiny superhero, keeping the person's face recognisable with bold outlines, bright flat colours, and a confident silly expression. Add a flowing cape, a simple city skyline, and comic action lines. Keep the mood cheerful and heroic, with crisp cartoon lines, 4K clarity, and vibrant cinematic lighting.

    Shin-chan foodie. Use this for a snack-time version with oversized treats and a delighted expression.

    Transform this photo into a playful Crayon Shin-chan cartoon style portrait at snack time, keeping the person's face recognisable with bold outlines, bright flat colours, and a delighted expression. Add oversized snacks, a simple kitchen background, and fun doodle details. Keep the mood cheerful and hungry, with crisp cartoon lines, 4K clarity, and vibrant cinematic lighting.

    Shin-chan beach day. Use this for a seaside version with sunglasses, sand, and a bright sky.

    Transform this photo into a playful Crayon Shin-chan cartoon style portrait at the beach, keeping the person's face recognisable with bold outlines, bright flat colours, and a cheeky smile. Add a bucket, a beach ball, and a simple blue sea background. Keep the mood cheerful and sunny, with crisp cartoon lines, 4K clarity, and vibrant cinematic lighting.

    Shin-chan detective. Use this for a mystery version with a magnifying glass and a curious expression.

    Transform this photo into a playful Crayon Shin-chan cartoon style portrait as a little detective, keeping the person's face recognisable with bold outlines, bright flat colours, and a curious expression. Add a magnifying glass, a detective hat, and comic clue doodles. Keep the mood cheerful and nosy, with crisp cartoon lines, 4K clarity, and vibrant cinematic lighting.

    Shin-chan winter fun. Use this for a snowy version with a scarf, snowflakes, and rosy cheeks.

    Transform this photo into a playful Crayon Shin-chan cartoon style portrait in winter, keeping the person's face recognisable with bold outlines, bright flat colours, and a joyful expression. Add a cosy scarf, falling snowflakes, and a simple snowy background. Keep the mood cheerful and frosty, with crisp cartoon lines, 4K clarity, and vibrant cinematic lighting.

    How to Customize This Prompt

    Customizing a cartoon prompt is about protecting two things: the likeness and the joke. The likeness lives in the phrase “keeping the person’s face recognisable,” and the joke lives in the scene you choose. Change the scene freely — classroom, beach, detective office — but keep the face phrase and the style phrases (“bold outlines, bright flat colours”) identical in every version, so the set reads as one cartoon world. If you are new to this style, this crayon shin chan character ai photo prompt is a friendly place to begin.

    Start with the expression, since Shin-chan comedy is facial. The original prompt asks for “cheeky expressions,” and that word does heavy lifting: cheeky is mischievous without being mean, which is the character’s whole personality. If you change the expression word, change it within the same family — “silly,” “smug,” “delighted,” “curious” — and avoid words like “serious” or “dramatic,” which fight the style. The best part of this crayon shin chan character ai photo prompt is how little setup it needs before you start seeing results.

    Next, choose one gag per portrait. A classroom portrait gets a chalkboard doodle; a detective portrait gets a magnifying glass; a beach portrait gets a bucket. One clear gag reads instantly at small size, while three gags compete and blur. Name the gag concretely and place it near the face or hands, where the eye goes first. You can reuse this crayon shin chan character ai photo prompt on different photos and still get a fresh look every single time.

    Then set the background simply. Cartoon backgrounds should be flat and uncluttered: one colour field, one or two simple shapes, and the doodle details. A busy, realistic background behind a flat cartoon character looks pasted together. Ask for “simple colourful background” in every version, and name at most two background elements. For a stronger finish, pair this crayon shin chan character ai photo prompt with good lighting and a clean, simple background.

    Finally, keep the colours bright and flat. Words like “vibrant,” “flat colours,” and “bright” belong in every version, and words like “muted,” “realistic shading,” or “photorealistic” must stay out. If a result comes out too realistic, the usual cause is a missing style phrase — put “bold outlines, bright flat colours” back in and regenerate. This crayon shin chan character ai photo prompt works especially well when you keep the main subject sharp and well centered.

    Step-by-Step Guide

    1. Pick a photo with a clear, expressive face. Front-facing shots with a visible smile or smirk adapt best, since the cartoon style exaggerates the expression it finds.
    2. Paste the main prompt unchanged with your photo. Judge the first result on two things only: is the face recognisable, and does it look like a cartoon rather than a filtered photo?
    3. Check the outlines and colours. Bold, clean outlines and flat bright colours are the style’s signature. If the result looks like a normal photo with a filter, the style phrases need repeating more firmly.
    4. Refine the gag in one follow-up. If the doodle details are missing or wrong, name the exact gag — “add a chalkboard with a funny doodle” — and repeat the face phrase.
    5. Build the set with variations. Run three or four scene variations on the same photo to create a matching cartoon series for a profile collection or a sticker set.
    6. Compare the series at small size. Cartoon portraits are often used as avatars and stickers, so check that the face and the gag both read clearly at thumbnail size. If the gag vanishes when small, make it bigger and simpler.
    7. Export at high quality and keep the backgrounds clean. The flat colours compress well, but re-saving the same JPEG repeatedly softens the outlines. Export once at the highest quality and work from that file.
    8. Save the prompt family together. Keep the main prompt and the variations you used in one note, so the next cartoon portrait starts from a proven style rather than a fresh guess.

    Common Mistakes to Avoid

    The most common mistake is losing the likeness. A cartoon that looks like nobody in particular is just a cartoon, not a portrait. The face phrase must stay in every prompt and every follow-up, and the source photo must be clear and front-facing. If the face drifts, restart from the original photo rather than pushing revisions. Beginners often get their best first result from this crayon shin chan character ai photo prompt before trying harder edits.

    Another mistake is mixing cartoon and realistic styles in one prompt. Asking for “cartoon style with realistic shading” pulls the AI in two directions and usually produces an uncanny middle ground. Commit to the cartoon language — bold outlines, flat colours, simple background — and let realism stay out of it. Once you try this crayon shin chan character ai photo prompt, small changes in the wording can create a completely new mood.

    A third mistake is overloading the scene. Five gags, three backgrounds, and a crowd of characters in one portrait produce clutter that reads as noise at small size. One gag, one background idea, one expression: that is the whole recipe, and it scales from avatar to poster without changes. This crayon shin chan character ai photo prompt is a good choice when you want a professional look without complex tools.

    A fourth mistake is using a dark or blurry source photo. Cartoon conversion needs clear facial features to exaggerate, and a dark photo hides the eyes and mouth the style depends on. Choose the brightest, sharpest photo available, even if the pose is plain. Sharing the result from this crayon shin chan character ai photo prompt is easy because the output is already ready for social media.

    A fifth mistake is adding realistic text or logos. Cartoon lettering drawn by the AI often misspells, and brand logos rendered in cartoon style look unofficial. Keep text out of the portrait, and add captions or names afterwards in an editor where every letter is controlled. This crayon shin chan character ai photo prompt keeps the whole editing process simple while the final image still looks premium.

    Best Tools for This Edit

    ChatGPT’s image tools are a natural home for this prompt, since they handle style transfer — photo to cartoon — confidently and keep the face recognisable while redrawing the rest. They are strong at the bold outlines and flat colours this style needs, and their conversational follow-ups make gag refinements easy. Use ChatGPT when you want the most cartoon-like result from an ordinary photo. With a little practice, this crayon shin chan character ai photo prompt becomes a fast and natural part of your editing routine.

    Google Gemini is a good alternative when the source photo must stay close to the original. It preserves facial proportions more conservatively, which helps likeness, though the cartoon effect may come out gentler. If the first Gemini result looks too photographic, repeat the style phrases — “bold outlines, bright flat colours, comic shading” — more firmly in the follow-up. This crayon shin chan character ai photo prompt suits both quick experiments and carefully planned posts equally well.

    CapCut is the finishing tool for turning cartoon portraits into stickers, avatars, and reel covers. Its background remover, sticker maker, and text tools let a cartoon portrait become a chat sticker or a profile badge in minutes. Export the portrait at the highest quality first, then do all sticker and text work in CapCut so the outlines stay crisp. Try this crayon shin chan character ai photo prompt on a high-resolution photo if you want the cleanest possible output.

    Frequently Asked Questions

    Will the cartoon portrait still look like me? Yes, if the prompt keeps the face-recognition phrase and the source photo is clear and front-facing. The style exaggerates features — bigger eyes, bolder lines — but the proportions and expression stay yours. Check the first result against the photo before building a series. This crayon shin chan character ai photo prompt is popular because it balances detail, color and mood in a single step.

    Can I use this style for a group photo? It works, but each face needs room. On a crowded group photo the cartoon faces can blur together. Crop to two or three people at most, or edit each person separately and combine them afterwards. If the first attempt feels slightly off, run this crayon shin chan character ai photo prompt again with a different photo.

    Why does my result look like a filter instead of a cartoon? The style phrases were probably too weak or the source photo too realistic. Repeat “bold outlines, bright flat colours, comic shading” explicitly, simplify the background, and ask for a “flat cartoon illustration” finish. This crayon shin chan character ai photo prompt gives you a reliable starting point before you add your own creative touches.

    Is this style suitable for kids’ content? Yes, it is one of the safest and most cheerful styles for children’s profiles, birthday posts, and school content. Keep the gags kind and the expressions playful, and avoid any scary or mocking variations. Many users save this crayon shin chan character ai photo prompt so they can repeat the exact same style again later.

    Can I print the cartoon portrait? Yes. Export at the highest resolution the tool offers and print from that file. The flat colours print cleanly, and the bold outlines stay sharp at poster size, which makes this style a good choice for birthday banners and room decor.

    Final Words

    Bold outlines, bright colours, and one good gag are all this style needs. Try it on a cheerful photo and let the cartoon do the talking.

    Build the series one scene at a time, keep the face recognisable in every version, and the collection will feel like a cartoon show starring you. That is the whole charm of the style — familiar faces, drawn funny, in a world of their own.

    Bold lines, bright colours, and one cheeky expression are all this prompt needs. Try it on your funniest photo and enjoy the result.

    Turn the result into a sticker or profile picture, since bold cartoon lines stay readable at tiny sizes where photos turn muddy. If you make one for a friend, use their funniest expression photo, because the cartoon style exaggerates whatever mood is already in the shot. Try a second version with a plainer background if the doodles compete with the face, and keep the version that reads most clearly at a glance. The style also works well printed small, such as on a mug or phone case, where the flat colours stay vivid.

  • Aesthetic Cinematic Photo Prompt That Pops

    Aesthetic Cinematic Photo Prompt That Pops

    Dreamy pastel portrait from a viral aesthetic cinematic photo editing prompt for ChatGPT - viral aesthetic cinematic photo editing prompt chatgpt

    Introduction

    The viral aesthetic cinematic photo editing prompt for ChatGPT is built for soft, dreamy portraits. It uses window light, pastel tones, and a blurred background to create a calm, artistic mood that feels like a still from a quiet film. This guide covers this viral aesthetic cinematic photo editing prompt chatgpt in a simple and practical way. This viral aesthetic cinematic photo editing prompt chatgpt is designed to give you a polished result in just a few minutes.

    This is the opposite of a loud, high-contrast edit. It suits minimal outfits, relaxed poses, and natural skin texture, and it works well for feeds that favour a clean, peaceful look over bold drama. Many creators start with this viral aesthetic cinematic photo editing prompt chatgpt and then tweak the small details to match their own style.

    Soft window light portrait with pastel tones and film grain

    How to Use This Viral Aesthetic Cinematic Photo Editing Prompt for ChatGPT

    1. Start with a softly lit photo. A shot near a window, with no harsh shadows on the face, will match the prompt best.
    2. Paste the prompt unchanged for the first result. The pastel grade and film grain are balanced as a set, so judge them together.
    3. Adjust one element at a time. If the image feels too pale, ask for slightly deeper colour. If the grain feels heavy, ask for a cleaner finish.
    Minimal outfit portrait with calm colours and dreamy background

    Copy-Paste Prompt

    Create an aesthetic cinematic portrait with soft window light, pastel tones, and a dreamy blurred background. Style the subject in a minimal outfit with gentle film grain, calm colours, and a relaxed pose. Keep the mood peaceful and artistic, with natural skin texture, ultra-realistic detail, 4K clarity, and cinematic lighting.

    Pro Tips – Viral Aesthetic Cinematic Photo Editing Prompt ChatGPT

    • Keep the outfit simple. Plain colours and clean lines let the light and tones carry the aesthetic.
    • Protect the skin texture. Asking for natural skin keeps the portrait believable instead of plastic smooth.
    • Use it as a series. The same prompt on three or four photos makes a feed look planned and consistent.
    Peaceful artistic portrait with natural skin texture

    More Prompts to Try

    The aesthetic prompt works because its ingredients are balanced: soft light, pastel tones, gentle grain, and a relaxed pose. The variations below keep that balance and change one ingredient at a time, so each result feels like part of the same calm, artistic series. Use them to build a matching set of portraits for a feed, a profile collection, or a small series of wallpapers.

    Morning light pastel portrait. Use this for a fresh, early-morning version with pale gold light.

    Create an aesthetic cinematic portrait in soft morning light, with pale gold tones, a dreamy blurred bedroom background, and gentle film grain. Style the subject in a simple white outfit with a relaxed pose and calm expression. Keep the mood peaceful and fresh, with natural skin texture, ultra-realistic detail, 4K clarity, and cinematic lighting.

    Rainy window aesthetic portrait. Use this for a quiet, thoughtful portrait with rain and soft grey-blue tones.

    Create an aesthetic cinematic portrait beside a rainy window, with soft grey-blue tones, raindrops on glass, and a dreamy blurred background. Style the subject in a cosy knit outfit with a thoughtful pose and gentle film grain. Keep the mood calm and poetic, with natural skin texture, ultra-realistic detail, 4K clarity, and cinematic lighting.

    Blossom pastel portrait. Use this for a spring version with cherry blossom and pink tones.

    Create an aesthetic cinematic portrait under soft cherry blossom, with pastel pink tones, falling petals, and a dreamy blurred garden background. Style the subject in a light pastel outfit with a relaxed pose and gentle smile. Keep the mood dreamy and romantic, with natural skin texture, ultra-realistic detail, 4K clarity, and cinematic lighting.

    Golden dusk aesthetic portrait. Use this for a warm evening version with soft amber light.

    Create an aesthetic cinematic portrait at golden dusk, with warm amber tones, soft sunlight through curtains, and a dreamy blurred room background. Style the subject in a minimal beige outfit with a calm pose and gentle film grain. Keep the mood warm and nostalgic, with natural skin texture, ultra-realistic detail, 4K clarity, and cinematic lighting.

    Minimal studio aesthetic portrait. Use this for a clean, gallery-style portrait with a plain backdrop.

    Create an aesthetic cinematic portrait in a minimal studio, with a plain cream background, soft diffused light, and gentle film grain. Style the subject in a simple neutral outfit with a relaxed standing pose and calm expression. Keep the mood quiet and artistic, with natural skin texture, ultra-realistic detail, 4K clarity, and cinematic lighting.

    Seaside pastel portrait. Use this for a breezy coastal version with pale blue and sand tones.

    Create an aesthetic cinematic portrait by the sea, with pale blue and sand tones, soft sea breeze in the hair, and a dreamy blurred beach background. Style the subject in a light linen outfit with a relaxed pose and peaceful expression. Keep the mood airy and free, with natural skin texture, ultra-realistic detail, 4K clarity, and cinematic lighting.

    How to Customize This Prompt

    Customizing the aesthetic prompt means protecting its softness while changing its setting. The prompt’s identity is the combination of soft light, pastel colour, and calm mood; if you change the light to harsh noon sun or the colours to saturated neon, the aesthetic collapses even if the words look similar. Change the setting first — window, garden, beach, studio — and keep the light soft and the colours pastel in every version. If you are new to this style, this viral aesthetic cinematic photo editing prompt chatgpt is a friendly place to begin.

    Start with the light source, since soft light is the foundation. Window light, morning light, and diffused lamp light all work; direct sunlight does not. If your source photo was taken in harsh light, expect the AI to soften it, and judge the first result on the mood rather than the exact background. A phrase like “soften the harsh light” in a follow-up can rescue a sunny source photo. The best part of this viral aesthetic cinematic photo editing prompt chatgpt is how little setup it needs before you start seeing results.

    Next, choose a pastel palette and name it. “Pastel tones” alone gives the AI freedom to pick any pale colours, which can drift toward grey. Naming two colours — “pale pink and cream,” “soft blue and sand,” “lavender and pearl grey” — keeps the palette deliberate. Keep the palette to two colours plus one neutral, and the portrait will feel designed rather than washed out. You can reuse this viral aesthetic cinematic photo editing prompt chatgpt on different photos and still get a fresh look every single time.

    Then adjust the outfit and pose to match the setting. Minimal outfits suit this aesthetic because plain fabrics let light and colour carry the image. A busy pattern or a loud logo competes with the soft grade and breaks the calm. Likewise, a relaxed pose — sitting by a window, standing in soft light, looking slightly away — suits the mood better than a stiff, formal pose. For a stronger finish, pair this viral aesthetic cinematic photo editing prompt chatgpt with good lighting and a clean, simple background.

    Finally, control the film grain. Gentle grain is part of the look, but heavy grain can make skin look rough and the image look old. If the grain feels strong, ask for “a cleaner finish with very light grain.” If the image feels too digital and smooth, ask for “slightly more film grain.” Grain is a seasoning: a little deepens the analogue feeling, a lot overwhelms it. This viral aesthetic cinematic photo editing prompt chatgpt works especially well when you keep the main subject sharp and well centered.

    Step-by-Step Guide

    1. Choose a softly lit source photo. A shot near a window with no harsh shadows is ideal. Avoid photos taken in direct midday sun, since the AI must fight the existing light to create the soft look.
    2. Simplify the outfit in your mind before you prompt. If the photo has a loud pattern, expect the AI to simplify it or ask for a “minimal outfit” explicitly, as the main prompt does.
    3. Paste the prompt unchanged with your photo. Judge the first result as a set — light, palette, grain, and mood together — rather than fixing one detail immediately.
    4. Check the skin texture first. The prompt asks for natural skin, so look for pores and fine detail. If the skin looks plastic-smooth, ask for “more natural skin texture” before changing anything else.
    5. Tune the palette in one follow-up. If the image feels too pale, ask for “slightly deeper pastel colours.” If it feels too colourful, ask for “softer, more muted tones.” One palette change per message keeps the grade controlled.
    6. Build the series with variations. Run two or three variation prompts on photos from the same shoot to create a matching set. Shared light and palette make the series feel intentional.
    7. Check the series at feed size. Aesthetic portraits are usually seen small, in a grid, so view the set as thumbnails. The portraits should read as calm and consistent even when small; if one stands out as too dark or too saturated, regrade it to match.
    8. Save the prompt family together. Keep the main prompt and the variations you used in one note with the finished images, so the next series starts from a proven set rather than from scratch.

    Common Mistakes to Avoid

    The most common mistake is starting with a harsh, high-contrast photo. The aesthetic prompt asks for soft light, but it works from the light already in the photo, and a harshly lit source often keeps hard shadows even after editing. Choose the softest-lit photo you have, and the prompt will have far less work to do. Beginners often get their best first result from this viral aesthetic cinematic photo editing prompt chatgpt before trying harder edits.

    Another mistake is asking for “perfect” skin. Words like “flawless” and “perfect” push the AI toward heavy smoothing, which destroys the natural texture this aesthetic depends on. The prompt deliberately says “natural skin texture” — keep that phrase in every version and every follow-up. Once you try this viral aesthetic cinematic photo editing prompt chatgpt, small changes in the wording can create a completely new mood.

    A third mistake is overdoing the pastel grade until the image looks grey. Pastel is pale colour, not absent colour. If faces look washed out, the grade has gone too far; ask for “slightly deeper colour” and a “warmer tone” to bring life back. A good test is the lips and cheeks: if they have lost all colour, the grade is too strong. This viral aesthetic cinematic photo editing prompt chatgpt is a good choice when you want a professional look without complex tools.

    A fourth mistake is mixing aesthetics within one series. Running a pastel prompt on one photo, a neon prompt on the next, and a vintage prompt on the third produces a scattered feed. Pick one aesthetic family per series and finish the whole set before starting another. Consistency is what makes a feed look curated. Sharing the result from this viral aesthetic cinematic photo editing prompt chatgpt is easy because the output is already ready for social media.

    A fifth mistake is adding heavy effects after the edit. Stickers, bold frames, and strong filters applied on top of a soft aesthetic portrait fight the calm mood. If the portrait needs a finishing touch, use a very light grain overlay or a soft vignette, and nothing louder. This viral aesthetic cinematic photo editing prompt chatgpt keeps the whole editing process simple while the final image still looks premium.

    Best Tools for This Edit

    ChatGPT’s image tools are the natural home for this prompt, and they handle the soft grade, the film grain, and the background blur as a balanced set. They are also forgiving with follow-up language: “a little warmer” or “slightly softer” produce sensible revisions. Use ChatGPT when you want the dreamy, artistic version of a portrait and you are happy to iterate conversationally. With a little practice, this viral aesthetic cinematic photo editing prompt chatgpt becomes a fast and natural part of your editing routine.

    Google Gemini is a strong choice when the source photo must stay recognisable and the edit should feel like a gentle enhancement rather than a reinvention. Its skin tones stay natural and its window-light rendering is clean. The pastel grade may come out subtler in Gemini, so add “soft pastel tones” explicitly if the first result looks too neutral. This viral aesthetic cinematic photo editing prompt chatgpt suits both quick experiments and carefully planned posts equally well.

    Lightroom-style mobile editors, such as Snapseed or Lightroom Mobile, are the right finishing tools. After the AI edit, a small lift in warmth, a gentle grain addition, or a slight fade can unify a series. Doing this finishing pass in an editor rather than in the prompt gives you precise control over the final grade, and it keeps every image in the series at exactly the same settings. Try this viral aesthetic cinematic photo editing prompt chatgpt on a high-resolution photo if you want the cleanest possible output.

    Frequently Asked Questions

    Will this prompt work on a photo taken indoors at night? It can, but the result depends on the existing light. A night photo lit by a warm lamp adapts well, because the prompt can soften and pastel-tint that light. A dark, noisy phone photo taken in a dim room is harder; brighten it first or choose a daytime photo for the cleanest result. This viral aesthetic cinematic photo editing prompt chatgpt is popular because it balances detail, color and mood in a single step.

    Can I use this aesthetic for a couple portrait? Yes, and it suits couples well, because the soft light and calm mood flatter two people at once. Ask for both faces to stay unchanged, keep the framing wide enough for two, and use the same pastel palette across the set so the series matches. If the first attempt feels slightly off, run this viral aesthetic cinematic photo editing prompt chatgpt again with a different photo.

    Why does my result look grey instead of pastel? The grade went too far toward desaturation. Ask for “slightly deeper pastel colours” and name two colours, such as pale pink and cream. The named colours anchor the palette and stop the image drifting into grey. This viral aesthetic cinematic photo editing prompt chatgpt gives you a reliable starting point before you add your own creative touches.

    Is film grain supposed to be visible? Only faintly. Gentle grain adds an analogue texture; visible, chunky grain looks like noise. If you can see the grain at a normal viewing distance, ask for “very light film grain” or “a cleaner finish.” Many users save this viral aesthetic cinematic photo editing prompt chatgpt so they can repeat the exact same style again later.

    Can I use these portraits as phone wallpapers? Yes. Ask for a tall vertical crop with the subject slightly below centre, leaving clean space at the top for the clock. The soft background keeps the home screen readable, which is exactly what a wallpaper needs. This viral aesthetic cinematic photo editing prompt chatgpt can also be adapted for stories, profile pictures, posters and thumbnails.

    Final Words

    Soft light, calm colour, and a relaxed pose are all this prompt needs. Try it on a quiet portrait and let the aesthetic do the talking.

    Keep the palette to two soft colours, protect the skin texture, and let the series share one light. That discipline is what makes a calm feed feel deliberate rather than accidental.

    Soft light, calm colour, and a relaxed pose are all this prompt needs. Try it on a quiet portrait and let the aesthetic do the talking.

    Pair this edit with a soft, minimal caption and plenty of white space in your feed, since the calm mood of the portrait deserves room to breathe. If you shoot more portraits in the same style, keep the light source consistent, such as the same window at the same hour, so the series matches without extra work. A gentle film grain overlay applied after the AI edit can deepen the analogue feeling, but use it lightly so the skin stays natural. When the result feels right, resist adding more effects, because this aesthetic is strongest when it stays simple.

  • Viral Cinematic Photo Edit Prompt for ChatGPT

    Viral Cinematic Photo Edit Prompt for ChatGPT

    Cinematic portrait made with a viral cinematic photo editing prompt for ChatGPT - viral cinematic photo editing prompt chatgpt

    Introduction

    A viral cinematic photo editing prompt for ChatGPT works because it copies the look of a film poster: dramatic light, deep shadows, and a colour grade that feels expensive. The prompt below builds that look in one pass, placing you against a blurred city evening with rim light on the hair and a confident expression. This guide covers this viral cinematic photo editing prompt chatgpt in a simple and practical way. This viral cinematic photo editing prompt chatgpt is designed to give you a polished result in just a few minutes.

    This style suits profile pictures, posters, and social posts that need to stand out. It works best on photos with a clear subject and a little space around the head and shoulders, so the background blur has room to show. Many creators start with this viral cinematic photo editing prompt chatgpt and then tweak the small details to match their own style.

    Moody city evening portrait with dramatic side lighting

    How to Use This Viral Cinematic Photo Editing Prompt for ChatGPT

    1. Choose a photo with a clear subject. A half-body or head-and-shoulders shot with a simple background gives the cleanest result.
    2. Paste the prompt with your photo. Keep the wording as it is for the first try, so you can see the baseline film-poster look.
    3. Tune the mood next. If it feels too dark, ask for softer shadows. If the colour grade feels strong, ask for a lighter teal and orange balance.
    Film poster style photo with teal and orange colour grade

    Copy-Paste Prompt

    Create a viral cinematic photo edit with dramatic side lighting, deep shadows, and a moody teal-and-orange colour grade. Place the subject against a blurred city evening background, add gentle rim light on the hair, and keep the expression confident. Deliver a film-poster feel with ultra-realistic detail, 4K resolution, and cinematic lighting.

    Pro Tips – Viral Cinematic Photo Editing Prompt ChatGPT

    • Side light is the key detail. Photos taken near a window or a street light already have the direction of light this prompt expects.
    • Keep the expression calm and confident. A relaxed face reads as cinematic, while a big smile can break the film-poster mood.
    • Crop for the poster feel. A tall crop with the subject slightly off centre looks more like a movie poster than a square crop.
    Confident portrait with rim light on hair at dusk

    More Prompts to Try

    One cinematic prompt is enough to learn the look, but a set of variations is what turns a single viral edit into a repeatable style. The prompts below are original variations on the same film-poster idea: dramatic light, deep shadows, a strong colour grade, and a confident subject. Each one changes the setting or the grade while keeping the cinematic language intact, so the results feel like frames from different films rather than copies of one edit.

    Rainy street cinema. Use this for a moody, rain-soaked film-noir version with reflections.

    Create a cinematic rainy-street portrait with wet reflections, dramatic side lighting, and deep shadows. Place the subject under a blurred neon-lit street at night, add rain droplets and a glistening coat, and keep the expression calm and confident. Deliver a film-noir feel with ultra-realistic detail, 4K resolution, and cinematic lighting.

    Desert sunset cinema. Use this for a warm, epic western-style portrait with golden light.

    Create a cinematic desert portrait at sunset with golden rim light, warm orange shadows, and a vast blurred dune background. Style the subject in earthy tones with a confident stance, add drifting dust in the light, and keep the mood epic and quiet. Deliver a film-poster feel with ultra-realistic detail, 4K resolution, and cinematic lighting.

    Neon night cinema. Use this for a bold cyberpunk-style portrait with pink and blue light.

    Create a cinematic neon-night portrait with pink and blue rim lighting, deep shadows, and a blurred futuristic city background. Add gentle haze, glowing signs, and a confident expression. Deliver a cyberpunk film feel with ultra-realistic detail, 4K resolution, and cinematic lighting.

    Forest mist cinema. Use this for a quiet, mysterious portrait with soft fog and green tones.

    Create a cinematic forest portrait in morning mist with soft diffused light, deep green shadows, and a blurred woodland background. Add drifting fog, gentle light rays, and a thoughtful expression. Deliver a mysterious film feel with ultra-realistic detail, 4K resolution, and cinematic lighting.

    Vintage film cinema. Use this for a retro, grainy portrait that looks like an old movie still.

    Create a cinematic vintage portrait with warm faded colours, visible film grain, and soft window light. Style the subject in retro clothing against a blurred old-town background, and keep the expression calm and nostalgic. Deliver an old-film feel with ultra-realistic detail, 4K resolution, and cinematic lighting.

    Rooftop dusk cinema. Use this for a city-skyline portrait with the last light of the day.

    Create a cinematic rooftop portrait at dusk with a glowing city skyline behind, purple and orange sky tones, and gentle wind in the hair. Add rim light on the face, keep the expression confident, and blur the skyline softly. Deliver a film-poster feel with ultra-realistic detail, 4K resolution, and cinematic lighting.

    How to Customize This Prompt

    The cinematic prompt is built from four ingredients: the light, the grade, the background, and the expression. Changing any one of them changes the film the portrait belongs to, while changing all four at once usually breaks the look. Start with the background, because it fixes the story: a city evening says thriller, a desert says epic, a forest says mystery. Name the background concretely — “blurred city evening” is good, “blurred street with neon signs and wet reflections” is better, because the extra detail gives the AI texture to render. If you are new to this style, this viral cinematic photo editing prompt chatgpt is a friendly place to begin.

    Next, match the grade to the background. The teal-and-orange grade in the main prompt suits city nights and action posters, but it fights with a forest or a vintage scene. For green settings, ask for deep greens and soft golds; for vintage settings, ask for warm faded tones and film grain. The grade is the colour script of your film, and it should agree with the location rather than compete with it. The best part of this viral cinematic photo editing prompt chatgpt is how little setup it needs before you start seeing results.

    Then adjust the light direction and strength. Dramatic side lighting is the signature of this style, but “side light” can be hard or soft. Hard side light with deep shadows suits thrillers and action posters; soft side light with lifted shadows suits dramas and romance. If the portrait looks too harsh, add “soften the shadows slightly” rather than removing the side light entirely, so the cinematic shape survives. You can reuse this viral cinematic photo editing prompt chatgpt on different photos and still get a fresh look every single time.

    Finally, tune the expression and pose words. “Confident” is the default, but “thoughtful,” “defiant,” and “calm” each push the portrait toward a different genre. Keep the expression word consistent with the background story: a defiant expression on a rooftop reads as action, while a thoughtful expression in mist reads as mystery. One well-chosen expression word does more work than a paragraph of extra adjectives. For a stronger finish, pair this viral cinematic photo editing prompt chatgpt with good lighting and a clean, simple background.

    Step-by-Step Guide

    1. Pick a photo with space around the subject. Head-and-shoulders or half-body shots work best, because the blurred background needs room to show. Avoid tight face crops, which leave no space for the cinematic setting.
    2. Check the existing light direction. If the photo was taken near a window or a street light, the prompt’s side lighting will blend naturally. If the light is flat and frontal, expect a stronger transformation and judge the first result with that in mind.
    3. Paste the prompt unchanged with your photo. Keep the wording as written for the first attempt so you learn the baseline film-poster look before you start changing it.
    4. Review the four ingredients separately. Look at the light, the grade, the background, and the expression one at a time, and decide which one is weakest. Naming the weak ingredient stops you from rewriting a prompt that is mostly working.
    5. Refine one ingredient per follow-up. If the grade is too strong, ask for “a lighter teal and orange balance.” If the shadows hide the face, ask for “slightly softer shadows.” Single changes keep the edit under control.
    6. Try a variation prompt on the same photo. Once the main look works, run one or two variations to build a matching set. The shared cinematic language makes them feel like frames from one shoot.
    7. Crop for the poster feel. Use a tall crop with the subject slightly off centre and a little extra space at the top. Check the result at post size, since cinematic detail that looks rich full-screen can vanish in a small thumbnail.
    8. Save the prompt and the best version together. Note the exact wording, the tool, and the date. A cinematic style you can repeat is worth more than a single lucky result.

    Common Mistakes to Avoid

    The biggest mistake is starting with a busy, cluttered photo. The cinematic prompt needs to rebuild the background, and a photo full of people, signs, and objects gives the AI too much to erase. Choose a photo with a simple background and one clear subject, and the transformation will be far cleaner. This viral cinematic photo editing prompt chatgpt works especially well when you keep the main subject sharp and well centered.

    Another mistake is overdoing the colour grade. The teal-and-orange look is strong by design, and pushing it further — asking for “extreme” or “maximum” grade — turns skin green and shadows muddy. If the grade feels heavy, ask for it lighter rather than stronger. Restraint is what separates a film poster from a filter. Beginners often get their best first result from this viral cinematic photo editing prompt chatgpt before trying harder edits.

    A third mistake is smiling too broadly. A big grin breaks the film-poster mood faster than any technical error. The cinematic look depends on a calm, confident expression, so if your source photo has a wide smile, pick a different photo or ask for a “calm, subtle expression” and accept that the result will be a compromise. Once you try this viral cinematic photo editing prompt chatgpt, small changes in the wording can create a completely new mood.

    A fourth mistake is ignoring the hair and edges. Rim light only works when the subject is separated from the background, and in a dark portrait a dark-haired subject can melt into a dark background. If that happens, ask for “stronger rim light on the hair” to carve the outline back out. This viral cinematic photo editing prompt chatgpt is a good choice when you want a professional look without complex tools.

    A fifth mistake is exporting at low quality. Cinematic edits live in the shadows and the grain, and heavy compression crushes exactly those details. Export at the highest quality the tool offers, and avoid re-saving the same JPEG multiple times, since each save softens the shadows a little more. Sharing the result from this viral cinematic photo editing prompt chatgpt is easy because the output is already ready for social media.

    Best Tools for This Edit

    ChatGPT’s image tools are the natural home for this prompt, since it was written for them and they handle the dramatic grade and background rebuild confidently. They are strong at the full transformation — new background, new light, new grade in one pass — and their conversational follow-ups make it easy to tune the mood step by step. Use ChatGPT when you want the boldest, most poster-like result and you are starting from an ordinary photo. This viral cinematic photo editing prompt chatgpt keeps the whole editing process simple while the final image still looks premium.

    Google Gemini is a good alternative when the source photo is precious and you want less reinvention. It preserves the original face and details more conservatively, which suits portraits where likeness matters most. The cinematic grade may come out softer in Gemini, so add a phrase like “stronger teal and orange grade” if the first result feels too gentle. With a little practice, this viral cinematic photo editing prompt chatgpt becomes a fast and natural part of your editing routine.

    CapCut is where the cinematic portrait becomes content. Use it to crop the portrait to poster and story formats, add a title in a film-poster font, and animate a slow zoom for reels. Keeping the grade consistent between the still portrait and the video version makes the whole post feel like one production, so apply the same colour adjustments to both. This viral cinematic photo editing prompt chatgpt suits both quick experiments and carefully planned posts equally well.

    Frequently Asked Questions

    Does this prompt work on full-body photos? It can, but the film-poster look is strongest on head-and-shoulders or half-body shots, where the face and the grade dominate. On full-body photos the background takes over and the cinematic light has less impact. Crop to half-body first for the most poster-like result. Try this viral cinematic photo editing prompt chatgpt on a high-resolution photo if you want the cleanest possible output.

    Why does my edit look too dark? The prompt asks for deep shadows, and on a photo that is already dark the result can go muddy. Ask for “slightly softer shadows” or “a touch more light on the face” as a follow-up, and start from the brightest clear photo you have. This viral cinematic photo editing prompt chatgpt is popular because it balances detail, color and mood in a single step.

    Can I use this prompt for a couple or group photo? It is written for one subject. On group photos the grade applies unevenly and faces at the edges often distort. Edit one person at a time for consistent results, or accept a looser, more artistic group result. If the first attempt feels slightly off, run this viral cinematic photo editing prompt chatgpt again with a different photo.

    Will the teal and orange grade suit every skin tone? It suits most, but on very deep or very fair skin it can shift colour noticeably. If the skin looks off, ask for “natural skin tones with a lighter grade” — the cinematic light stays, and the skin returns to a believable colour. This viral cinematic photo editing prompt chatgpt gives you a reliable starting point before you add your own creative touches.

    How do I turn the portrait into a real poster? Ask for a taller crop with empty space at the top, export at high quality, then add the title and credits in a design app. AI-generated text is unreliable, so always add lettering yourself. Many users save this viral cinematic photo editing prompt chatgpt so they can repeat the exact same style again later.

    Final Words

    One strong prompt, one good photo, and one careful review are all this look needs. Try it on your favourite portrait and see how quickly an everyday photo turns cinematic.

    Run the variations on the same photo to find your favourite genre, then keep that prompt as your signature cinematic style. A consistent film-poster look across your posts is what turns single edits into a recognisable feed.

    One strong prompt, one good photo, and one careful review are all this look needs. Try it on your favourite portrait and see how quickly an everyday photo turns cinematic.

    For a matching set, run the same prompt on two or three portraits from the same shoot and post them as a carousel, since the shared grade makes them feel like a series. If you want a poster, ask for a taller crop with extra space at the top for a title, and keep the subject slightly off centre. Try the edit on a black-and-white original as well, because the teal and orange grade behaves differently on monochrome sources and can produce a striking duotone. Save each variation before you move on, so you can compare them side by side later.

  • 6 Best Gemini Photo Editing Prompts to Try

    6 Best Gemini Photo Editing Prompts to Try

    Portrait edited with one of the 6 best Google Gemini AI photo editing prompts

    Introduction

    The 6 best Google Gemini AI photo editing prompts all share one goal: a clean, premium portrait that still looks like the real person. Gemini is strong at studio-style edits, so it can smooth a messy background, balance the light, and sharpen the details that matter, like the eyes, without changing the face. This 6 best google gemini ai photo editing prompts is designed to give you a polished result in just a few minutes.

    The prompt below is a great place to start. It asks for clean studio lighting, a soft blurred background, and natural skin tones, with a subtle warm glow for a polished profile-picture finish. Use it on a clear, front-facing photo for the best result. Many creators start with this 6 best google gemini ai photo editing prompts and then tweak the small details to match their own style.

    Studio portrait with soft light from Gemini photo editing prompts

    How to Use These 6 Best Google Gemini AI Photo Editing Prompts

    1. Upload a clear photo. Pick a sharp, front-facing shot with even light on the face, and avoid heavy filters or sunglasses.
    2. Paste the prompt with your photo. Add it exactly as written, then wait for the first result before changing anything.
    3. Refine in small steps. If the background is still busy, ask for a stronger blur. If the skin looks flat, ask for a touch more warmth and contrast.
    Close-up profile picture with natural skin tones and warm glow

    Copy-Paste Prompt

    Transform this photo into a polished Gemini-style portrait with clean studio lighting, a soft blurred background, and natural skin tones. Keep the original face unchanged, sharpen the eyes, smooth the background, and add a subtle warm glow. Aim for a premium profile-picture look with balanced colours, ultra-realistic detail, 4K sharpness, and cinematic lighting.

    Pro Tips

    • Keep the face unchanged in your wording. Telling the AI to preserve the original face is what keeps the edit looking like you.
    • Ask for one change at a time on the second pass. Single tweaks are easier to judge than a long list of new requests.
    • Save the version you like before trying a bolder style, so you always have a safe result to fall back on.
    Before and after photo edit with clean blurred background

    More Prompts to Try

    The main prompt gives you the clean studio look, but the real value of the 6 best Google Gemini AI photo editing prompts is the set: six related prompts that cover different moods while keeping the same premium finish. The variations below are original prompts in the same family. Each one keeps the face unchanged and the skin natural, and changes only the light, background, or mood, so you can build a full set of portraits that still look like one person.

    Golden-hour window portrait. Use this when the studio look feels too formal and you want warmth.

    Transform this photo into a warm golden-hour portrait with soft window light falling across the face, a gently blurred home interior background, and natural skin tones. Keep the original face unchanged, add a soft glow on the hair, and keep the expression relaxed. Aim for a premium lifestyle portrait with balanced colours, ultra-realistic detail, 4K sharpness, and cinematic lighting.

    Cool monochrome studio portrait. Use this for a bold, editorial profile picture with a fashion-magazine feel.

    Transform this photo into a striking black-and-white studio portrait with strong contrast, deep shadows, and a plain dark background. Keep the original face unchanged, sharpen the eyes, and keep the skin texture natural without smoothing. Aim for a premium editorial look with crisp detail, 4K sharpness, and dramatic cinematic lighting.

    Outdoor garden portrait. Use this for a fresh, natural profile picture with greenery and daylight.

    Transform this photo into a fresh outdoor portrait in a softly blurred garden, with dappled daylight, green foliage tones, and natural skin colour. Keep the original face unchanged, add gentle sunlight on the hair, and keep the expression calm and friendly. Aim for a premium natural portrait with balanced colours, ultra-realistic detail, 4K sharpness, and cinematic lighting.

    Festive warm portrait. Use this for festival posts and celebration profile pictures.

    Transform this photo into a festive portrait with warm marigold and diya-light tones, a softly blurred celebration background, and a gentle golden glow. Keep the original face unchanged, style the outfit in traditional colours, and keep the expression joyful but natural. Aim for a premium festive look with rich colours, ultra-realistic detail, 4K sharpness, and cinematic lighting.

    Professional headshot with grey background. Use this for LinkedIn, CVs, and official profiles where a neutral look matters.

    Transform this photo into a professional headshot with a clean grey studio background, even soft lighting, and natural skin tones. Keep the original face unchanged, frame the head and shoulders centrally, and keep the expression confident and approachable. Aim for a polished corporate portrait with balanced colours, ultra-realistic detail, 4K sharpness, and clean studio lighting.

    Dreamy pastel portrait. Use this for a soft, artistic profile picture with a calm, creative mood.

    Transform this photo into a dreamy pastel portrait with soft diffused light, pale pink and lavender tones, and a blurred airy background. Keep the original face unchanged, soften the contrast gently, and keep the expression peaceful. Aim for a premium artistic look with delicate colours, ultra-realistic detail, 4K sharpness, and cinematic lighting.

    How to Customize This Prompt

    Customizing a Gemini portrait prompt is mostly a matter of swapping three things: the light, the background, and the mood. The structure of the prompt — transform the photo, keep the face unchanged, name the light, name the background, name the finish — stays the same in every version. When you change only the light from “clean studio lighting” to “warm evening light,” everything else in the result stays familiar, and you can compare versions fairly. If you are new to this style, this 6 best google gemini ai photo editing prompts is a friendly place to begin.

    Start with the background, because it sets the context of the portrait. A plain studio background says professional, a blurred street says lifestyle, and a garden says fresh and natural. Name the background in concrete words rather than vague ones: “softly blurred bookshop interior” beats “nice background” every time, because the AI has something visible to build. The best part of this 6 best google gemini ai photo editing prompts is how little setup it needs before you start seeing results.

    Next, adjust the light to match the background. Studio light suits plain backgrounds, golden-hour light suits outdoor settings, and warm lamp light suits evening interiors. Mismatched light and background — bright noon light in a dark room, for instance — is the most common reason an edit looks fake. If the result feels wrong but you cannot say why, the light-background match is the first thing to check. You can reuse this 6 best google gemini ai photo editing prompts on different photos and still get a fresh look every single time.

    Then tune the mood with the expression and colour words. “Calm and confident” gives a professional portrait, “relaxed and joyful” gives a festive one, and “thoughtful and quiet” gives an artistic one. Colour words work the same way: “warm glow” feels welcoming, “cool tones” feel modern, and “rich festive colours” feel celebratory. Change one mood word at a time so you can see what each word actually does. For a stronger finish, pair this 6 best google gemini ai photo editing prompts with good lighting and a clean, simple background.

    Finally, keep the face-protection phrase in every version. “Keep the original face unchanged” is the sentence that stops Gemini from reshaping the person into a stranger. It should survive every edit you make. If you remove it while customizing, the portrait may become prettier and less recognisable at the same time, which defeats the purpose of a personal photo edit. This 6 best google gemini ai photo editing prompts works especially well when you keep the main subject sharp and well centered.

    Step-by-Step Guide

    1. Choose the best source photo. Pick a sharp, front-facing shot with even light, no sunglasses, and no heavy filter. The AI can improve light and background, but it cannot invent facial detail that is hidden behind sunglasses or blur.
    2. Open Gemini and upload the photo. Attach the image first, then paste the prompt in the same message, so the model treats the photo as the thing to edit rather than as a reference.
    3. Paste the main prompt unchanged for the first result. Resist the urge to add extras on the first try; the baseline result tells you what the prompt does on its own.
    4. Study the result against the original. Check the face first: is it still recognisably you? Then check the background blur, the skin tones, and the light direction. Note exactly one thing to improve.
    5. Ask for one refinement. If the background is still busy, write “make the background more blurred.” If the skin looks flat, write “add a touch more warmth and contrast.” One change per message keeps the edit controllable.
    6. Build your set with the variations. Once the main prompt works, run two or three of the variation prompts on the same photo to create matching portraits for different platforms.
    7. Compare versions side by side. Look at them at the size they will be seen — small, as profile pictures — because a portrait that looks great full-screen can look muddy at avatar size. Pick the version that reads clearly when small.
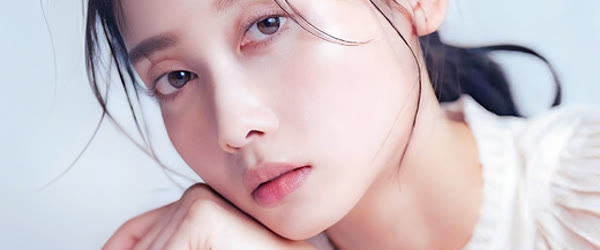
    8. Save the final prompt and the winning image together. Write down the exact prompt wording that produced the version you kept, so you can repeat it on the next photo without guessing.

    Common Mistakes to Avoid

    The most common mistake is uploading a low-quality or heavily filtered photo. Gemini works from the detail in the source image, so a blurry selfie with a beauty filter gives it little to work with, and the result often looks waxy. Start with the sharpest, least filtered photo you have, even if it looks plain; the prompt adds the polish. Beginners often get their best first result from this 6 best google gemini ai photo editing prompts before trying harder edits.

    Another mistake is asking for too many changes in one prompt. A prompt that asks for a new background, new outfit, new hairstyle, new light, and a new expression all at once gives the AI five ways to drift from the original face. Keep the first prompt focused on light, background, and finish, and handle outfit or style changes as a separate second step. Once you try this 6 best google gemini ai photo editing prompts, small changes in the wording can create a completely new mood.

    A third mistake is forgetting the face-protection phrase on follow-up edits. Each follow-up message is a fresh instruction, and if you write “make it more dramatic” without repeating “keep the original face unchanged,” the face can shift. Repeat the protection phrase in every message that changes the image. This 6 best google gemini ai photo editing prompts is a good choice when you want a professional look without complex tools.

    A fourth mistake is over-smoothing the skin. Prompts that ask for “flawless skin” or “perfect skin” often erase pores, fine lines, and texture, producing a plastic look that reads as fake instantly. Ask for “natural skin tones” and “natural skin texture” instead, and let small imperfections stay. Real skin is what makes a portrait believable. Sharing the result from this 6 best google gemini ai photo editing prompts is easy because the output is already ready for social media.

    A fifth mistake is using the same portrait everywhere at the same crop. A square profile picture, a wide banner, and a story post need different framings, and a single crop stretched to fit all three looks amateur. Generate the winning edit once, then create a wider version for banners and a taller version for stories, keeping the face centred in each. This 6 best google gemini ai photo editing prompts keeps the whole editing process simple while the final image still looks premium.

    Best Tools for This Edit

    Google Gemini is the natural home for these prompts, since they were written for its photo editing strengths: preserving the original face while rebuilding light and background. Its studio-style edits are clean, its skin tones stay natural, and it handles follow-up refinements in conversation well. Use it when the source photo matters and the edit should look like a better version of the real picture rather than a new invention. With a little practice, this 6 best google gemini ai photo editing prompts becomes a fast and natural part of your editing routine.

    ChatGPT’s image tools are a strong alternative, especially when you want a more dramatic or stylized result. It is more willing to reimagine a scene, which suits cinematic and festive variations, and its conversational follow-ups make it easy to iterate. The trade-off is face drift: check the face carefully after every edit, and restate the face-protection phrase often. This 6 best google gemini ai photo editing prompts suits both quick experiments and carefully planned posts equally well.

    CapCut and VN are not photo editors, but they matter for what happens after the portrait is made. A Gemini portrait becomes a profile video, a reel cover, or a status update through these apps, and their filters, text, and crop tools finish the job. Export the portrait from Gemini at the highest quality, then do cropping, text, and light filters in the video app so the still and the reel share the same look. Try this 6 best google gemini ai photo editing prompts on a high-resolution photo if you want the cleanest possible output.

    Frequently Asked Questions

    Will Gemini change my face when I use these prompts? It should not, as long as the prompt says to keep the original face unchanged. That phrase is included in every prompt here for exactly that reason. If a result still drifts, upload a clearer source photo and repeat the phrase in your follow-up message. This 6 best google gemini ai photo editing prompts is popular because it balances detail, color and mood in a single step.

    Can I use these prompts on group photos? They are written for single portraits. On a group photo, the AI may edit one face well and blur or alter the others. Crop the photo to one person first, run the prompt, and repeat for each person if you need the whole group edited. If the first attempt feels slightly off, run this 6 best google gemini ai photo editing prompts again with a different photo.

    Why does my result look too smooth or plastic? That usually comes from asking for flawless skin or from a heavily filtered source photo. Use the wording “natural skin tones” and “natural skin texture,” start from an unfiltered photo, and avoid adding “smooth” or “perfect” to the prompt. This 6 best google gemini ai photo editing prompts gives you a reliable starting point before you add your own creative touches.

    Do I need a paid plan to use Gemini photo editing? The basic photo editing features are available on the free tier in most regions, with usage limits that reset over time. Heavy daily use may hit those limits, in which case a paid plan or a second tool like ChatGPT covers the overflow. Many users save this 6 best google gemini ai photo editing prompts so they can repeat the exact same style again later.

    Can I use the edited portrait commercially? For personal profiles and social posts, yes. For client work or advertising, check the tool’s current terms for commercial use and keep the original photo and the prompt on file. When a brand’s policy requires it, disclose that the image is AI-assisted. This 6 best google gemini ai photo editing prompts can also be adapted for stories, profile pictures, posters and thumbnails.

    Final Words

    Start with this clean studio look, then branch out to the other prompts in the set once you trust the workflow. A few good prompts, reused well, will cover most of your profile and portrait needs. A second pass with this 6 best google gemini ai photo editing prompts often brings out finer details in the final image.

    Build the set slowly, keep the prompts that work, and let the variations cover each platform. A small, trusted prompt kit beats a long list of untested ideas every time.

    Start with this clean studio look, then branch out to the other prompts in the set once you trust the workflow. A few good prompts, reused well, will cover most of your profile and portrait needs.

    If you plan to use the portrait as a profile picture everywhere, make a second version with a slightly wider crop for banners and cover photos, so the same edit works at every size. Try the prompt on an older photo too, since Gemini often rescues soft or noisy shots better than expected. When you find a version you love, note the exact wording you used, because small changes in the prompt can shift the result more than you expect. Over time, a short list of proven prompts becomes your personal editing kit.