Introduction
The cinematic eyes view prompt idea turns the camera into a person. Instead of watching a scene from outside, viewers see it through eyes, lashes, and reflections, which makes every frame feel personal. It is a small shift in framing, but it changes the whole emotion of a photo or video. Used carefully, the cinematic eyes view prompt keeps the subject, setting, and mood working toward the same result.
This style works for travel, romance, and quiet moments. A blink transition, a reflection in an eye, or a view half-hidden by lashes can say more than a wide shot. The intimacy is the point, and the soft focus around the edges makes it feel like a memory. That balance is what makes the cinematic eyes view prompt useful beyond a single lucky generation.
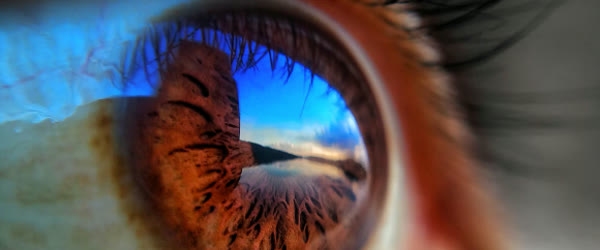
Table of Contents
- How to Use This Prompt
- Quick Take
- Pro Tips for Cinematic Eyes View Prompt
- The Power of the Eyes View
- Techniques That Sell the POV Feeling
- Related Ideas to Explore
- How to Customize This Concept
- Step-by-Step Guide
- Common Mistakes to Avoid
- Best Tools for This Concept
- Frequently Asked Questions
- Final Words
How to Use This Prompt
- Frame your shot so the edges of the view are soft, like lashes or a window edge, with the subject sharp in the center.
- Add a reflection or a blink-style transition to sell the feeling that a real person is looking.
- Keep the colors warm and the light soft, and export the final frame with a gentle vignette.

Quick Take
First-person POV shots framed through eyes, lashes, and reflections for an intimate cinematic feel, where the viewer experiences the scene as the subject sees it rather than watching from outside. The cinematic eyes view prompt also travels well across portraits, scenes, and themed variations.
Pro Tips for Cinematic Eyes View Prompt
- Keep the center of the frame sharp, since a fully blurred image loses the story.
- Use reflections sparingly, because one strong reflection beats three weak ones.
- Pair the POV shot with a normal wide shot, so viewers understand where the scene takes place.

The Power of the Eyes View
The cinematic eyes view works because it removes the distance between the viewer and the scene. Traditional photography shows you a place; a POV shot puts you inside it. When the frame is edged with lashes, softened like a gaze, or interrupted by a blink, the viewer’s brain reads the image as their own sight, and the emotional response deepens instantly. That is why a simple view through eyes can outperform a technically perfect landscape: the landscape is admired, but the POV shot is inhabited. For the final check, compare the result against the cinematic eyes view prompt and remove anything that distracts from it.
The style has deep roots in cinema, where directors have used first-person shots for decades to create intimacy, tension, and romance. A character opens their eyes and the audience wakes with them; a lover looks up and the audience feels the look returned. Social media compressed that language into still images and short clips, and AI tools made it accessible to everyone. You no longer need a camera rig or a film crew to build a POV frame; you need a clear idea of what the eyes are seeing and the words to describe the softness at the edges.
The most effective eyes-view images share three qualities. First, the center is sharp, because the gaze has a focus and the viewer needs to know where to look. Second, the edges are soft, darkened, or partially covered, because real vision is never uniformly sharp. Third, the scene itself is emotionally legible in one glance: a face, a sunset, a street, a pair of hands. When those three qualities combine, the image stops being a picture of something and becomes a moment of seeing, and moments of seeing are what people save, share, and remember.
Techniques That Sell the POV Feeling
Several specific techniques create the eyes-view effect, and each one suits a different mood.
The lash frame places soft, out-of-focus lashes along the top edge of the frame, as if the viewer is peeking through half-open eyes. It suits intimate, romantic, and sleepy moods, and it works best when the center of the image is bright and warm, so the dark lashes read as a natural frame rather than a flaw. Keep the lashes subtle and soft; hard, sharp lashes look like a filter, while soft ones feel like vision. A second version built from the cinematic eyes view prompt can reveal a stronger crop, expression, or color balance.
The blink transition cuts between two moments with a fast dark blink, mimicking the eye closing and opening. In video, a blink transition between a wide shot and a close-up feels startlingly real, because it copies what eyes actually do. Use it once per video at the emotional peak, because repeated blinking becomes a gimmick, while a single blink feels like a heartbeat. The cinematic eyes view prompt keeps the creative direction visible even after several custom changes.
The eye reflection shows the scene mirrored in a close-up of an eye, so the viewer sees both the seer and the seen at once. A city skyline, a sunset, or a loved one’s face reflected in an iris is one of the most shareable images in this style, because it contains a whole story in a single frame. Keep the reflection large and legible, and keep the eye itself sharp, or the effect dissolves into blur. When time is short, the cinematic eyes view prompt offers a repeatable route to a coherent finish.
The window edge frames the scene through a car window, a doorway, or a rain-covered pane, with the edge soft and the center clear. This technique suits travel and longing, because the frame itself suggests distance and looking outward. Rain on the glass, condensation, or a handprint adds texture that makes the frame feel real rather than drawn. The cinematic eyes view prompt becomes easier to control once the main subject is described in plain language.
The half-hidden view lets an object, a curtain, a shoulder, a doorframe, cover part of the frame while the subject shows through the gap. It creates the feeling of watching something private and unguarded, which is powerfully engaging. Use it sparingly, and always leave the subject’s face or the key detail fully visible, because a view that hides too much frustrates instead of intriguing. A thoughtful variation of the cinematic eyes view prompt can change the mood without rebuilding the whole scene.
Related Ideas to Explore
The eyes-view concept connects naturally to several neighboring styles, and exploring them will deepen your command of the POV language. For a natural finish, use the cinematic eyes view prompt to guide the details instead of piling on effects.
- Through the rear-view mirror: a driving POV where the road, the mirror, and the reflection share the frame, perfect for journey and nostalgia content.
- Waking-up sequence: a series of frames that begin blurred and dark, then sharpen into a morning scene, mimicking the experience of opening your eyes.
- Underwater gaze: a POV from beneath the surface, with light rippling overhead and the world blurred above the waterline, ideal for dreamy summer content.
- Crowd perspective: a POV from inside a crowd, with shoulders and raised hands framing a stage or a celebration, which makes viewers feel present at the event.
- Reading over a shoulder: a POV of a book, a letter, or a phone screen with hands visible at the edges, intimate and story-driven.
- Mirror self-portrait: a POV of meeting your own eyes in a mirror, which turns the gaze back on the viewer and creates a striking, memorable image.
How to Customize This Concept
Customizing the eyes view starts with deciding whose eyes the viewer is borrowing. A lover’s eyes want softness, warmth, and a face in the center. A traveler’s eyes want scale, horizon, and movement. A child’s eyes want color, wonder, and things seen from low down. The identity of the gazer decides the height of the camera, the softness of the edges, and the emotional temperature of the scene, so name the gazer before you build anything. For a more personal finish, let the cinematic eyes view prompt set the foundation and then change one detail at a time.
Next, choose the moment of the gaze. Eyes views work best at thresholds: waking up, arriving somewhere, seeing someone after a long time, or watching something disappear. These threshold moments carry built-in emotion, and the POV framing amplifies it. A random Tuesday afternoon seen through eyes is merely a gimmick, but a first look after a long journey is a story. Pick the threshold, and the technique will serve it. The cinematic eyes view prompt works best when the strongest visual idea stays easy to read.
Then set the technical qualities deliberately. Decide how soft the edges should be, how dark the vignette, and how much reflection or lash detail to include, and keep those choices consistent across a series. Consistency builds a recognizable style, and a recognizable style is what turns one successful POV image into a following. Finally, pair the POV shot with a normal shot when you post a series, so viewers understand the place before they inhabit the gaze. The wide shot gives context, and the POV shot gives feeling, and together they tell a complete story.
Step-by-Step Guide
Follow these steps to build a convincing eyes-view image or clip.
- Name the gazer and the moment. Write one sentence, such as a traveler sees the ocean for the first time at dawn. That sentence controls every later choice, from the height of the frame to the warmth of the light, so make it specific before you generate anything.
- Describe the edge treatment first. In your prompt, name the soft edges, lashes, window frame, or vignette before describing the scene itself, because the edge treatment is what makes the image a POV shot rather than an ordinary photo. Be explicit: soft dark lashes along the top edge, gentle vignette, warm center sharpness.
- Keep the center sharp and legible. Name one clear subject in the center of the frame, a face, a horizon, a pair of hands, and insist on sharpness there. If the center blurs, the image loses its story, and no amount of beautiful edge softness will save it.
- Add one reflection or transition. Include a single reflection, blink, or window element to sell the feeling of real sight. One is enough; two or three compete and the image becomes a demonstration of effects instead of a moment of seeing.
- Generate and inspect the edges closely. Zoom into the corners and edges of the result and check that the softness looks organic rather than smeared. If the edges look painted or artificial, regenerate with gentler language, such as slightly soft edges, and avoid words like heavy blur.
- Warm the color and soften the light. Apply a warm, soft grade with gentle contrast, because POV images feel like memories, and memories are warm and soft. Keep the highlights from blowing out, since blown highlights destroy the delicate edge detail that sells the effect.
- Pair with a context shot. When posting, place a normal wide shot before or after the POV image so viewers understand the scene. The wide shot answers where, and the POV shot answers how it felt, and the combination is far stronger than either image alone.
- Export with a gentle vignette and share. Add the final vignette, export at the highest quality, and write a caption that invites the viewer into the gaze, such as a first-person line about what is being seen. Captions written as if spoken by the gazer deepen the POV effect beautifully.
Common Mistakes to Avoid
Blurring the whole image. A POV shot with no sharp area anywhere reads as a mistake, not a style. Real vision always has a point of focus, and the image must too. Keep the center crisp and let only the edges soften, and check at full size that the subject is genuinely sharp before posting. A careful pass with the cinematic eyes view prompt can sharpen the composition without changing the original intent.
Overusing reflections. Three reflections in one image, an eye, a window, and a mirror, create a hall of mirrors that confuses rather than intrigues. One strong reflection, large and legible, is the maximum for a single image. Restraint is what makes the reflection feel like a discovery instead of a trick. When you compare versions, the cinematic eyes view prompt gives each result the same clear creative baseline.
Forgetting the story. A POV frame without a moment, a gaze with nothing worth seeing, is an empty technique. The eyes must be looking at something that matters: a face, a departure, an arrival, a wonder. If you cannot name what the eyes are seeing and why it matters, the concept is not ready, and no amount of edge softness will fix it. The real strength of the cinematic eyes view prompt is how it turns a broad idea into specific visual choices.
Making the vignette too dark. A heavy black vignette turns a soft gaze into a tunnel and makes the image feel claustrophobic. The vignette should darken only the extreme corners and remain invisible as an effect. If viewers notice the vignette before they notice the scene, reduce its strength by half and check again. Keep the cinematic eyes view prompt focused, and the final image will usually feel more deliberate.
Using the POV style for everything. When every post is a POV shot, the style stops surprising and starts feeling like a filter. Reserve the eyes view for moments that deserve intimacy, and use normal framing for the rest. Scarcity preserves impact, and a POV image posted once a week will outperform the same style posted daily. The cinematic eyes view prompt is a useful starting point when you want the result to feel intentional from the first try.
Best Tools for This Concept
ChatGPT image editing handles POV prompts well, because the edge and reflection instructions are natural language and it follows them faithfully. Describe the gazer, the edge treatment, and the central subject in that order, and review the edges closely in the result. Its follow-up requests in plain words make it easy to soften or strengthen the vignette without regenerating from scratch. Small changes around the cinematic eyes view prompt can produce a fresh result while preserving the scene that works.
Google Gemini is strong for POV images that must preserve a real person’s identity, such as a lover’s face seen through the gazer’s eyes. It keeps faces recognizable while applying the soft-edge treatment, which matters enormously for romantic and personal content. Generate, check the center sharpness, and ask for small adjustments until the gaze feels real. For consistency across a set, the cinematic eyes view prompt helps related images share the same mood and finish.
Midjourney suits creators building a consistent POV series with a distinctive look, because its style controls and aspect-ratio options make it easy to repeat the same edge treatment across many images. It takes longer to learn, but for a creator posting POV content regularly, the consistency it offers is worth the effort. Whichever tool you use, the prompt structure, gazer, edges, sharp center, one reflection, stays the same. The cinematic eyes view prompt is most effective when lighting, expression, and background all support one another.
Frequently Asked Questions
Does the eyes view work for video or only for photos?
It works beautifully for video, where a blink transition or a slow opening of the eyes adds motion that still images cannot match. For video, keep the clip short, five to ten seconds, and put the blink or the focus-pull at the emotional peak. For photos, the same principles apply, with the edge treatment doing the work that motion does in video. Before you generate again, check that the cinematic eyes view prompt still names the subject and setting clearly.
Can I create a POV shot from an existing photo?
Yes. Upload the photo and ask the tool to reframe it as seen through eyes, adding soft lash edges, a gentle vignette, and a sharp center. The result is most convincing when the original photo already has a clear central subject and some depth, because the tool needs something real to build the gaze around. A polished result from the cinematic eyes view prompt often comes from restraint rather than extra decoration.
Why does my POV image look like a blurry filter?
Because the center is not sharp enough or the edges are too uniformly blurred. Real vision has a gradient: sharpest at the focus point, softening gradually outward. Ask for a sharp center with gradually softening edges rather than a uniform blur, and avoid the word blurry in favor of soft edges and gentle vignette. The cinematic eyes view prompt gives beginners a dependable structure while leaving room to experiment.
Is the eyes view suitable for commercial or brand content?
It is excellent for travel, hospitality, and lifestyle brands, because it places the viewer inside the experience the brand is selling. A hotel room seen through a waking traveler’s eyes, or a dish seen through a diner’s eyes, is more persuasive than a standard product shot. Keep the branding out of the POV frame itself, and place it in the caption, so the gaze stays immersive. When the first result is close, refine the cinematic eyes view prompt instead of starting from a completely new idea.
How often should I post POV content?
Once or twice a week is plenty. The style’s power comes from its intimacy, and intimacy loses impact with overuse. Mix POV posts with normal framing, and reserve the eyes view for your strongest moments: arrivals, reunions, first looks, and quiet wonders. Your audience will learn that a POV post means something special, and they will stop for it every time. That is why the cinematic eyes view prompt rewards a clear subject more than a crowded scene.
Final Words
Seeing through someone’s eyes is the fastest way to make a viewer feel something. Frame it soft, keep it sharp in the middle, and let the moment breathe. Used at full quality, the cinematic eyes view prompt can make an everyday photo feel ready to publish.
Leave a Reply